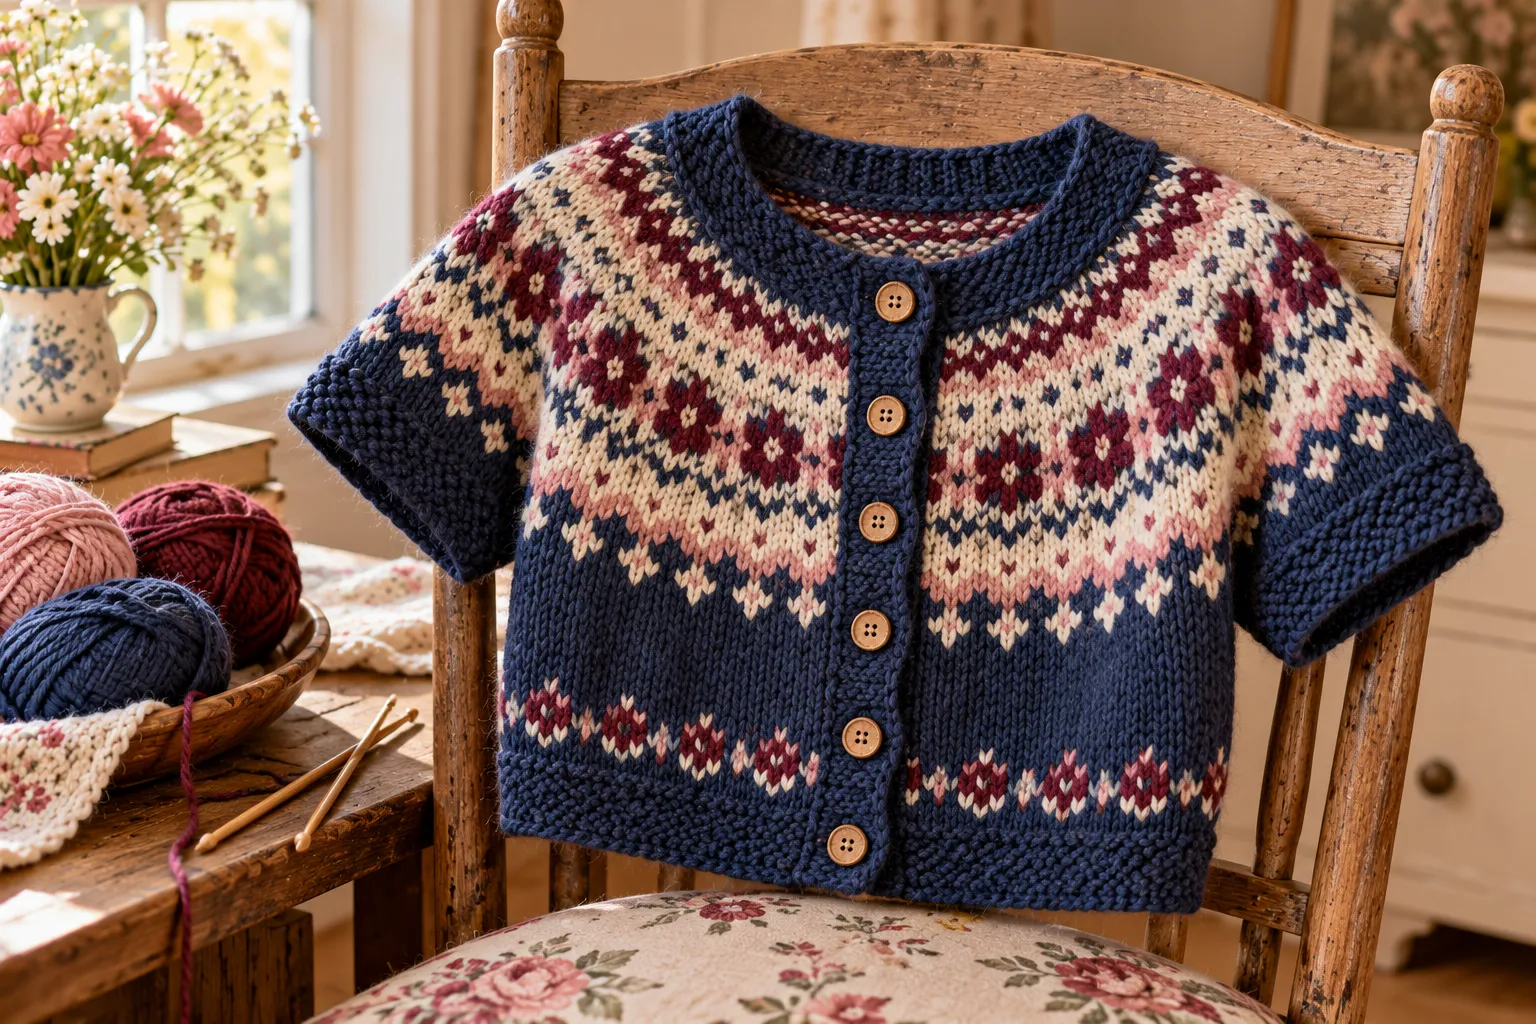
The Harriet knitted cardigan is a cheerful cropped cardigan featuring short sleeves and a colorful Fair Isle pattern. Designed with a moss-stitch edging and a bright multicolor pattern across the main sections, it makes a charming handmade layer for transitional weather.
This pattern is worked flat in separate pieces and then assembled. The cardigan includes a back, two fronts, short sleeves, a moss-stitch neckband, a button band, and a buttonhole band with six buttonholes.
The finished cardigan has a relaxed cropped shape, making it especially easy to pair with dresses, high-waisted skirts, jeans, or trousers.
Harriet Cardigan at a Glance
| Feature | Details |
|---|---|
| Garment | Cropped knitted cardigan |
| Style | Short sleeves with Fair Isle pattern |
| Intended chest | 32 in / 81 cm |
| Finished chest | 34 in / 86 cm |
| Finished length | 15 in / 38 cm |
| Sleeve seam | 5 in / 13 cm |
| Yarn | Double knitting weight |
| Main shade | 2 × 50 g balls |
| Contrast shades | 1 × 50 g ball in 5 colors |
| Needles | 3.25 mm and 3.75 mm |
| Buttons | 6 |
| Tension | 23 sts × 27 rows = 10 cm over pattern |
The original color combination uses a light navy main shade with cream and several pink and burgundy tones, but the design works beautifully with many different color palettes.
Materials You Will Need
For the Harriet cardigan, gather:
- 2 × 50 g balls of double knitting weight yarn in the main shade
- 1 × 50 g ball in each of 5 contrasting colors
- 3.75 mm knitting needles
- 3.25 mm knitting needles
- 6 buttons
- Yarn needle for sewing and weaving in ends
- Scissors
- Stitch holders or scrap yarn for holding stitches
The pattern uses a double knitting weight yarn, which gives the finished cardigan enough structure while keeping it comfortable and relatively lightweight.
Choosing the Main Color
A darker or neutral main shade allows the Fair Isle design to stand out.
Good options include:
- Navy
- Cream
- Charcoal
- Chocolate brown
- Soft grey
- Dusty pink
- Deep burgundy
- Forest green
For a look similar to the original design, use a darker blue or navy as the main shade and combine it with cream, pink, and burgundy.
Choosing the Contrast Colors
The five contrast shades can be coordinated or deliberately varied.
A romantic palette could use:
- Cream
- Blush pink
- Dusty rose
- Deep pink
- Burgundy
For a brighter cardigan, try:
- Cream
- Mustard
- Coral
- Teal
- Green
The Fair Isle section is the focal point, so contrasting colors should have enough difference from the main shade to remain visible.
Gauge and Tension
The required tension is:
23 stitches and 27 rows to 10 cm measured over the pattern.
Gauge is particularly important for a fitted cardigan because even a small difference can change the finished chest measurement.
Before starting the cardigan, make a reasonably sized swatch using the Fair Isle pattern and your chosen needles.
If you have too many stitches in 10 cm, your knitting is too tight and you may need larger needles.
If you have too few stitches, your knitting is too loose and smaller needles may be needed.
Always measure your swatch after allowing it to settle naturally rather than stretching it aggressively.
Understanding the Moss Stitch
The cardigan begins and ends sections with moss stitch.
The basic pattern used throughout the edging is:
Row 1: Knit 1, purl 1 across to the last stitch, knit 1.
This establishes the moss-stitch texture.
The pattern uses this same principle for the initial edges, neckband, button band, and buttonhole band.
Moss stitch creates a firm, textured border that contrasts nicely with the Fair Isle pattern.
Fair Isle Knitting Tips
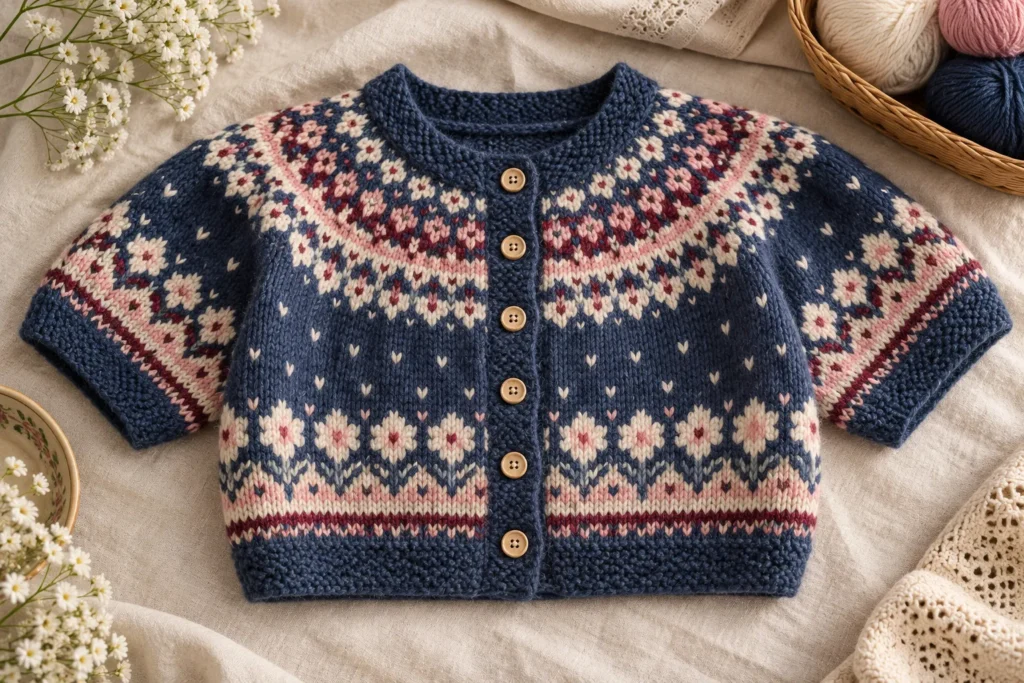
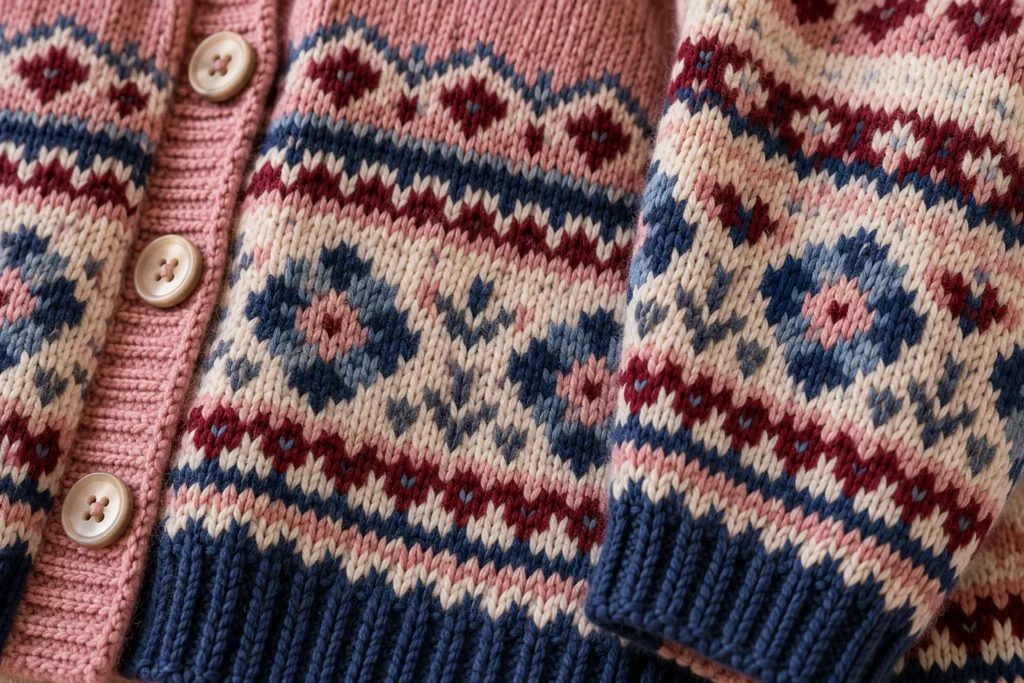
The colorful pattern is worked according to the Fair Isle chart.
When changing colors:
- Join the new shade neatly.
- Carry unused yarn carefully on the wrong side.
- Avoid making floats excessively long.
- Keep your knitting relaxed while working colorwork.
- Check the chart frequently.
- Make sure the pattern repeat remains aligned.
When working Fair Isle, avoid pulling the floats too tightly. Tight floats can cause the fabric to pucker and can make the finished cardigan narrower than expected.
Back of the Cardigan
The back begins with a moss-stitch border before the Fair Isle section.
Back — Foundation
Using the 3.75 mm needles and the main shade, cast on:
97 stitches.
Work:
Row 1: Knit 1, purl 1, repeating to the last stitch, knit 1.
This establishes the moss-stitch pattern.
Repeat this row 7 more times, ending with a wrong-side row.
You now have the lower moss-stitch section ready for the colorwork.
Begin the Fair Isle Pattern
Join and break off colors as required while working the Fair Isle pattern from the chart.
Continue following the pattern carefully.
To shape the width of the garment, increase:
- 1 stitch at each end of the 13th row
- 1 stitch at each end of each of the following four 6th rows
This gives:
107 stitches.
Continue straight until two pattern repeats have been completed, ending with a wrong-side row.
Shaping the Back Armholes
Once the Fair Isle section has been completed, begin shaping the armholes.
Cast off:
5 stitches at the beginning of the next two rows.
You now have:
97 stitches.
Next, decrease 1 stitch at each end of the:
- Next 3 rows
- Next 3 alternate rows
- Following 4th row
This leaves:
83 stitches.
Continue straight until the armhole measures:
18 cm
from the beginning of the armhole shaping.
End with a wrong-side row.
Shaping the Back Shoulders
Begin the shoulder shaping by casting off:
11 stitches at the beginning of the next four rows.
After the shoulder stitches have been cast off, leave the remaining:
39 stitches
on a stitch holder.
These stitches form the back neck and will later be incorporated into the neckband.
Left Front
The left front is worked separately from the back and has its own armhole and neckline shaping.
Using 3.75 mm needles and the main shade, cast on:
49 stitches.
Moss-Stitch Border
Work:
Row 1: Knit 1, purl 1 to the last stitch, knit 1.
Repeat this row 7 more times, ending with a wrong-side row.
Fair Isle Section
Join and break off the colors as necessary and begin the Fair Isle pattern using the chart.
Increase:
- 1 stitch at the beginning of the 13th row
- 1 stitch at the beginning of each of the following four 6th rows
You should now have:
54 stitches.
Continue straight until two pattern repeats have been completed, ending with a wrong-side row.
Left Front Armhole
Cast off:
5 stitches at the beginning of the next row.
Work 1 row straight.
Then decrease 1 stitch at the beginning of:
- The next 3 rows
- The next 3 alternate rows
- The following 4th row
This leaves:
42 stitches.
End with a right-side row.
Left Front Neck Shaping
Begin shaping the neckline.
Cast off:
6 stitches at the beginning of the next row.
Then decrease 1 stitch at the neck edge on:
- The next 7 rows
- The next 5 alternate rows
- The following 2 4th rows
This leaves:
22 stitches.
Continue straight until the work matches the back to the beginning of the shoulder shaping.
End with a wrong-side row.
Left Front Shoulder
Cast off:
11 stitches at the beginning of the next row.
Work 1 row.
Then cast off the remaining:
11 stitches.
The left front is now complete.
Right Front
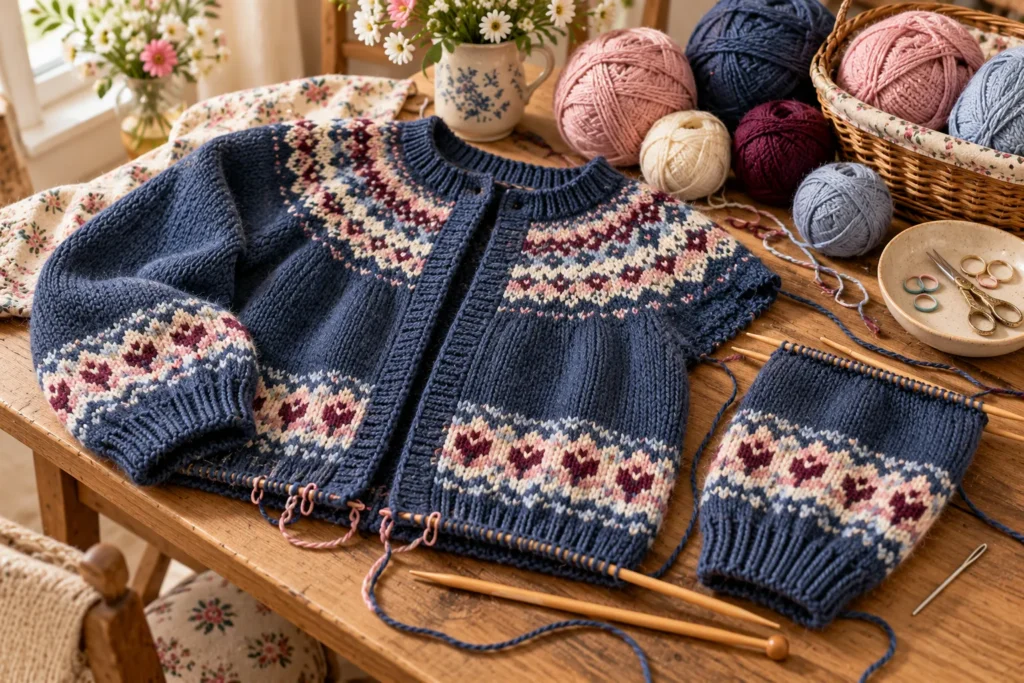
The right front mirrors the left front.
Using 3.75 mm needles and the main shade, cast on:
49 stitches.
Work the moss stitch:
Knit 1, purl 1 to the last stitch, knit 1.
Repeat for 8 rows in total, ending with a wrong-side row.
Right Front Fair Isle Section
Join and break off the colors as required and begin the Fair Isle pattern.
Increase:
1 stitch at the end of the 13th row and on each of the following four 6th rows.
You should have:
54 stitches.
Continue straight until two pattern repeats have been completed, ending with a wrong-side row.
Right Front Armhole
Work 1 row.
Then cast off:
5 stitches at the beginning of the next row.
You have:
49 stitches.
Decrease 1 stitch at the end of:
- The next 3 rows
- The next 3 alternate rows
- The following 4th row
You should have:
42 stitches.
End with a right-side row.
Right Front Neckline
Work 1 row.
Cast off:
6 stitches at the beginning of the next row.
Then decrease 1 stitch at the neck edge on:
- The next 7 rows
- The next 5 alternate rows
- The following 2 4th rows
You should have:
22 stitches.
Continue straight until the work matches the back to the beginning of the shoulder shaping.
End with a right-side row.
Right Front Shoulder
Cast off:
11 stitches at the beginning of the next row.
Work 1 row.
Cast off the remaining:
11 stitches.
The two front pieces are now ready for assembly.
Knitted Short Sleeves
The Harriet cardigan uses short sleeves with the same moss-stitch and Fair Isle theme as the body.
Using 3.25 mm needles and the main shade, cast on:
67 stitches.
Sleeve Cuff
Work:
Row 1: Knit 1, purl 1 to the last stitch, knit 1.
Repeat this row 7 more times, ending with a wrong-side row.
You will have worked 8 moss-stitch rows.
Change Needle Size
Change to:
3.75 mm needles.
Join and break off the colors as necessary and begin the Fair Isle pattern from the chart.
For the sleeves, start with:
Row 15 of the chart.
This is important because the sleeve pattern is positioned differently from the main body.
Sleeve Increases
Keeping the Fair Isle pattern correct, increase:
- 1 stitch at the end of the 7th row
- 1 stitch at the end of each of the following three 6th rows
You should have:
75 stitches.
Continue straight until row 23 of the chart has been completed for a second time.
The sleeve should now match the body pieces at the armhole.
End with a wrong-side row.
Sleeve Armhole Shaping
Begin shaping the sleeve head.
Cast off:
5 stitches at the beginning of the next two rows.
You now have:
65 stitches.
Decrease 1 stitch at each end of:
- The next 3 rows
- The next 4 alternate rows
- The following 3 4th rows
- The next 4 alternate rows
- The next 5 rows
You should have:
27 stitches.
Then cast off:
5 stitches at the beginning of the next two rows.
Finally, cast off the remaining:
17 stitches.
The sleeve is complete.
Repeat the complete sleeve instructions to make the second sleeve.
Joining the Cardigan
Once all the knitted pieces are complete, carefully prepare them for assembly.
First:
- Darn in the loose yarn ends.
- Join the shoulder seams.
- Set the sleeves into the armholes.
- Join the side seams.
- Join the sleeve seams.
Take care when setting in the sleeves so that the sleeve head sits smoothly inside the armhole without puckering.
Before sewing permanently, it can be helpful to pin or lightly tack the pieces into position and check that the Fair Isle pattern aligns as neatly as possible.
Neckband
The neckband is worked in moss stitch using the 3.25 mm needles and the main shade.
With the right side facing, pick up and knit:
- 40 stitches from the right front
- Across the 39 stitches held for the back neck
- 40 stitches from the left front
Total:
119 stitches.
Work:
Row 1: Knit 1, purl 1 to the last stitch, knit 1.
Repeat this row 5 more times, giving six rows in total.
Cast off in moss stitch.
This creates a neat textured finish around the neckline.
Button Band
Using 3.25 mm needles, the main shade, and the right side facing, pick up and knit:
57 stitches
along the left front of the cardigan.
Work:
Row 1: Knit 1, purl 1 to the last stitch, knit 1.
Repeat this row 5 more times.
Cast off in moss stitch.
The button band is now complete.
Buttonhole Band
Using 3.25 mm needles, the main shade, and the right side facing, pick up and knit:
57 stitches
along the right front.
Work:
Row 1: Knit 1, purl 1 to the last stitch, knit 1.
Repeat this row once more.
Creating the Six Buttonholes
Work the buttonhole row as follows:
K1, P1, K1, (YON, K2tog, [P1, K1] × 4) 5 times, YON, K2tog, P1, K1.
This creates:
6 buttonholes.
After the buttonhole row, work:
3 more rows in moss stitch.
Cast off in moss stitch.
Adding the Buttons
Sew 6 buttons onto the button band, positioning each one so that it corresponds neatly with the six buttonholes.
Before sewing them permanently, close the cardigan and check the spacing.
The buttons should sit comfortably without pulling the knitted fabric.
Color Ideas for the Harriet Cardigan
The Fair Isle design gives you plenty of opportunities to personalize the cardigan.
Classic Navy and Pink
- Light navy main shade
- Cream
- Blush
- Dusty pink
- Burgundy
- Deep rose
This combination keeps the original cheerful character of the design.
Soft Neutral
- Oatmeal main shade
- Cream
- Beige
- Camel
- Dusty rose
- Chocolate brown
This creates a more understated everyday cardigan.
Autumn Palette
- Deep brown main shade
- Cream
- Rust
- Mustard
- Burgundy
- Forest green
The result is perfect for fall outfits.
Fresh Spring Palette
- Cream main shade
- Soft pink
- Sage green
- Pale blue
- Butter yellow
- Coral
This makes the Fair Isle pattern feel light and playful.
How to Style a Cropped Fair Isle Cardigan
The cropped length makes Harriet particularly versatile.
With High-Waisted Jeans
Pair the cardigan with high-waisted straight-leg or wide-leg jeans. The shorter hem balances the higher waist and creates a clean silhouette.
With a Midi Skirt
A floral or pleated midi skirt can create a feminine outfit. Keep the skirt relatively simple if your cardigan has particularly colorful Fair Isle details.
Over a Dress
Wear the cardigan over a simple dress. A cream, navy, black, or burgundy dress works especially well with colorful Fair Isle knitting.
With Tailored Trousers
For a more polished look, combine the cardigan with high-waisted trousers and simple shoes.
With a Denim Skirt
A denim skirt provides a casual base that allows the colorful knitted pattern to become the main feature.
How to Make the Cardigan Look More Modern
Although Fair Isle is a traditional knitting technique, the cropped silhouette gives this cardigan a contemporary feel.
For a modern outfit:
- Choose a high-waisted bottom.
- Keep accessories simple.
- Use a limited color palette.
- Pair the cardigan with clean silhouettes.
- Choose minimal jewelry.
- Let the Fair Isle border remain the focal point.
A cropped cardigan also works particularly well with wide-leg trousers because the shorter length helps define the waist.
Tips for Successful Fair Isle Knitting
Fair Isle can look complicated, but good tension and careful color management make a major difference.
Keep Your Tension Consistent
Try not to tighten your stitches when changing colors.
Check the Wrong Side
Frequently inspect the back of the work. Long floats should remain relaxed and should not pull the fabric together.
Follow the Chart Carefully
Mark your position on the chart so that you do not accidentally skip or repeat a section.
Organize Your Yarn
Keep contrast yarns separated while working. This makes color changes easier and reduces tangling.
Avoid Very Long Floats
Where appropriate, catch long floats on the wrong side so that they do not become loose loops inside the finished cardigan.
Match the Pattern Before Sewing
Lay the finished pieces flat before assembly. Check that the Fair Isle motifs are positioned consistently across the fronts, back, and sleeves.
Blocking the Finished Cardigan
Blocking can help even out the stitches and improve the overall shape.
Before blocking, check the yarn manufacturer’s care instructions.
For suitable yarns, gently dampen the finished pieces or use an appropriate steam-blocking method.
Shape the pieces according to the intended measurements, paying particular attention to:
- Body width
- Cardigan length
- Sleeve length
- Shoulder width
- Armhole shape
- Front edges
Allow the pieces to dry completely before final assembly if you are blocking them separately.
Avoid stretching the cardigan excessively, especially around the Fair Isle sections.
Common Problems and Solutions
My Fair Isle Fabric Is Puckering
This usually happens when the contrast-color floats are pulled too tightly.
Solution: Keep the unused yarn loose enough to allow the fabric to spread naturally.
The Cardigan Is Smaller Than Expected
Check your gauge. If you are knitting more stitches per 10 cm than specified, your stitches are smaller.
A larger needle may be necessary.
The Cardigan Is Too Wide
If you are getting fewer stitches per 10 cm, your knitting is looser than the required tension.
A smaller needle may help.
The Pattern Does Not Line Up
Count your stitches and check your chart position. Make sure increases have been incorporated into the Fair Isle pattern correctly.
The Sleeve Does Not Fit the Armhole
Check the sleeve and body measurements before sewing. Accurate gauge and careful armhole shaping are important for a smooth fit.
The Button Band Looks Uneven
When picking up stitches, distribute them evenly along the edge rather than simply picking up wherever convenient.
Harriet Cardigan Finishing Checklist
Before considering the cardigan complete, check each area:
- Back completed
- Left front completed
- Right front completed
- Two sleeves completed
- Loose ends woven in
- Shoulder seams joined
- Sleeves attached
- Side seams sewn
- Sleeve seams sewn
- Neckband completed
- Button band completed
- Buttonhole band completed
- Six buttonholes checked
- Six buttons attached
- Cardigan blocked if appropriate
- Final measurements checked
Harriet Cardigan FAQs
What size is the Harriet cardigan designed for?
The pattern is designed to fit a 32-inch chest, with a finished chest measurement of approximately 34 inches / 86 cm.
How long is the finished cardigan?
The finished length is approximately 15 inches / 38 cm, making it a cropped cardigan.
How long are the sleeves?
The sleeve seam measures approximately 5 inches / 13 cm, creating the characteristic short-sleeve shape.
What yarn weight should I use?
The pattern specifies double knitting weight yarn.
How many colors are needed?
You need one main shade plus five contrasting colors for the Fair Isle pattern.
How many buttons are required?
The cardigan uses six buttons and has six corresponding buttonholes.
What knitting needles are required?
The pattern uses both 3.25 mm and 3.75 mm needles.
Is the cardigan knitted in separate pieces?
Yes. The back, two fronts, and sleeves are knitted separately and then assembled.
Is the Fair Isle section difficult for beginners?
Colorwork requires some additional concentration because you need to follow a chart and manage multiple yarn colors. A beginner who is comfortable with basic knitting and decreases can approach it by practicing the Fair Isle section on a small swatch first.
Can I change the colors?
Yes. The Fair Isle section is ideal for customization. You can keep the main shade neutral and experiment with different combinations of five contrast colors.
Can I make the cardigan longer?
The supplied pattern specifies a finished length of approximately 15 inches. Changing the length would require adjusting the straight sections before the armhole shaping, while maintaining the required stitch counts and pattern alignment.
Final Thoughts
The Harriet knitted cardigan combines a classic Fair Isle colorwork pattern with a fresh cropped silhouette and short sleeves. The moss-stitch edges provide a neat textured finish, while the colorful pattern creates the cheerful focal point of the garment.
With its relatively short length and six-button front, Harriet is especially versatile for layering. A traditional navy, cream, pink, and burgundy palette gives it a vintage-inspired feel, while modern neutral or seasonal color combinations can completely change its character.
The most important elements for achieving a polished result are accurate tension, careful Fair Isle color management, consistent shaping, and neat finishing. Once the individual pieces are complete, the neckband, button bands, and six buttons bring everything together into a wearable handmade cardigan.