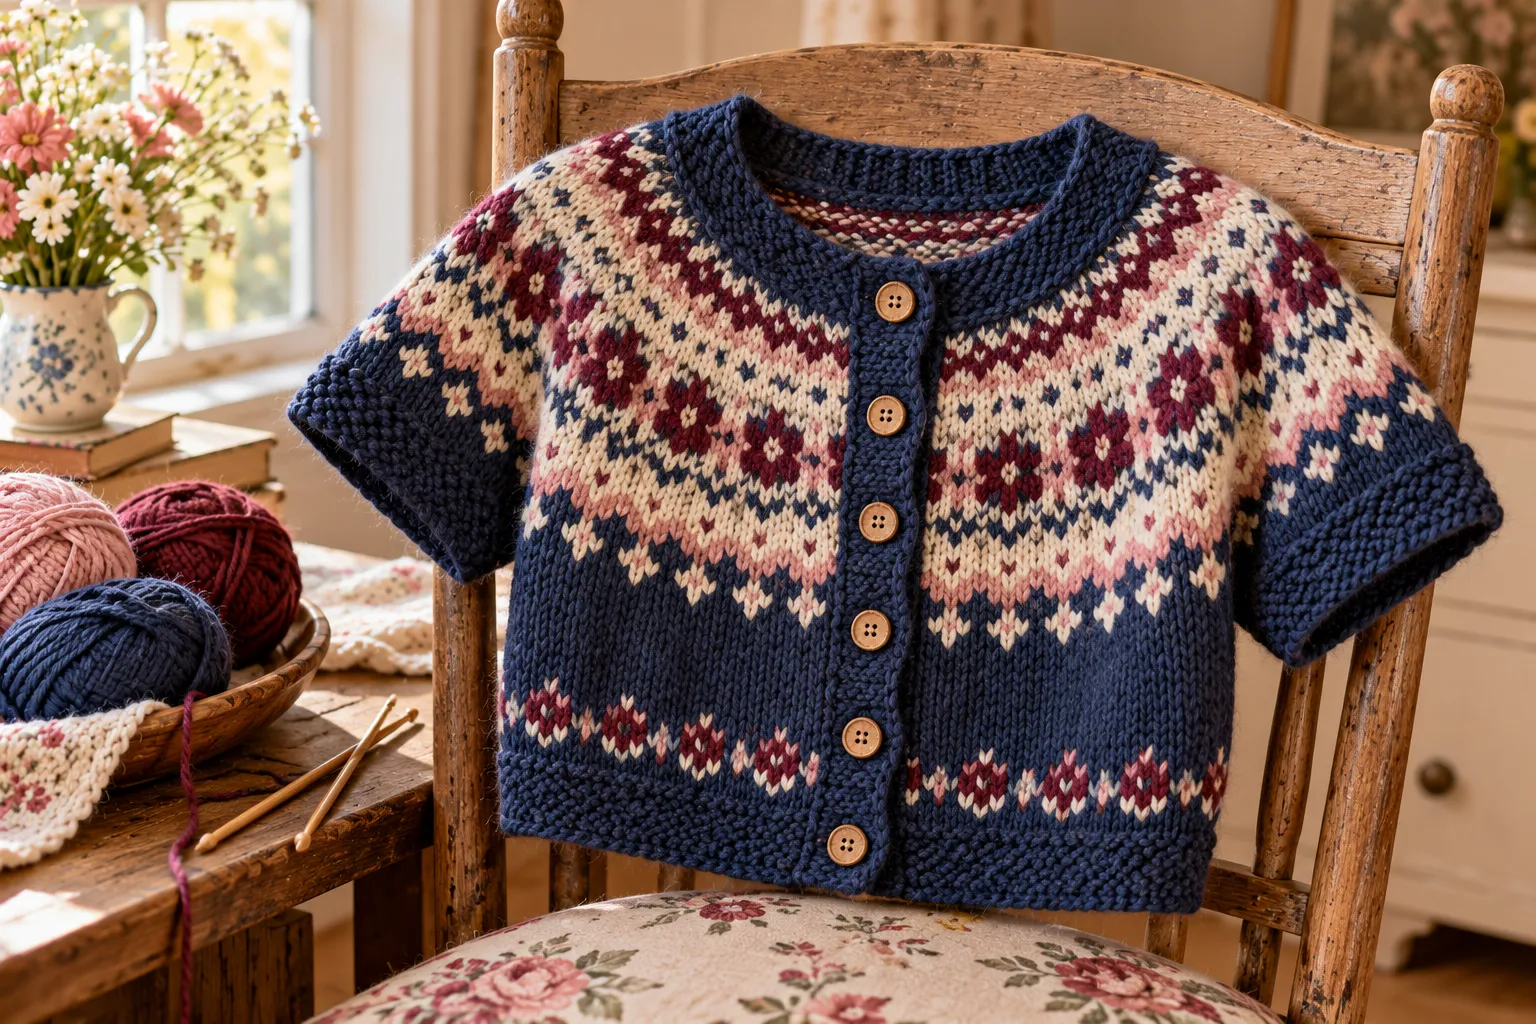
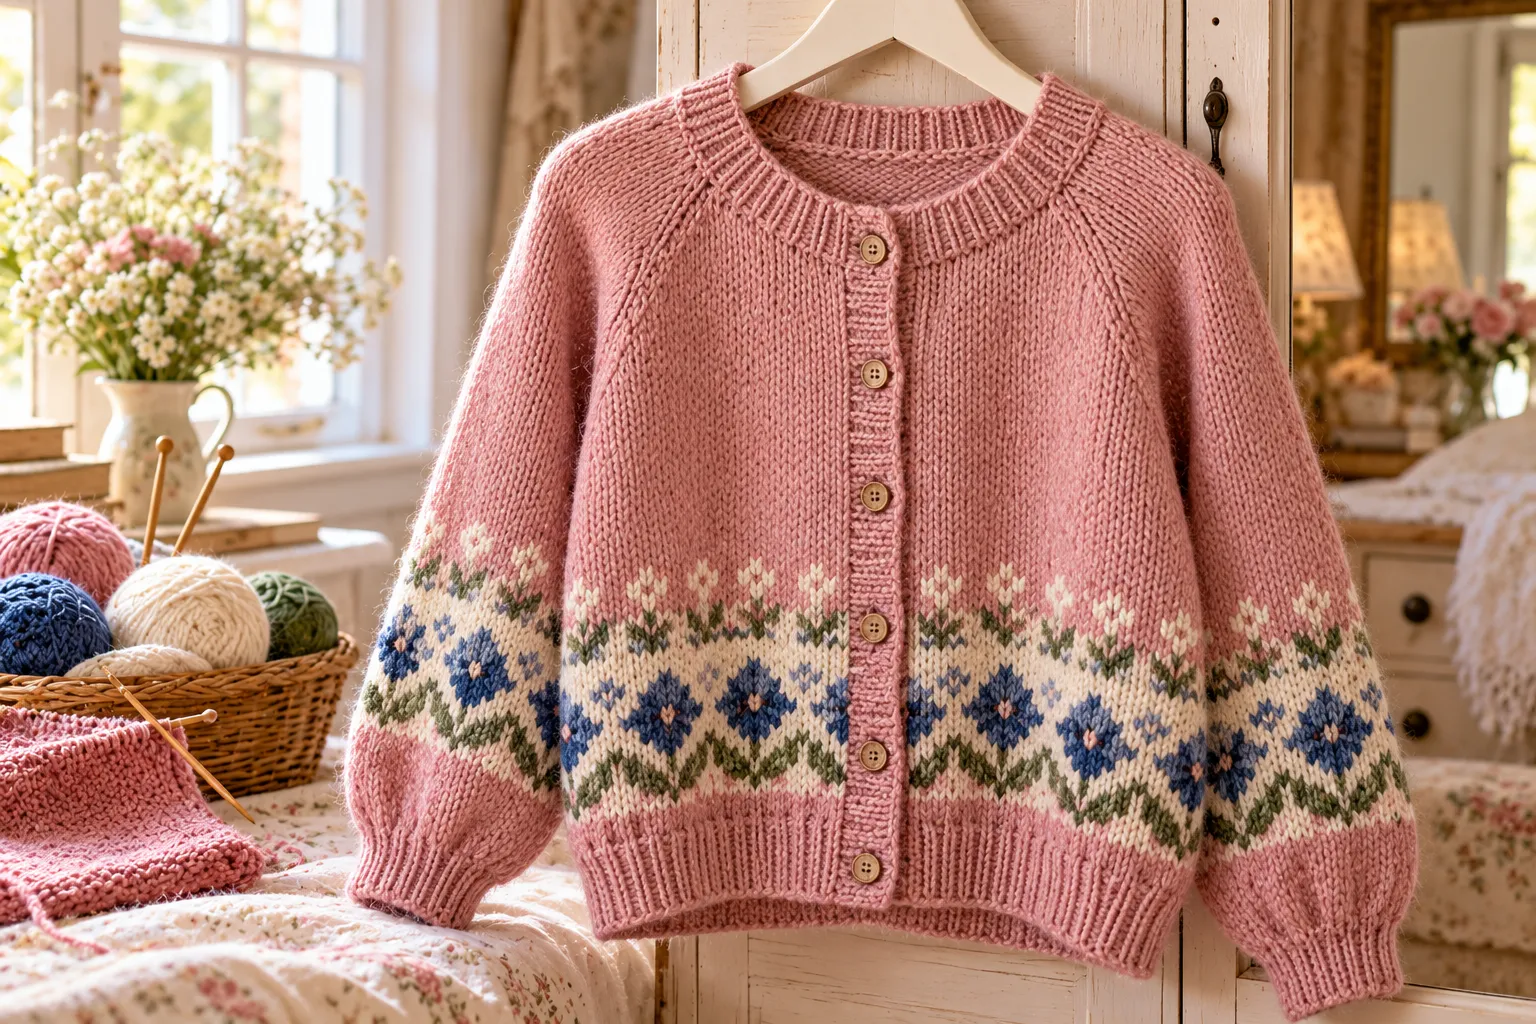
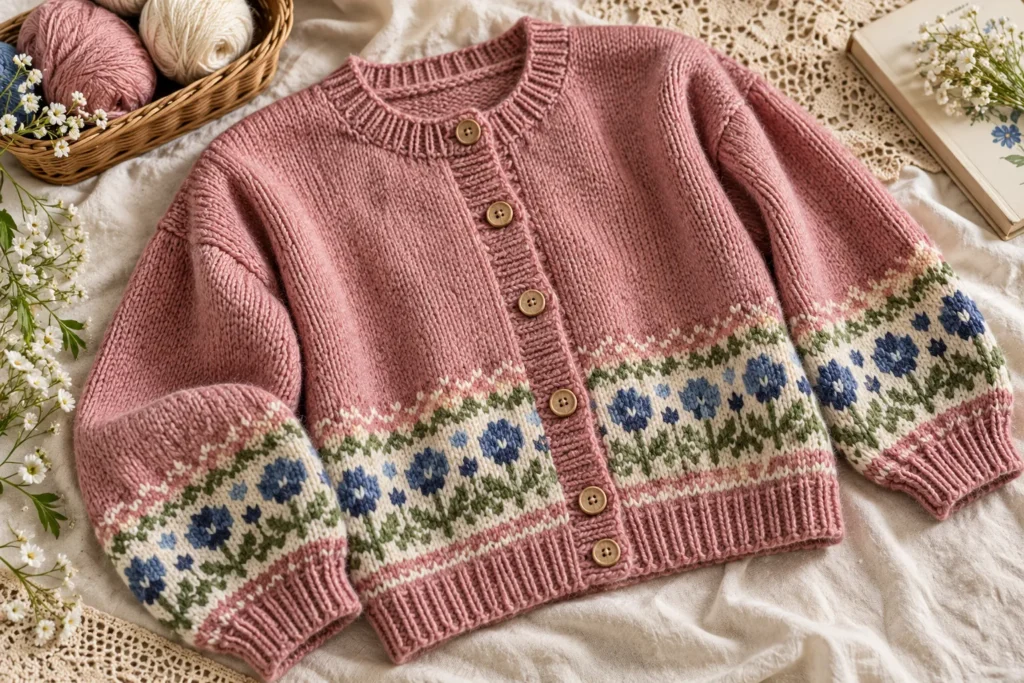
The Edith cardigan is a beautiful loose-fitting knitted cardigan featuring a decorative Fair Isle border around the lower body. Worked in 4-ply weight yarn, this classic design combines simple stocking stitch with colorful Fair Isle knitting, ribbed edges, shaped shoulders, and a neat button fastening.
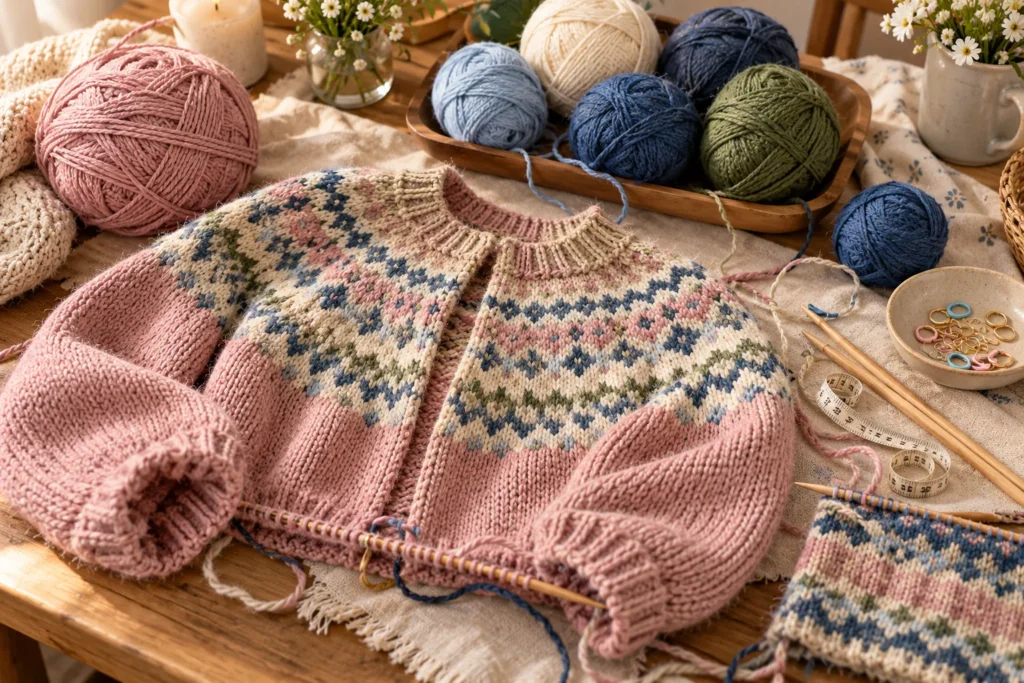
The cardigan is knitted in one piece up to the armholes. The upper body is then divided into the right front, back, and left front, with the shoulders shaped using short rows and joined with a three-needle bind-off. The sleeves are knitted separately and sewn into the armholes.
With its soft pink base and delicate multicolor border, this cardigan makes a lovely handmade wardrobe staple for cooler seasons.
Edith Cardigan at a Glance
The design features:
- A relaxed, loose-fitting silhouette
- Pink main color
- Decorative Fair Isle border
- Ribbed lower edge
- Stocking-stitch body
- Short-row shoulder shaping
- Three-needle bind-off
- Flat-knitted sleeves
- Ribbed neckband
- Button band
- Buttonhole band
- Twelve small buttons
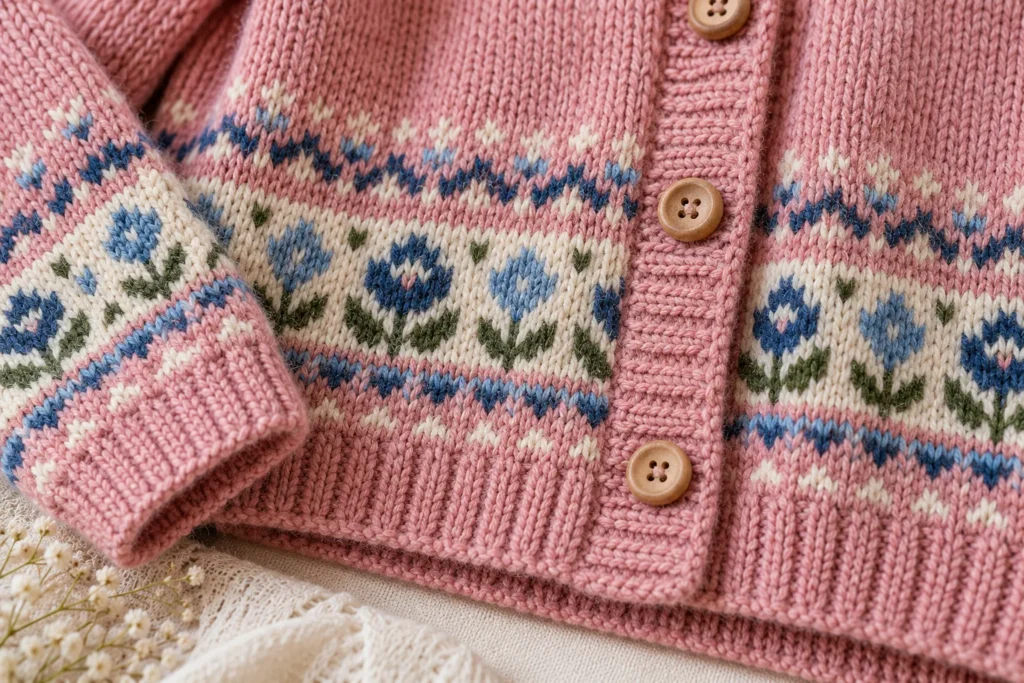
The Fair Isle section uses a repeating 16-stitch motif and is worked over 13 rows.
Create your own Edith Fair Isle Border Cardigan with this elegant knitting pattern! Featuring a relaxed fit, a beautiful colourwork border, and classic button details, it’s a lovely addition to your handmade wardrobe.
Get the PDF pattern with step-by-step instructions, sizing, materials list, and Fair Isle chart.
Ready to start knitting?
GET THE PDF PATTERN
Size and Finished Measurements
This pattern is designed for one size.
| Measurement | Size |
|---|---|
| Intended bust | 32–34 in / 80–85 cm |
| Finished chest | 36 in / 92 cm |
| Sleeve seam | 18 in / 46 cm |
| Finished length | 19 in / 48 cm |
The relaxed finished chest measurement provides some ease over the intended bust measurement.
Materials You’ll Need
Yarn
You will need:
- 10 × 25 g balls of pink 2-ply jumper-weight yarn
- Approximately 5 g each of cream, light blue, medium blue, dark blue, and green yarn
The pink yarn forms the main body of the cardigan, while the additional colors are used for the Fair Isle border.
Choosing the right yarn is essential for creating a beautiful knitted cardigan. A soft pink yarn such as Lion Brand Wool-Ease can be a lovely option for achieving a cozy, comfortable finish. Make sure to select a yarn weight that matches your pattern’s recommended gauge for the best results.
Check the pink yarn options on Amazon.
Needles
Use:
- 2.75 mm straight needles for ribbing, button bands, and neckband
- 3 mm circular needles for the lower body
- 3 mm straight needles for the upper body and sleeves
- 3.25 mm circular needles for the Fair Isle section
- Stitch holders
Buttons and Other Supplies
You will also need:
- 12 buttons approximately 1 cm in diameter
- Tapestry or yarn needle
- Scissors
- Measuring tape
- Spare yarn for holding stitches
Knitting Gauge
The required gauge is:
26 stitches and 40 rows = 10 cm measured over stocking stitch.
Gauge is especially important because this cardigan is available in one size.
Before beginning the garment, knit a gauge swatch and measure it after allowing the fabric to relax.
If you have too many stitches in 10 cm, use larger needles.
If you have too few stitches, use smaller needles.
Knitting Abbreviations
| Abbreviation | Meaning |
|---|---|
| k | Knit |
| p | Purl |
| sts | Stitches |
| dec | Decrease |
| m1 | Make one |
| alt | Alternate |
| RS | Right side |
| WS | Wrong side |
| yrn | Yarn round needle |
| LH | Left hand |
| RH | Right hand |
Wrap and Turn
The pattern uses wrap-and-turn short rows.
To wrap and turn, work the required number of stitches, slip the next stitch to the right-hand needle, bring the yarn to the opposite side of the work, slip the stitch back to the left-hand needle, and turn.
When you return to the wrapped stitch, work the wrap and stitch together.
How to Knit the Edith Cardigan
Step 1: Knit the Lower Body
Using 3 mm circular needles, cast on:
228 stitches
Begin with the ribbed lower edge.
Row 1 — RS
K1, then repeat:
K2, P2
until the final 3 stitches.
Finish with:
K3
Row 2 — WS
P1, then repeat:
P2, K2
until the final 3 stitches.
Finish with:
P3
Repeat Rows 1 and 2 until you have completed:
16 rows total.
This creates the cardigan’s neat ribbed lower edge.
Step 2: Begin Stocking Stitch
Commence stocking stitch.
Work 4 rows, decreasing 1 stitch on the final row and ending with a WS row.
You should now have:
227 stitches
Change to 3.25 mm needles for the Fair Isle border.
Step 3: Knit the Fair Isle Border
Work the Fair Isle chart for:
13 rows
The design uses a 16-stitch repeat.
The colors are:
- Pink
- Cream
- Light blue
- Medium blue
- Dark blue
- Green
The Fair Isle pattern creates a geometric decorative band around the lower portion of the cardigan.
After completing the 13-row border, change back to 3 mm needles.
On the first row after the Fair Isle section, increase 1 stitch.
You should return to:
228 stitches
Step 4: Continue the Body
Continue in plain stocking stitch.
Work straight until the cardigan measures:
30 cm / 12 inches
from the lower edge.
At this point, the body is divided for the armholes.
Step 5: Shape the Right Front
Work the right-front section over:
53 stitches
Turn and leave the remaining stitches on a spare needle.
Keeping the pattern correct, shape the armhole.
At the armhole edge:
- Decrease 1 stitch on each of the next 5 rows.
- Decrease 1 stitch on each of the following 2 alternate rows.
- Decrease 1 stitch on the following 4th row.
You should have:
45 stitches
Work 2 more rows, ending with a WS row.
Shape the Right Front Neckline
Place:
9 stitches on a holder
Rejoin the yarn to the next stitch and continue working across the remaining stitches.
At the neck edge:
- Decrease 1 stitch on each of the next 8 rows.
- Decrease 1 stitch on each of the next 6 alternate rows.
- Decrease 1 stitch on each of the following 3 fourth rows.
You should finish with:
19 shoulder stitches
Continue straight until the armhole measures:
17 cm
End with a WS row.
Shape the Right Shoulder
Use short-row shaping.
Work:
K13, wrap and turn.
Purl to the end.
Then:
K7, wrap and turn.
Purl to the end.
Knit to the end.
Place the shoulder stitches on a holder and break the yarn.
Step 6: Knit the Back
With the RS facing, rejoin yarn to the stitches on the spare needle.
Cast off:
8 stitches
Pattern across:
106 stitches
Turn and leave the remaining stitches on a spare needle.
Shape both armholes simultaneously.
Decrease 1 stitch at each end of the next:
5 rows
You should have:
96 stitches
Decrease 1 stitch at each end of the next:
2 alternate rows
You should have:
92 stitches
Decrease 1 stitch at each end of the following:
4th row
You should have:
90 stitches
Continue without shaping until the armhole measures the same as the right front.
End with a WS row.
Shape the Back Shoulders
For the first shoulder:
K23, then turn, leaving the remaining stitches on a spare needle.
Working on the 23 shoulder stitches:
Cast off 4 stitches.
Purl until there are 13 stitches on the RH needle.
Wrap and turn.
Knit to the end.
P7, wrap and turn.
Knit to the end.
Purl to the end.
Place the resulting:
19 stitches
on a holder.
Shape the Back Neck
Return to the remaining back stitches.
Place the first:
44 stitches
on a holder for the back neck.
Rejoin yarn to the remaining 23 stitches.
Cast off 4 stitches.
Knit until 13 stitches remain on the RH needle.
Wrap and turn.
Purl to the end.
K7, wrap and turn.
Purl to the end.
Knit to the end.
Place the final:
19 stitches
on a holder.
Step 7: Knit the Left Front
With RS facing, rejoin yarn to the remaining stitches.
Cast off:
8 stitches
Pattern across the remaining:
53 stitches
At the armhole edge:
- Decrease 1 stitch on each of the next 5 rows.
- Decrease 1 stitch on each of the following 2 alternate rows.
- Decrease 1 stitch on the following 4th row.
You should have:
45 stitches
Work 2 rows, ending with a WS row.
Shape the Left Neckline
Work until the final 9 stitches.
Turn and place those 9 stitches on a stitch holder.
Working across the remaining 36 stitches:
- Decrease 1 stitch at the neck edge on the next 8 rows.
- Decrease 1 stitch at the neck edge on the next 6 alternate rows.
- Decrease 1 stitch at the neck edge on 3 following 4th rows.
You should have:
19 stitches
Continue straight until the armhole measures the same as the right front and back.
End with a RS row.
Shape the Left Shoulder
Work:
P13, wrap and turn.
Knit to the end.
P7, wrap and turn.
Knit to the end.
Purl to the end.
Place the stitches on a holder and break the yarn.
Step 8: Knit the Sleeves
The sleeves are knitted flat and then seamed.
Using 2.75 mm straight needles, cast on:
54 stitches
Sleeve Ribbing
Row 1
K2, then repeat:
P2, K2
to the end.
Row 2
P2, then repeat:
K2, P2
to the end.
Repeat these two rows 7 more times.
You should have:
16 rows total
Change to 3 mm needles.
Work 4 rows in stocking stitch.
Increase the Sleeve
On the next RS increase row:
K2, M1, knit to the last 2 stitches, M1, K2.
You now have:
56 stitches
Work 9 rows.
Repeat the increase on the next increase row.
Continue repeating this 10-row sequence another 13 times.
You should reach:
84 stitches
Continue without shaping until the sleeve measures:
46 cm / 18 inches
Step 9: Shape the Sleeve Cap
Cast off 6 stitches at the beginning of the next 2 rows.
You should have:
72 stitches
Decrease 1 stitch at each end of the next 3 rows.
You should have:
66 stitches
Work 1 row without decreasing.
Then decrease 1 stitch at each end of the next row.
Repeat this 2-row sequence once more.
You should have:
62 stitches
Next, work 3 rows without decreasing.
Decrease 1 stitch at each end of the next row.
Repeat this sequence 4 more times.
You should have:
52 stitches
Work 1 row without decreasing.
Decrease 1 stitch at each end of the next row.
Repeat this 2-row sequence 4 more times.
You should have:
42 stitches
Decrease 1 stitch at each end of the next 5 rows.
You should have:
32 stitches
Cast off 4 stitches at the beginning of each of the next 4 rows.
You should have:
16 stitches
Cast off the remaining stitches.
Make the second sleeve in the same way.
Step 10: Join the Shoulders
Place the right-front shoulder stitches and corresponding back shoulder stitches onto straight needles.
With RS facing, use a three-needle bind-off to join the shoulder.
Repeat the same process for the opposite shoulder.
This creates a clean and secure shoulder seam.
Step 11: Sew the Sleeves
Join the sleeve seams.
Then set each sleeve into its corresponding armhole.
Sew the sleeves securely into place, taking care to distribute the sleeve head evenly around the armhole.
Step 12: Knit the Neckband
Using 2.75 mm needles and with RS facing, work around the neckline.
The stitch pickup is:
- Knit across 9 stitches from the right-front holder.
- Pick up and knit 38 stitches from the right front.
- Pick up and knit 9 stitches from the right back.
- Knit across 44 stitches from the back-neck holder.
- Pick up and knit 9 stitches from the left back.
- Pick up and knit 38 stitches from the left front.
- Knit across 9 stitches from the left-front holder.
Total:
156 stitches
Neckband Ribbing
Row 1 — WS
P3, then repeat:
K2, P2
to the last stitch.
Finish with P1.
Row 2 — RS
K3, then repeat:
P2, K2
to the last stitch.
Finish with K1.
Repeat these two rows twice more.
You should have:
6 rows total
Cast off in rib.
Step 13: Knit the Button Band
Using 2.75 mm needles, pick up and knit:
94 stitches along the left front.
Row 1 — WS
Repeat:
P2, K2
to the final 2 stitches.
Finish with P2.
Row 2 — RS
Repeat:
K2, P2
to the final 2 stitches.
Finish with K2.
Repeat Rows 1 and 2 twice more.
You should have:
6 rows total
Cast off in rib.
Step 14: Knit the Buttonhole Band
Using 2.75 mm needles, pick up and knit:
94 stitches along the left front.
Row 1 — WS
Repeat:
P2, K2
to the final 2 stitches.
Finish with P2.
Row 2 — RS
Repeat:
K2, P2
to the final 2 stitches.
Finish with K2.
Repeat Row 1 once more.
Buttonhole Row
Work the buttonhole row as follows:
K2, [P2tog, YRN, K2, P2, K2] × 11, P2tog, YRN, K2.
Work the final two rows following the established rib pattern.
Cast off in rib.
Step 15: Sew on the Buttons
Once all knitting is complete, weave in and secure all loose yarn ends.
Position the 12 buttons so they line up accurately with the buttonholes.
Sew each button firmly into place.
Before finishing the sewing, close the cardigan and check that all buttons and buttonholes align correctly.
Understanding the Fair Isle Border
The Fair Isle border is the decorative focal point of the cardigan.
The pattern consists of a repeating 16-stitch motif worked over 13 rows.
The color palette combines:
- Pink
- Cream
- Light blue
- Medium blue
- Dark blue
- Green
The geometric motif creates a decorative horizontal band while keeping the rest of the cardigan relatively simple.
This balance makes the design attractive without requiring complex colorwork throughout the entire garment.
Fair Isle Knitting Tips
For a clean colorwork section:
- Keep your tension consistent.
- Follow the chart row by row.
- Count your repeats carefully.
- Avoid pulling the floats too tightly.
- Keep the carried yarn relaxed behind the work.
- Check your color sequence before starting each row.
- Make sure the Fair Isle fabric lies flat.
If you’re new to Fair Isle knitting, practice the 16-stitch repeat on a small swatch first.
Short-Row Shoulder Shaping
Short rows are used to create the shoulder shape.
The wrap-and-turn technique allows the shoulder to be shaped gradually rather than ending at a completely straight edge.
When working back across the short-row section, remember to work the wrap together with the wrapped stitch.
Taking care with these steps will help create smoother and more professional-looking shoulders.
Choosing Different Colors
The original design uses pink as the main color, but the Fair Isle concept can easily inspire other palettes.
Soft Pastel
Try:
- Blush pink
- Cream
- Powder blue
- Sage green
- Lavender
Neutral
Choose:
- Cream
- Beige
- Taupe
- Soft gray
- Sage
Autumn
Try:
- Burgundy
- Cream
- Rust
- Forest green
- Navy
Classic Winter
Use:
- Cream
- Burgundy
- Forest green
- Dark blue
- Soft gray
Styling the Edith Cardigan
The relaxed shape makes this cardigan easy to incorporate into everyday outfits.
Casual Outfit
Pair it with:
- White T-shirt
- Straight-leg jeans
- Ankle boots
- Simple handbag
The Fair Isle border provides enough decoration to keep the outfit interesting.
Feminine Outfit
Try wearing it with:
- Midi skirt
- Simple blouse
- Ankle boots
- Delicate jewelry
The soft color palette works beautifully with feminine silhouettes.
Layered Winter Outfit
For colder weather, layer the cardigan over:
- Fine-knit turtleneck
- Long-sleeved blouse
- Straight trousers
- Tall boots
The slightly loose fit makes layering practical and comfortable.
Common Knitting Problems
The Cardigan Is Too Large
Check your gauge.
If you have fewer than 26 stitches per 10 cm, your stitches are larger than required and the finished garment may become wider.
Try smaller needles.
The Cardigan Is Too Small
If you have more than 26 stitches per 10 cm, your stitches are smaller than required.
Try larger needles.
The Fair Isle Border Is Puckering
This usually happens when the floats are pulled too tightly.
Allow the unused yarn to travel naturally across the back of the work without creating excessive tension.
The Shoulder Looks Uneven
Check each wrap-and-turn carefully.
The short-row shaping must be worked consistently on both sides.
The Sleeve Does Not Fit the Armhole
Compare the sleeve measurements with the body measurements before sewing.
Distribute the sleeve cap evenly around the armhole instead of concentrating excess fabric in one area.
The Buttonholes Do Not Align
Close the cardigan before sewing the buttons.
Mark the center of every buttonhole and sew the corresponding button directly opposite it.
Finishing Checklist
Before wearing the finished cardigan, check:
- Ribbing is even.
- Fair Isle border is neat.
- Body length is correct.
- Fronts are symmetrical.
- Armholes are properly shaped.
- Shoulders are securely joined.
- Sleeve seams are neat.
- Sleeves are correctly positioned.
- Neckband lies flat.
- Button band is secure.
- Buttonhole band is even.
- All 12 buttons are securely sewn.
- All loose ends are woven in.
Frequently Asked Questions
What size is this cardigan?
It is designed for a 32–34 inch / 80–85 cm bust, with a finished chest measurement of approximately 36 inches / 92 cm.
What yarn should I use?
The design uses pink 2-ply jumper-weight yarn as the main color, with small quantities of cream, light blue, medium blue, dark blue, and green for the Fair Isle border.
What needles are needed?
The cardigan uses 2.75 mm, 3 mm, and 3.25 mm needles, depending on the section being knitted.
How many buttons are needed?
The cardigan uses 12 buttons, approximately 1 cm in diameter.
How long is the finished cardigan?
The finished length is approximately 19 inches / 48 cm.
How long are the sleeves?
The sleeve seam measures approximately 18 inches / 46 cm.
Is the Fair Isle pattern difficult?
The colorwork is relatively straightforward and is suitable for a confident beginner who is comfortable following a knitting chart.
Is the cardigan knitted in one piece?
The lower body is knitted in one piece up to the armholes. The upper body is then divided into the fronts and back.
How are the shoulders joined?
The shoulders are shaped with short rows and joined using a three-needle bind-off.
Are the sleeves knitted in the round?
No. The sleeves are knitted flat and then seamed before being inserted into the armholes.
Can I change the colors?
Yes. The Fair Isle border provides an excellent opportunity to experiment with different color combinations while keeping the main body in a single shade.
Final Thoughts
The Edith knitted cardigan is a lovely combination of classic garment construction and decorative Fair Isle knitting. Its relaxed shape makes it comfortable for everyday wear, while the colorful lower border gives it a distinctive handmade character.
The project also provides excellent practice in several valuable knitting techniques, including ribbing, stocking stitch, Fair Isle colorwork, increases, decreases, short-row shaping, three-needle bind-off, picking up stitches, buttonhole construction, and sleeve setting.
With its soft pink body, geometric Fair Isle border, neat ribbed edges and twelve-button front, this cardigan has a timeless handmade appeal that can easily be adapted to different color palettes and personal styles.