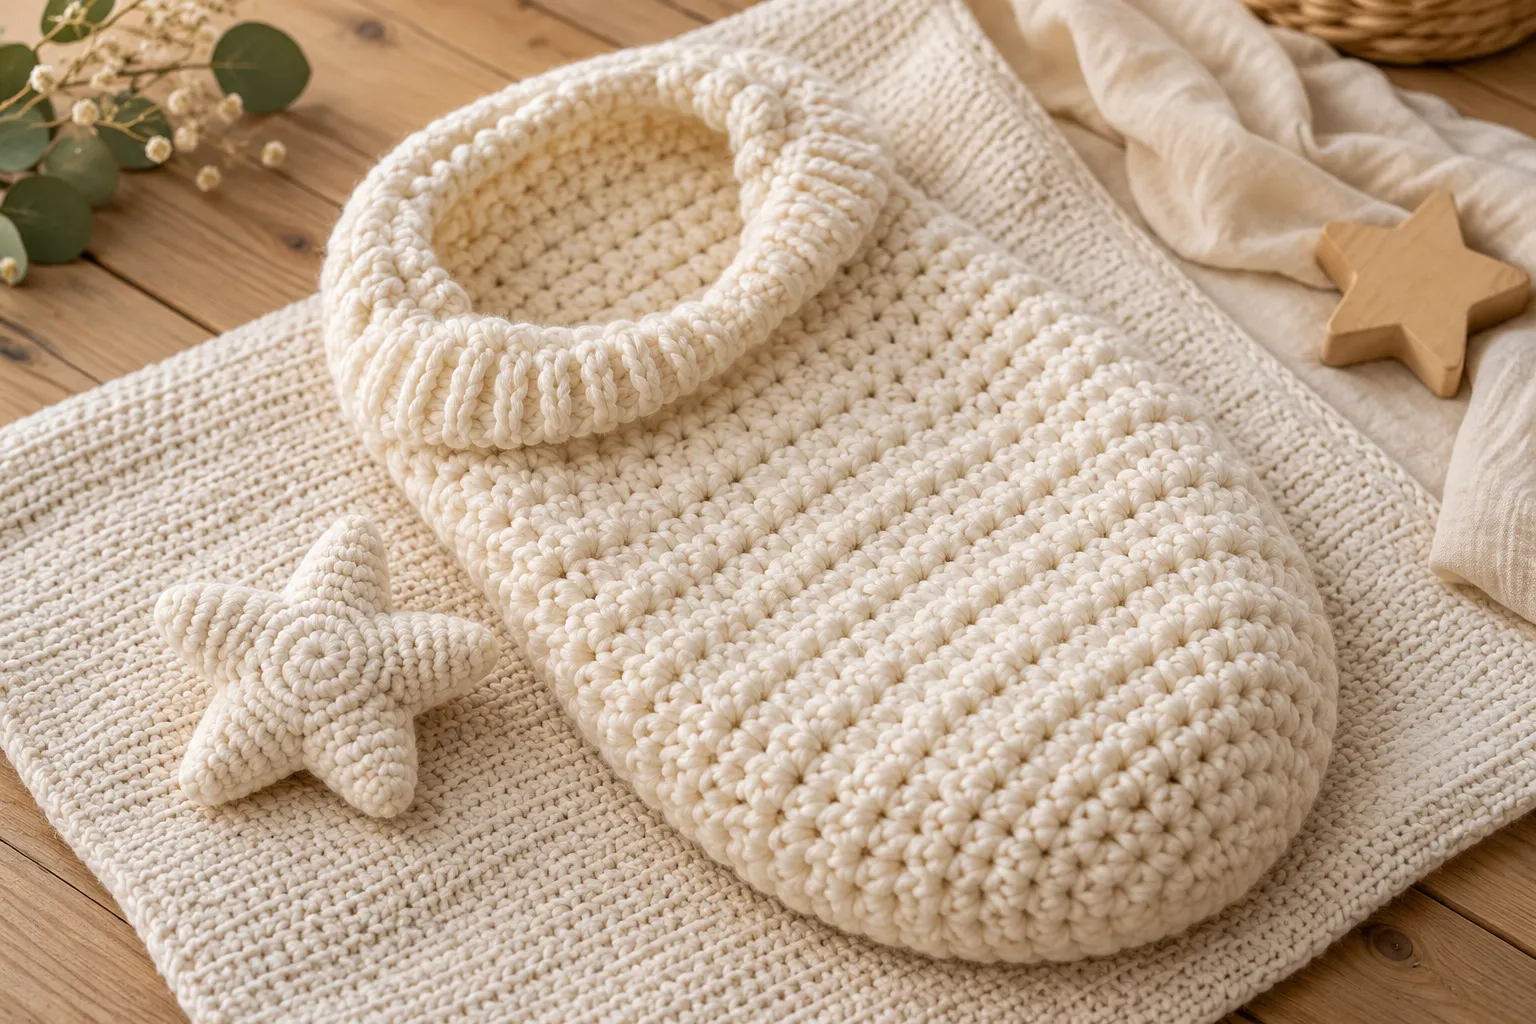
A handmade baby cocoon is a sweet crochet project for newborn photography, nursery gifts, and cozy keepsake sets. This Little Star Crochet Baby Cocoon features a simple rounded body, a gently ribbed opening, and a decorative star-inspired finish.
Because newborns are especially vulnerable to overheating and restricted movement, this project should be treated primarily as a supervised photography prop or decorative keepsake, not as an unsupervised sleep product. Never leave a baby unattended in a crochet cocoon.
Why You’ll Love This Baby Cocoon
This project is:
- Beginner-friendly
- Soft and cozy
- Quick to crochet
- Easy to customize
- Suitable for baby shower gifts
- Beautiful for newborn photography
- Great for neutral nursery themes
- Easy to coordinate with crochet hats and blankets
You can make it in one solid color or combine soft shades for a more playful look.
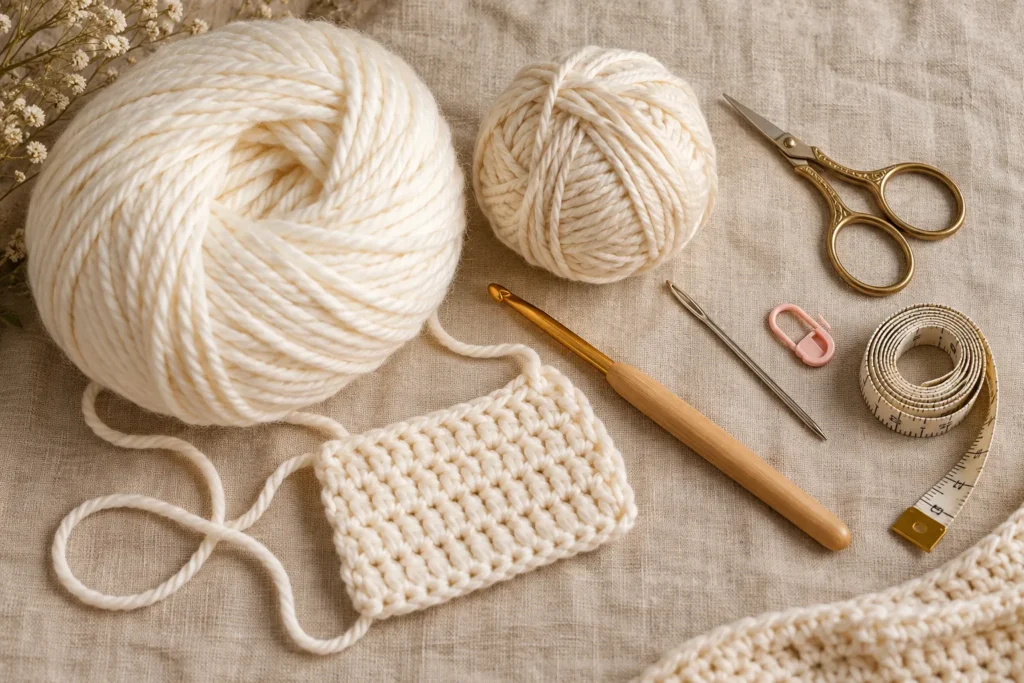
Materials You’ll Need
| Material | Recommendation |
|---|---|
| Yarn | Soft baby-friendly yarn |
| Yarn weight | Worsted or chunky, depending on desired texture |
| Crochet hook | Appropriate size for your yarn |
| Yarn needle | For finishing |
| Scissors | For trimming ends |
| Stitch marker | Optional |
| Measuring tape | Recommended |
For a baby project, choose a yarn that is soft, washable, and free from scratchy fibers.
Good options include:
- Soft acrylic
- Cotton blends
- Baby yarn
- Washable merino blends
Avoid rough or highly textured yarn that could irritate delicate skin.
Finished Size
A newborn cocoon can vary considerably depending on yarn weight and tension.
As a starting point, aim for approximately:
16–18 inches long
and approximately:
8–10 inches wide when laid flat
These measurements are approximate.
Always make a gauge sample and measure the finished project before using it.
Crochet Abbreviations
| Abbreviation | Meaning |
|---|---|
| ch | Chain |
| sl st | Slip stitch |
| sc | Single crochet |
| hdc | Half double crochet |
| dc | Double crochet |
| BLO | Back loop only |
| st | Stitch |
| sts | Stitches |
| rep | Repeat |
Before You Begin
The cocoon is worked from the bottom upward.
You’ll first create a rounded base, then work upward in rounds to form the body.
The opening can be finished with a simple ribbed edge.
The pattern can be adjusted by changing the number of rounds rather than completely changing the construction.
Little Star Crochet Baby Cocoon Pattern
Step 1: Create the Base
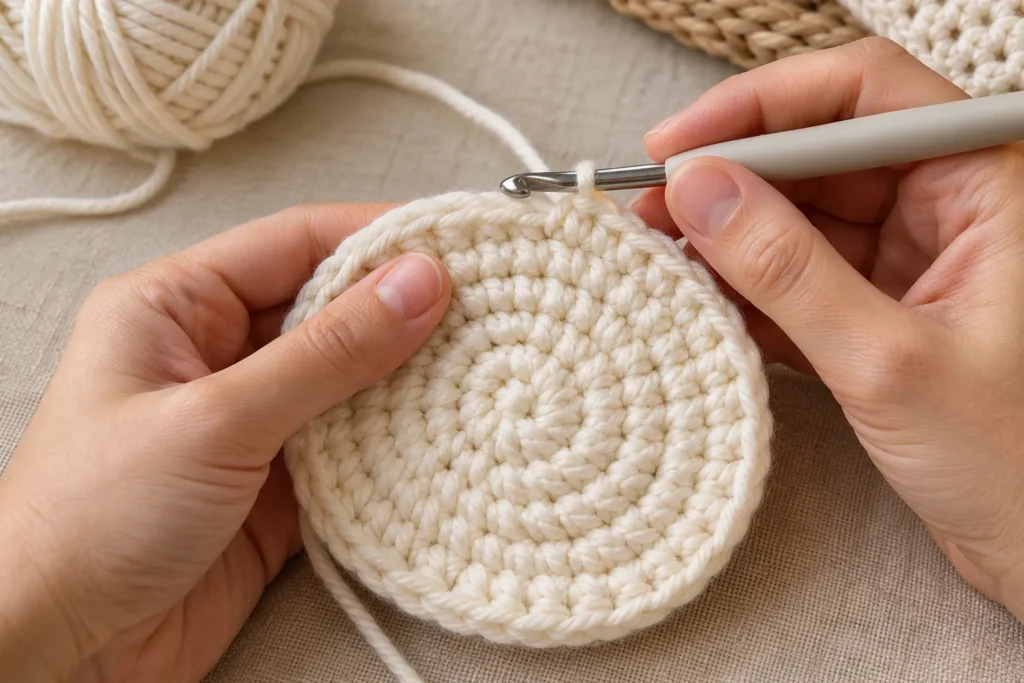
Start with your chosen yarn and make a magic ring.
Round 1
Work 8 hdc into the magic ring.
Pull the ring closed.
Join with a slip stitch.
You should have:
8 stitches
Round 2
Chain 1.
Work 2 hdc into each stitch around.
Join with a slip stitch.
You should have:
16 stitches
Round 3
Chain 1.
Repeat:
1 hdc in the next stitch, 2 hdc in the next stitch.
Continue around.
Join.
You should have:
24 stitches
Round 4
Chain 1.
Repeat:
1 hdc in each of the next 2 stitches, 2 hdc in the next stitch.
Continue around.
Join.
You should have:
32 stitches
Step 2: Continue Increasing the Base
Continue increasing evenly around the base.
The goal is to create a relatively flat circular bottom rather than a bowl-shaped base.
If the piece begins to curl upward sharply, you may need additional increases.
If it becomes very wavy, you may be adding too many stitches.
The correct tension should produce a gently flat base.
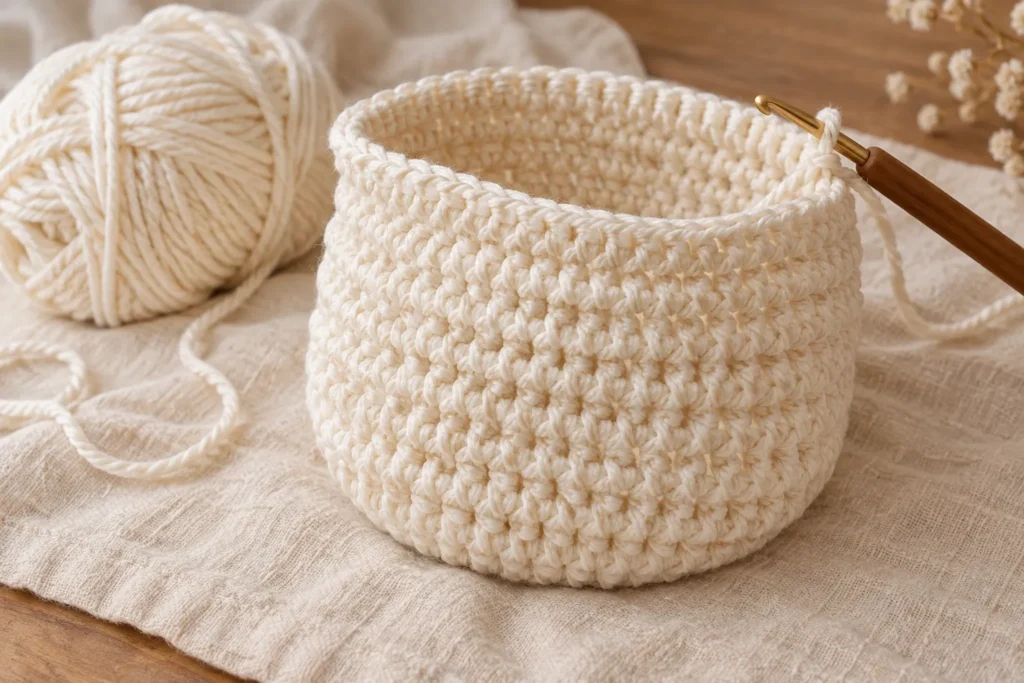
Step 3: Build the Cocoon Body
Once the base reaches approximately 8–10 inches across, stop increasing.
From this point onward, work one hdc into every stitch around.
Body Round 1
Chain 1.
Work 1 hdc in every stitch.
Join.
Body Rounds 2–10
Repeat the same round.
Continue until the cocoon reaches your desired length.
For a deeper cocoon, simply add more rounds.
Step 4: Add the Star Texture
For a subtle star-inspired texture, alternate groups of stitches around the body.
A simple version can use:
1 hdc, 1 front-post double crochet
repeated around.
The raised stitches create a gentle textured effect without requiring complicated colorwork.
If you prefer an entirely beginner-friendly version, simply continue with regular hdc rounds.
Step 5: Create the Opening
Once the body reaches the desired height, work a few rounds around the opening using single crochet.
This creates a cleaner edge.
Round
Chain 1.
Work 1 sc in every stitch around.
Join with a slip stitch.
Repeat for 2–3 rounds.
Step 6: Add a Ribbed Edge
For a more decorative finish, use single crochet through the back loop.
Work:
1 sc BLO in every stitch around.
Repeat for several rounds.
This creates a subtle ribbed texture around the opening.
Step 7: Finish the Cocoon
Once you’re happy with the length:
- Cut the yarn.
- Leave a small finishing tail.
- Pull the yarn through the final loop.
- Thread the tail onto a yarn needle.
- Weave it securely into the inside.
- Trim the excess.
Turn the cocoon right side out.
Optional: Add a Crochet Star
To emphasize the Little Star theme, create a small crocheted star separately.
Use a contrasting color such as:
- Cream
- Soft yellow
- Pale blue
- Dusty pink
Secure the star carefully to the exterior.
However, if the cocoon will be used around a baby, avoid detachable embellishments that could become loose.
For photography props, you can instead place the crocheted star beside the cocoon rather than attaching it.
Color Ideas
A baby cocoon doesn’t have to be traditional white.
| Color | Style |
|---|---|
| Ivory | Classic |
| Cream | Neutral |
| Dusty blue | Soft |
| Sage | Modern |
| Blush pink | Feminine |
| Beige | Natural |
| Lavender | Dreamy |
| Mustard | Warm |
| Terracotta | Autumn-inspired |
| Gray | Contemporary |
A cream cocoon with a pale gold or mustard star creates a beautiful celestial-inspired look.
How to Make the Cocoon Larger
If you want a larger photography prop or decorative cocoon, simply continue the body rounds.
To increase the width, add additional increase rounds before beginning the straight body.
However, avoid relying on this pattern for a fitted garment without recalculating the dimensions for the intended wearer.
How to Make the Cocoon Smaller
For a smaller decorative version:
- Stop increasing earlier.
- Use fewer body rounds.
- Choose thinner yarn.
- Use a smaller hook appropriate for that yarn.
Always measure the finished piece.
How to Make a Matching Baby Hat
A matching crochet hat can make the project look like a coordinated set.
Choose the same yarn color and create:
Cocoon + simple newborn hat + small star
For photography, you can coordinate the colors without attaching anything to the baby.
Matching Crochet Baby Accessories
You can create a complete handmade nursery collection using the same yarn.
Consider making:
- Baby blanket
- Newborn hat
- Baby booties
- Star pillow
- Crochet moon
- Baby photo mat
- Small nursery basket
A consistent color palette makes the collection look professionally coordinated.
Choosing Yarn for a Baby Cocoon
The yarn is especially important for baby-related projects.
Look for yarn that is:
- Soft
- Washable
- Lightweight enough for the intended use
- Free from scratchy fibers
- Easy to maintain
A soft acrylic or baby yarn is often practical because it can be washed easily.
Avoid Excessively Fuzzy Yarn
Very fuzzy yarn can shed fibers and make stitch definition difficult to see.
For photography, smooth yarn also produces cleaner-looking stitches.
How to Keep the Cocoon Soft
Use the yarn manufacturer’s recommended washing instructions.
Avoid harsh detergents.
Don’t use excessive heat unless specifically permitted by the yarn label.
After washing, reshape the cocoon gently and allow it to dry according to the yarn instructions.
How to Make the Cocoon Look Beautiful in Photos
If you’re making this project specifically as a photography prop, styling can make a significant difference.
Try:
Neutral Background
Use cream, beige, or light gray.
Soft Lighting
Natural window light creates gentle shadows.
Simple Accessories
Add:
- Small wooden stars
- Neutral blankets
- Soft fabric
- Faux greenery
- A simple knitted hat
Keep the composition uncluttered.
Seasonal Styling
For autumn, use:
Cream + rust + mustard
For winter:
Ivory + pale blue + soft gray
For spring:
Cream + sage + blush
Important Baby Safety Considerations
A crochet cocoon should not be treated as a safe sleep device.
For newborn photography, use the cocoon only with:
- Continuous adult supervision
- Appropriate support
- A safe, controlled environment
- A trained photographer when possible
Never place a sleeping baby unattended inside the cocoon.
Avoid adding:
- Loose buttons
- Beads
- Long cords
- Detachable appliqués
- Small decorative pieces
Also make sure the baby’s face and airway remain completely unobstructed.
If you’re unsure whether a design is appropriate for a baby, consult a pediatric professional or qualified newborn photographer.
Common Problems
The Base Is Curling
You may need additional increases.
Check your stitch count and tension.
The Base Is Wavy
You may have too many increases.
Try fewer increases in the next round.
The Cocoon Is Too Narrow
Add another increase round before beginning the body.
The Cocoon Is Too Short
Continue adding body rounds.
The Opening Is Too Tight
Use a larger hook for the edging or add a few stitches evenly around the opening.
The Fabric Feels Too Stiff
Try a larger hook or a softer yarn.
Frequently Asked Questions
Is this crochet baby cocoon beginner-friendly?
Yes. The construction uses basic crochet stitches and simple increasing, making it accessible to beginners who are comfortable crocheting in rounds.
How much yarn does a baby cocoon require?
The amount varies according to yarn weight, size, stitch pattern, and tension. Having an extra skein available is useful if you’re making a larger version.
What yarn is best for a baby cocoon?
Choose a soft, washable yarn designed to be comfortable against delicate skin. Soft acrylic, baby yarn, and suitable cotton blends are common choices.
Can I make the cocoon in different colors?
Absolutely. Neutral shades, pastels, earthy tones, and seasonal colors can all work beautifully.
Can I add a crochet star?
Yes, but avoid loose or detachable decorations around a baby. For photography, placing a separate crochet star beside the cocoon is a safer decorative option.
Can the cocoon be used for sleeping?
It should not be considered a sleep product. Use it as a supervised photography prop or decorative handmade item, and follow current infant-safety guidance.
Final Thoughts
The Little Star Crochet Baby Cocoon is a sweet handmade project that can become part of a beautiful newborn photography setup or baby-gift collection.
The basic construction is simple enough to customize with different yarns, colors, textures, and sizes. Add a matching crochet hat or blanket to create a coordinated handmade set.
For the safest approach, treat the cocoon as a supervised photography prop rather than a sleeping accessory, and keep the design free from loose or detachable decorations.
With soft yarn, a gentle color palette, and a few simple stitches, you can create a beautiful little star-inspired crochet piece that makes a memorable handmade gift.