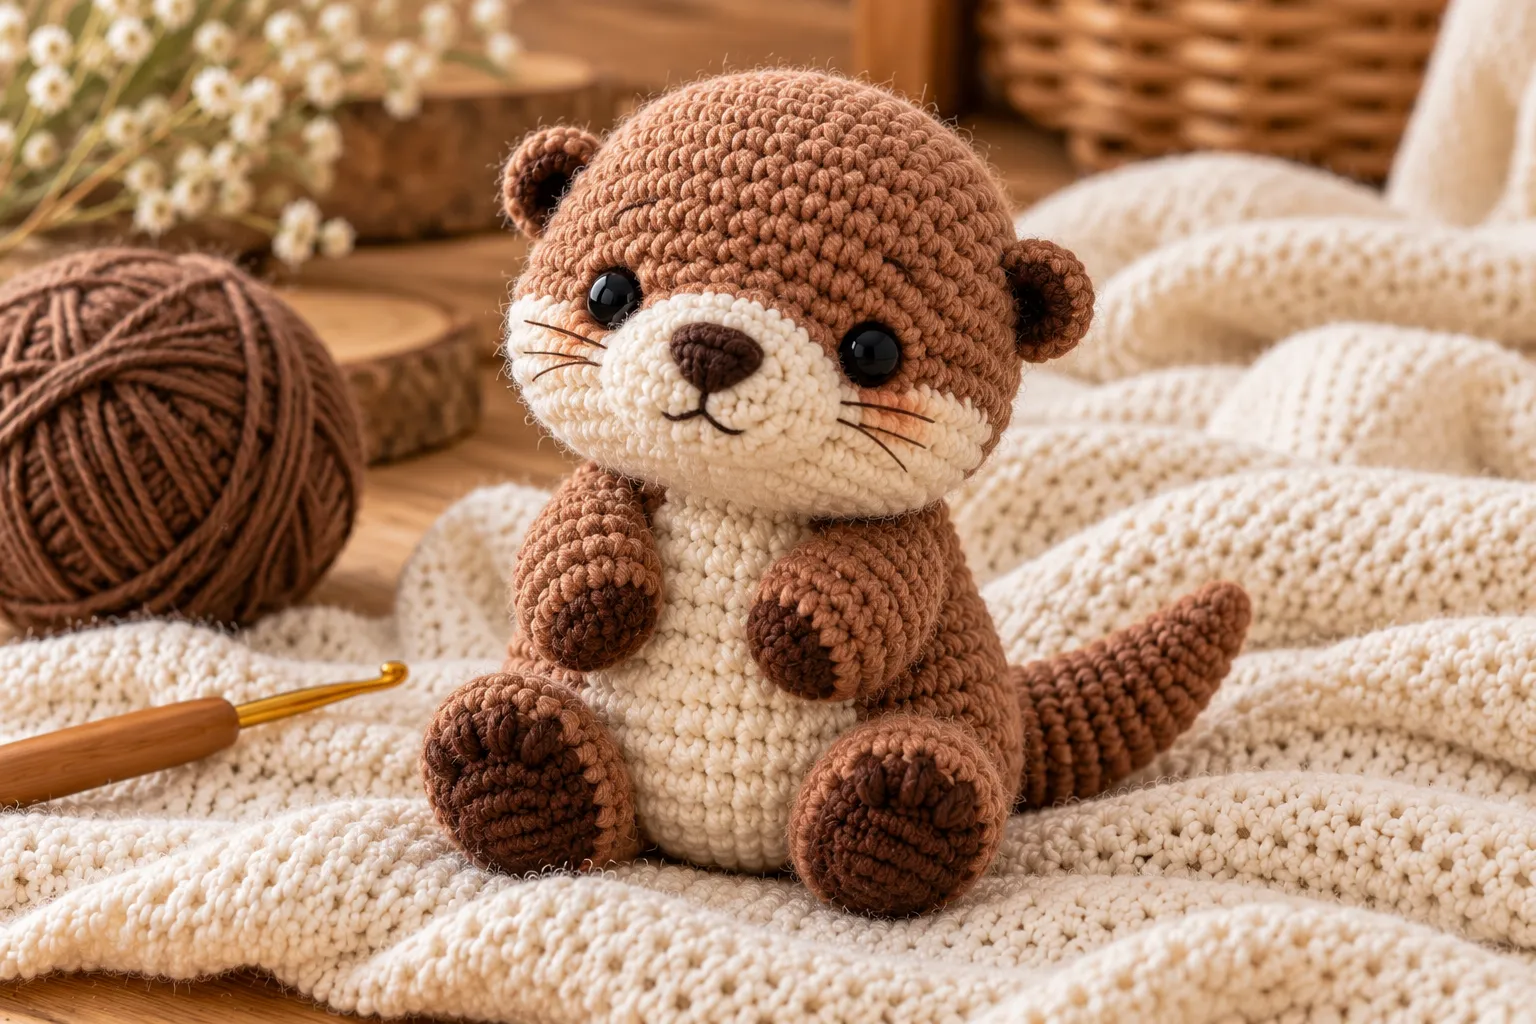
The Pocket Otter is a tiny, adorable amigurumi project inspired by one of nature’s most playful little animals. With its rounded body, tiny paws, sweet face, and compact size, this crochet otter makes a wonderful handmade gift, desk companion, nursery decoration, or pocket-sized collectible.
Its simple shapes make it a fun project for anyone who enjoys creating miniature crochet animals. You can keep the classic brown-and-cream color combination or experiment with different shades to create your own collection of tiny otters.
Why You’ll Love This Pocket Otter
This little otter is designed around simple amigurumi shapes, so you can focus on shaping and assembly without needing complicated crochet techniques.
The finished character can be customized with:
- Different yarn colors
- Larger or smaller proportions
- Different facial expressions
- A longer or shorter tail
- Tiny accessories
- Different ear shapes
- Embroidered details
Because the finished project is compact, it is also a great way to use leftover yarn from other amigurumi projects.
Materials You’ll Need
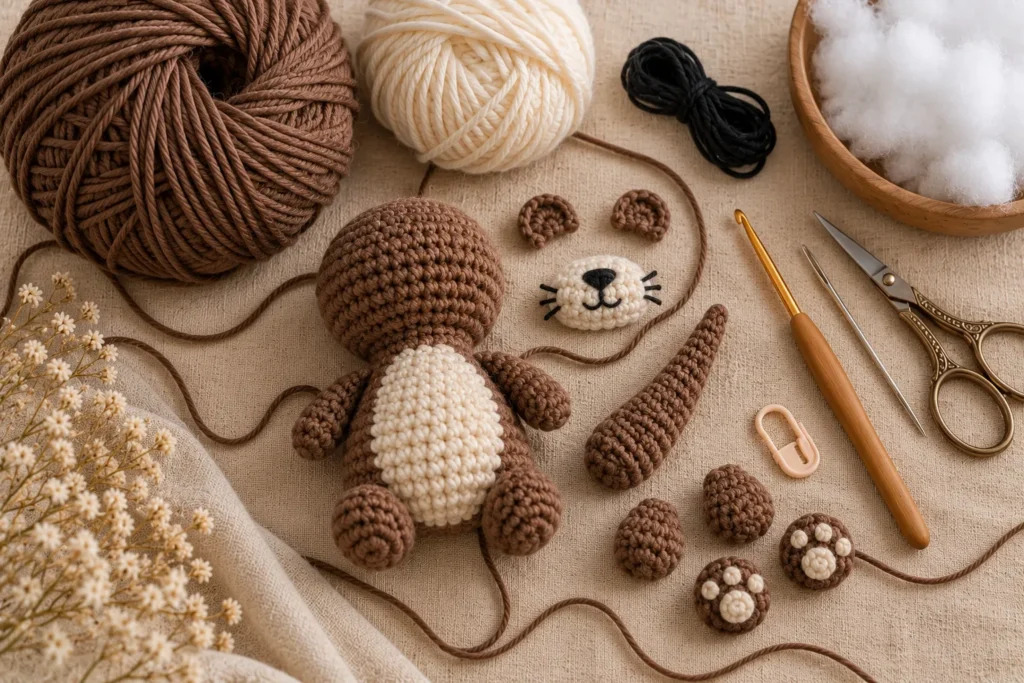
For a small pocket otter, gather:
- Brown or dark beige yarn
- Cream or light beige yarn
- Small amount of black yarn
- Crochet hook appropriate for your yarn
- Polyester fiberfill
- Yarn needle
- Stitch marker
- Small scissors
- Black embroidery thread
Optional:
- Safety eyes for appropriate projects
- Small amount of pink or dark brown yarn for the nose
For projects intended for babies or very young children, embroidered facial details are preferable to small detachable components.
Choosing Your Yarn
A smooth cotton or cotton-blend yarn works particularly well for this project.
Cotton provides crisp stitch definition, which is useful when working on a small amigurumi.
Acrylic yarn can also work well and may produce a slightly softer finished otter.
For an especially cuddly version, plush yarn can be used, although it can make stitch counting more difficult.
Color Ideas
Try these combinations:
Classic Otter
Warm brown body + cream belly
Chocolate Otter
Dark brown body + beige muzzle
Soft Woodland
Taupe body + oatmeal belly
Pastel Otter
Dusty brown + pale cream
Miniature Neutral
Warm gray-brown + ivory
Finished Size
The finished size depends on the yarn weight, hook size, and your crochet tension.
With lightweight yarn, the Pocket Otter can be made small enough to fit comfortably in one hand.
Using thicker yarn creates a larger plush while keeping the same basic construction.
Crochet Abbreviations
US crochet terminology:
- MR — magic ring
- ch — chain
- sc — single crochet
- sl st — slip stitch
- inc — increase
- dec — decrease
- st — stitch
- sts — stitches
- BLO — back loop only
- FO — fasten off
Amigurumi Tips Before Starting
Work the main pieces in continuous rounds unless otherwise specified.
Use a stitch marker to identify the first stitch of each round.
Keep your tension fairly tight so that the stuffing doesn’t show through.
Add stuffing gradually rather than filling a piece all at once.
When sewing the pieces together, temporarily position everything first. This makes it much easier to achieve a balanced finished character.
Pocket Otter Head Pattern
Begin with your main brown yarn.
Head
Round 1: 6 sc into MR — 6 sts
Round 2: inc around — 12 sts
Round 3: [sc, inc] around — 18 sts
Round 4: [2 sc, inc] around — 24 sts
Round 5: [3 sc, inc] around — 30 sts
Rounds 6–10: sc around — 30 sts
The head should now have a rounded shape.
Begin Shaping
Round 11: [3 sc, dec] around — 24 sts
Round 12: [2 sc, dec] around — 18 sts
Begin adding a small amount of fiberfill.
Round 13: [sc, dec] around — 12 sts
Add additional stuffing and check the shape.
Round 14: dec around — 6 sts
Fasten off.
Pull the opening closed and weave in the yarn securely.
Otter Muzzle
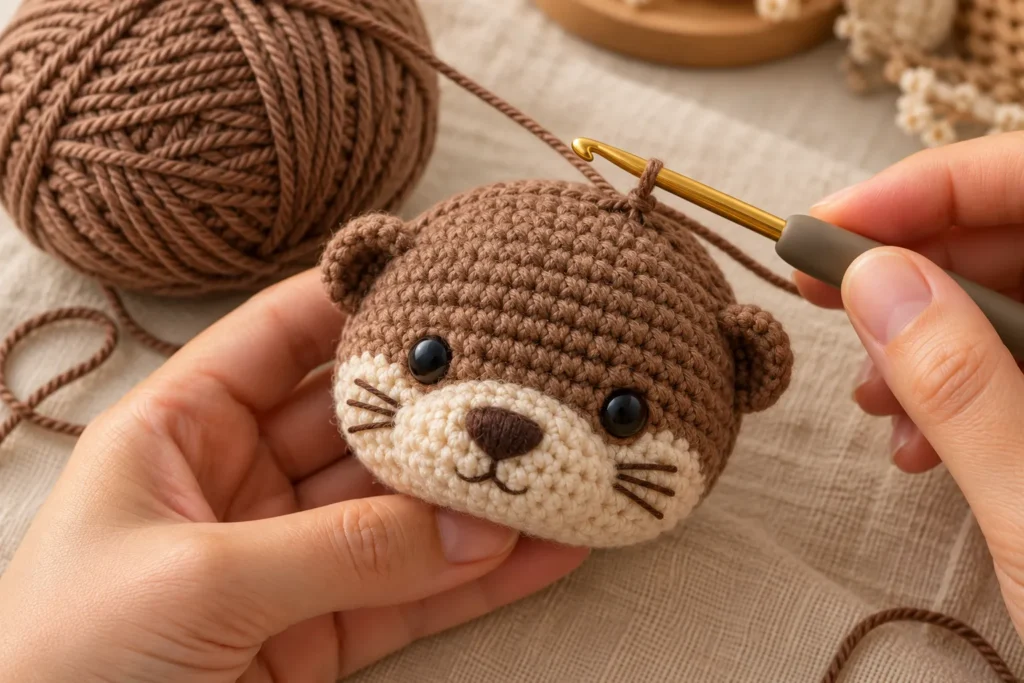
Switch to cream yarn.
Round 1: 6 sc into MR — 6 sts
Round 2: inc around — 12 sts
Round 3: sc around — 12 sts
Fasten off, leaving a long tail.
Add a tiny amount of stuffing.
Sew the muzzle onto the lower front portion of the head.
The muzzle should sit slightly below the center of the face.
Creating the Otter Face
The face is what gives this tiny animal its personality.
Use black embroidery thread to create:
- Small oval eyes
- Tiny rounded nose
- Short smiling mouth
Add the facial features only after positioning the muzzle.
Look at the face from several angles before permanently embroidering the details.
For a softer expression, place the eyes slightly farther apart.
For a more playful expression, make them slightly larger.
Otter Ears
The ears are small rounded pieces.
Use brown yarn.
Make Two
Round 1: 6 sc into MR — 6 sts
Round 2: [sc, inc] around — 9 sts
Round 3: sc around — 9 sts
Fasten off.
Don’t overstuff the ears.
Flatten them gently and leave a long yarn tail for sewing.
Attach one ear on each side of the head.
Pocket Otter Body
Use brown yarn.
Body
Round 1: 6 sc into MR — 6 sts
Round 2: inc around — 12 sts
Round 3: [sc, inc] around — 18 sts
Round 4: [2 sc, inc] around — 24 sts
Rounds 5–8: sc around — 24 sts
Round 9: [2 sc, dec] around — 18 sts
Round 10: sc around — 18 sts
Round 11: [sc, dec] around — 12 sts
Begin stuffing.
Round 12: sc around — 12 sts
Round 13: dec around — 6 sts
Fasten off and close the opening.
The finished body should be slightly smaller than the head.
Cream Belly
For an extra-cute otter, add a small cream belly.
Crochet a simple oval using cream yarn.
You can make the oval by starting with a short chain and crocheting around both sides.
Increase at the curved ends until the oval reaches the desired size.
Fasten off and leave a long sewing tail.
Position it centrally on the front of the body and sew it securely.
For a textured appearance, add a few embroidered horizontal lines.
Otter Arms
Make two small arms with brown yarn.
Round 1: 6 sc into MR — 6 sts
Rounds 2–5: sc around — 6 sts
Add only a tiny amount of stuffing.
Flatten the opening and close it.
Leave a long yarn tail.
Sew the arms onto the sides of the body.
For a cute pose, angle the paws slightly toward the belly.
Otter Feet
The feet can be slightly larger than the arms.
Make Two
Round 1: 6 sc into MR — 6 sts
Round 2: inc around — 12 sts
Rounds 3–4: sc around — 12 sts
Round 5: [2 sc, dec] around — 9 sts
Add a small amount of stuffing.
Fasten off.
Sew the feet near the bottom of the body.
Position them so the otter can sit upright.
Otter Tail
The tail is one of the most recognizable features.
Use brown yarn.
Round 1: 6 sc into MR — 6 sts
Rounds 2–4: sc around — 6 sts
Round 5: [2 sc, dec] around — 4 sts
Continue with 4 sc for several rounds.
Adjust the length according to your preferred design.
For a classic otter silhouette, make the tail slightly wider near the base and gradually taper it toward the tip.
Add only a small amount of stuffing if needed.
Sew the tail securely to the lower back of the body.
Assemble the Pocket Otter
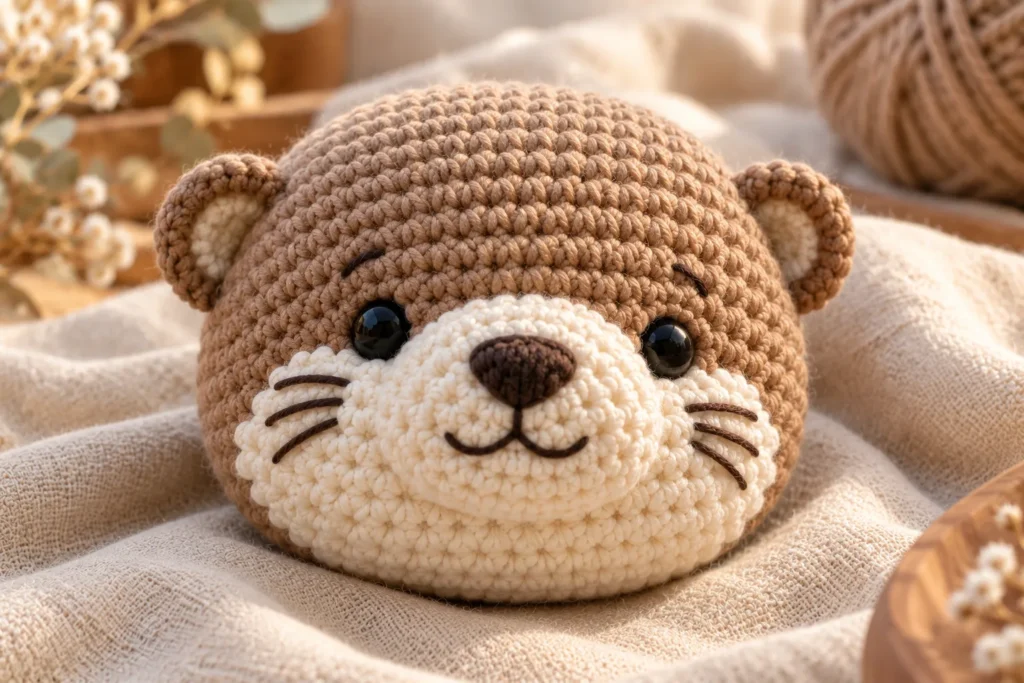
Once all the pieces are complete, arrange them before sewing.
Step 1: Attach the Head
Position the head on top of the body.
Sew around the neck using the yarn tail from the head.
Make several passes through the stitches for a secure connection.
Step 2: Attach the Ears
Position the ears symmetrically.
Check their height before sewing.
Step 3: Attach the Arms
Sew the arms onto both sides of the body.
Angle them slightly toward the front if you want the otter to appear as though it is holding its belly.
Step 4: Attach the Feet
Position the feet near the bottom of the body.
Make sure the otter can sit naturally.
Step 5: Attach the Tail
Sew the tail to the lower back.
Curve it slightly to one side for a more natural pose.
Step 6: Add the Belly
Center the cream belly panel and sew it securely to the body.
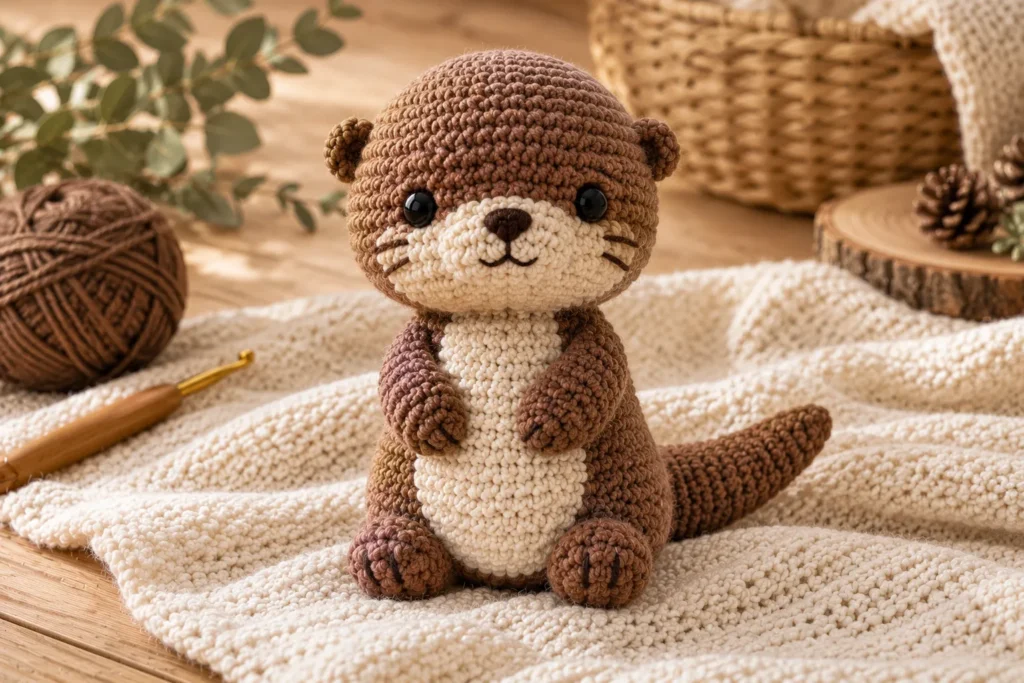
Making a Sitting Otter
A sitting pose works particularly well for a pocket-sized amigurumi.
Place the legs slightly apart.
Position the feet toward the front.
Attach the tail low on the back to help visually balance the character.
You can also position the arms close to the belly.
This creates a sweet pose that makes the otter appear to be hugging itself.
Making a Swimming Otter
For a different pose, make the body slightly longer.
Extend the arms outward.
Make the tail longer.
Instead of attaching the feet beneath the body, position them toward the sides.
This creates a playful swimming or floating otter design.
Cute Accessories
Once you’ve mastered the basic otter, you can create different versions.
Tiny Scarf
Crochet a narrow scarf using a contrasting color.
Try mustard, sage, dusty blue, or burgundy.
Little Flower
Add a small crochet flower near one ear.
Bamboo or Leaf
Create a tiny crochet leaf for a woodland-inspired character.
Mini Heart
Add a small embroidered heart to the belly.
Tiny Hat
Make a miniature beanie for a winter-themed otter.
Color Variations
Classic Brown
Brown body + cream muzzle + cream belly.
Dark Chocolate
Deep brown body + warm beige details.
Soft Taupe
Taupe body + ivory belly.
Gray Otter
Warm gray body + cream muzzle.
Pastel
Muted brown body + dusty pink accents.
How to Make a Smaller Pocket Otter
The easiest way to create a miniature version is to change the yarn and hook.
Use:
- Finer yarn
- Smaller hook
- Smaller facial details
Keep the stitch counts similar to the basic pattern.
The finished animal will simply have smaller dimensions.
How to Make a Larger Otter
Use thicker yarn and a larger hook.
You can also add additional increase rounds to the head and body.
If you enlarge the main pieces, remember to enlarge the ears, limbs, tail, and muzzle proportionally.
Tips for a Professional Finish
Keep Your Stitch Tension Consistent
Small differences become noticeable on miniature amigurumi.
Check the Face Before Sewing
The face is the most visible part of the project.
Temporarily position the muzzle and eyes before permanently attaching them.
Stuff Evenly
Uneven stuffing can make the head or body lumpy.
Add small amounts and shape the piece with your fingers.
Hide Your Yarn Ends
Weave every end deeply into the crochet fabric before trimming.
Match the Pieces
When making two ears, arms, or feet, try to crochet them consecutively so your tension remains similar.
Common Problems
The Otter Looks Too Long
Your body may have too many rounds.
Reduce the number of straight rounds.
The Head Is Too Small
Add an additional increase round before beginning the straight rounds.
The Body Won’t Stand
The feet may need to be positioned farther apart.
You can also slightly flatten the bottom of the body.
The Face Looks Uneven
Temporarily pin the facial pieces before sewing.
Check the placement from directly in front of the otter.
The Stuffing Shows
Your stitches are probably too loose.
Try a smaller hook or tighter tension.
Safety Considerations
If this project is intended for a baby or young child, construction should be especially secure.
Consider using embroidered eyes and facial details rather than detachable pieces.
Check that:
- All seams are secure.
- Yarn ends are properly woven in.
- Limbs cannot easily detach.
- No small accessories can come loose.
- The finished plush is regularly inspected for wear.
A crochet plush should not be placed loose in a baby’s sleep environment.
Frequently Asked Questions
Is the Pocket Otter suitable for beginners?
The individual shapes are relatively straightforward, but assembling a small amigurumi requires patience and careful stitch counting. Beginners who are comfortable with basic single crochet, increases, decreases, and continuous rounds can work through the project.
What yarn is best?
Smooth cotton yarn is an excellent choice when you want crisp, clearly defined stitches. Acrylic can also work well, while plush yarn creates a softer result.
How do I make the otter bigger?
Use thicker yarn and a larger hook, or increase the number of rounds in the head and body.
How do I make a tiny otter?
Use thinner yarn and a smaller hook.
Can I change the colors?
Absolutely. Try chocolate brown, taupe, gray, cream, or even pastel colors for a more whimsical character.
Can I sell the finished otter?
If you’re following another designer’s specific pattern, check that designer’s terms regarding commercial use before selling finished items.
Final Thoughts
The Pocket Otter is a charming little amigurumi project that combines simple rounded shapes with a few distinctive details to create a recognizable handmade animal.
Start with the classic brown-and-cream version, then experiment with different sizes, expressions, poses, and accessories. Once you have the basic construction down, you can turn the same idea into tiny otter families, woodland collections, keychain-sized characters, or larger cuddly plush designs.