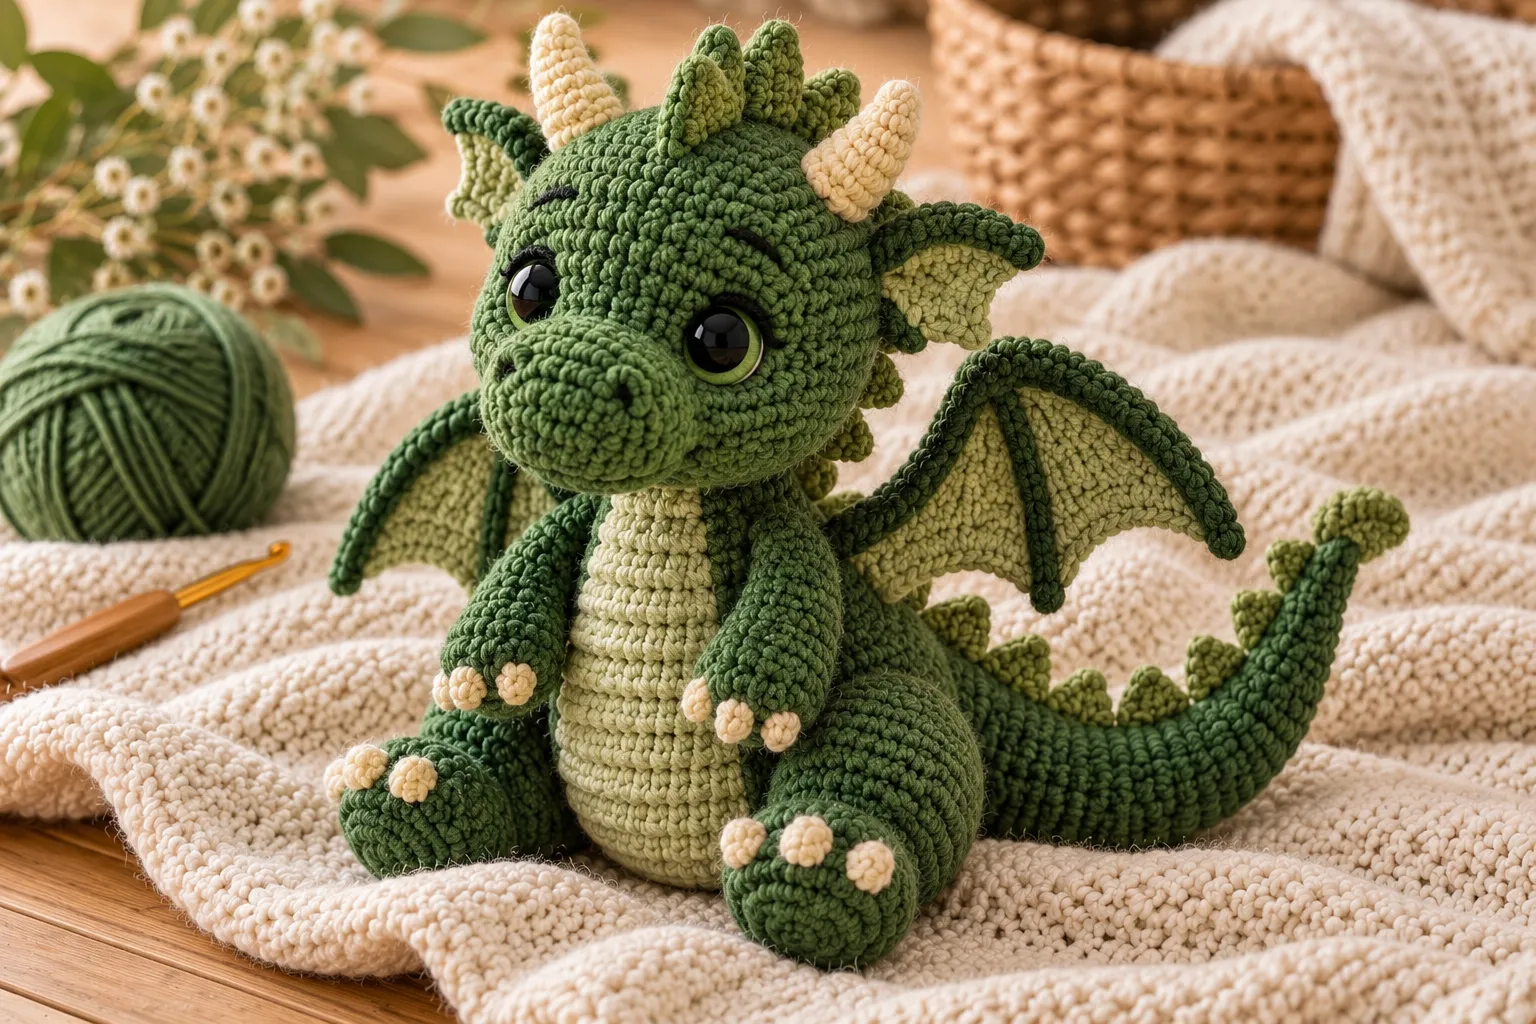
A crochet dragon plush is a magical project for anyone who loves whimsical amigurumi. With its rounded body, little wings, textured scales, horns, and friendly expression, a handmade dragon can become a charming nursery decoration, collectible, or handmade gift.
Whether you prefer a tiny baby dragon or a larger cuddly plush, the basic concept can be adapted into countless colors and styles.
Why Crochet a Dragon Plush?
Dragon amigurumi gives you plenty of opportunities to experiment with crochet techniques.
You can customize:
- Body size
- Wing shape
- Horns
- Spikes
- Tail length
- Eye style
- Color palette
- Facial expression
- Accessories
A simple dragon can also be transformed into a completely different character simply by changing the colors and proportions.
Materials You’ll Need
For a basic crochet dragon plush, gather:
- Main-color yarn
- Contrasting yarn for the belly and details
- Crochet hook suitable for your yarn
- Fiberfill stuffing
- Yarn needle
- Stitch marker
- Scissors
- Embroidery thread
- Optional safety eyes for appropriate projects
Smooth yarn is particularly helpful when making amigurumi because the stitches are easier to see.
Choosing Yarn
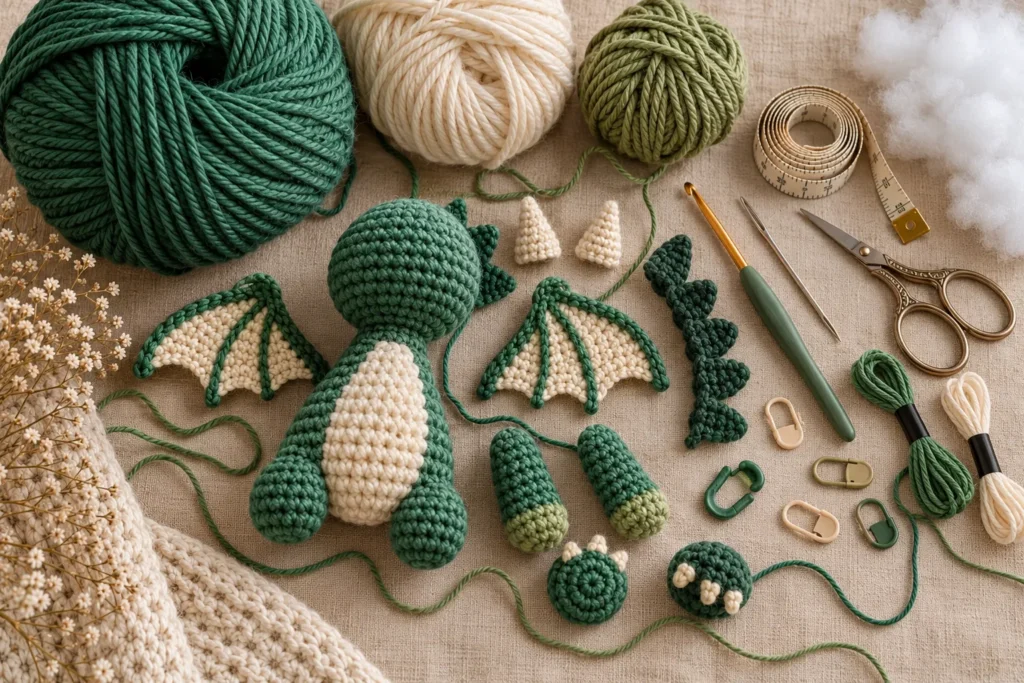
For a structured dragon plush, cotton or cotton-blend yarn is a popular option.
Acrylic yarn can also work well and may create a softer, lighter plush.
For a more cuddly dragon, plush yarn can create a soft velvety texture, although it can make stitch counting more challenging.
Popular dragon colors include:
- Emerald green
- Sage green
- Forest green
- Lavender
- Dusty blue
- Sky blue
- Pink
- Cream
- Mustard
- Terracotta
- Dark gray
You can also use two or three shades to create a more detailed character.
Crochet Abbreviations
US crochet terminology:
- MR — magic ring
- ch — chain
- sc — single crochet
- hdc — half double crochet
- dc — double crochet
- sl st — slip stitch
- inc — increase
- dec — decrease
- st — stitch
- sts — stitches
- BLO — back loop only
- FO — fasten off
Basic Dragon Construction
A crochet dragon plush can be broken down into several simple components:
- Head
- Body
- Snout
- Ears or horns
- Arms
- Legs
- Tail
- Wings
- Spikes
- Belly detail
- Facial features
Making the pieces separately gives you more control over the final shape.
1. Crochet Dragon Head
The head is usually worked in continuous rounds.
Begin with a magic ring.
Work several increases to create a rounded shape.
Continue crocheting without increases to establish the height.
Then begin decreasing.
Add stuffing gradually as the head becomes smaller.
Avoid adding all the stuffing at once because it can make the head uneven.
For a cute fantasy appearance, make the head slightly larger in proportion to the body.
2. Shape the Dragon Snout
The snout can be created as a small oval or rounded protrusion.
Use the same yarn as the head or switch to a lighter contrasting color.
A cream or pale green snout can create a softer expression.
Sew the snout securely to the front of the head.
3. Create the Dragon Eyes
The eyes are one of the most important details.
You can use:
- Embroidered eyes
- Crochet eye patches
- Suitable safety eyes
- Felt details for decorative pieces
For projects intended for very young children, securely embroidered facial details are a useful option.
Place both eyes carefully before permanently securing them.
4. Crochet the Dragon Body
The body can be made as a rounded oval or pear-shaped form.
A slightly larger lower section gives the dragon a stable sitting position.
Work increases first, then several even rounds, followed by gradual decreases.
Stuff the body as you work.
Make sure the stuffing is distributed evenly around the entire shape.
5. Dragon Arms
The arms can be simple narrow tubes.
Crochet two identical pieces.
For a more playful appearance, make the hands slightly wider than the upper arms.
Attach the arms to the sides of the body after positioning them carefully.
6. Dragon Legs
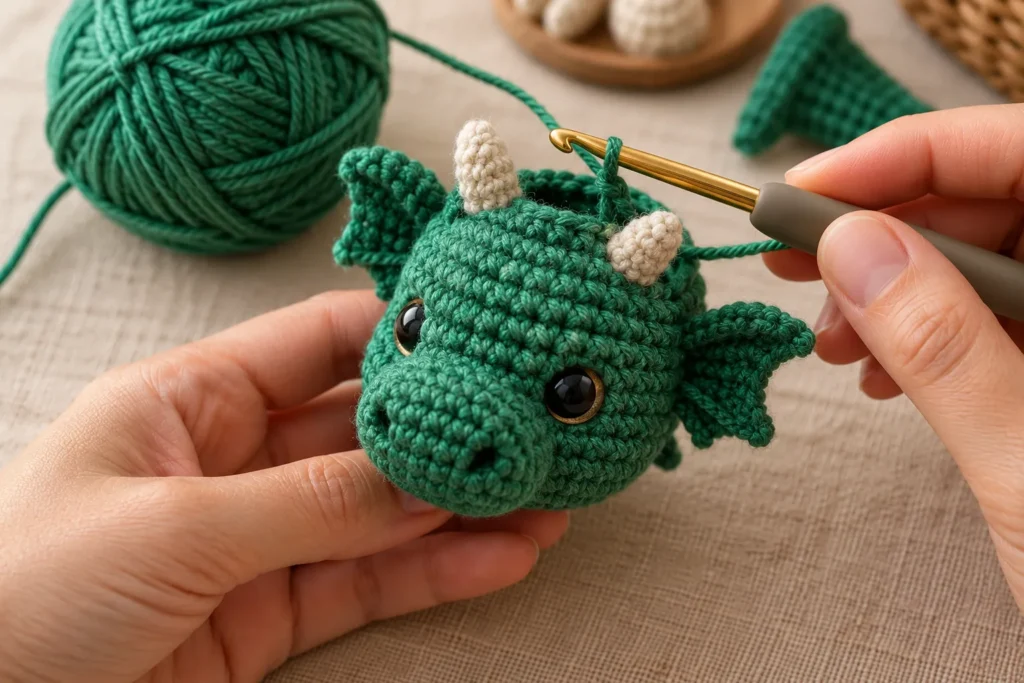
Larger feet help the dragon sit upright.
Create two rounded legs and slightly larger feet.
Position them near the bottom of the body.
Before sewing them permanently, place the dragon on a flat surface and check whether it balances correctly.
7. Crochet Dragon Tail
The tail is one of the easiest ways to give the dragon personality.
Make a long tapered tube.
Gradually reduce the number of stitches toward the end.
You can make the tail:
- Short and rounded
- Long and curved
- Tapered
- Coiled
- Slightly raised
A curved tail can be shaped by changing the stitch tension or positioning during assembly.
8. Add Dragon Wings
Wings can be made as flat crochet pieces.
Start at the bottom and increase toward the outer edge.
You can create:
- Rounded wings
- Pointed wings
- Bat-style wings
- Small triangular wings
Use a contrasting color for the wing membrane if you want additional visual interest.
Sew both wings symmetrically onto the back.
9. Add Dragon Horns
Small horns instantly make the character recognizable as a dragon.
Create two tiny tapered crochet pieces.
Use:
- Cream
- Beige
- Light brown
- Gold
- Contrasting darker yarn
Position the horns above the eyes or toward the top of the head.
10. Add Dragon Spikes
Spikes can be crocheted separately and attached along the head, back, and tail.
You can make several sizes.
Use smaller spikes near the head and gradually larger spikes along the back.
For a simpler design, crochet one continuous row of triangular scales instead of individual pieces.
11. Create a Textured Belly
A contrasting belly gives the dragon more dimension.
Try cream, pale yellow, light blue, or a lighter shade of the main color.
A simple oval crochet panel can be sewn onto the front of the body.
For additional texture, use:
- Ribbed rows
- Raised stitches
- Alternating colors
- Small embroidered lines
Dragon Color Ideas
Classic Green Dragon
Forest green body with cream belly and beige horns.
Sage Dragon
Soft sage body with ivory belly and dusty green wings.
Lavender Dragon
Lavender body with pale pink wings and cream horns.
Blue Dragon
Dusty blue body with cream belly and darker blue wings.
Pink Dragon
Muted pink body with cream belly and lavender wings.
Woodland Dragon
Olive green body with brown horns and cream details.
Night Dragon
Charcoal body with deep blue wings and cream horns.
10 Cute Crochet Dragon Variations
1. Baby Dragon
Make the head oversized and the body small.
Short limbs and a tiny tail create a particularly cute silhouette.
2. Sleeping Dragon
Embroider closed eyes and create a curled sitting position.
This makes an adorable nursery decoration.
3. Tiny Dragon
Use thinner yarn and a smaller hook.
The finished dragon can become a miniature desk or shelf decoration.
4. Giant Dragon Plush
Use chunky or plush yarn to create a larger cuddly character.
Keep the proportions simple and rounded.
5. Dragon With a Scarf
Add a miniature crochet scarf around the neck.
Choose a contrasting color to make it stand out.
6. Dragon With a Crown
Create a tiny crochet crown for a fantasy-themed character.
Gold or mustard yarn works especially well.
7. Woodland Dragon
Use muted greens, browns, and creams for a natural-inspired dragon.
8. Rainbow Dragon
Change yarn colors across the body, wings, or spikes.
Pastel rainbow colors create a softer nursery aesthetic.
9. Dragon With a Flower
Add a small crocheted flower beside one ear.
Use this idea for a whimsical decorative character.
10. Dragon Family
Create several dragons in different sizes.
Use the same design while changing the yarn colors and proportions.
How to Make a Simple Dragon Plush
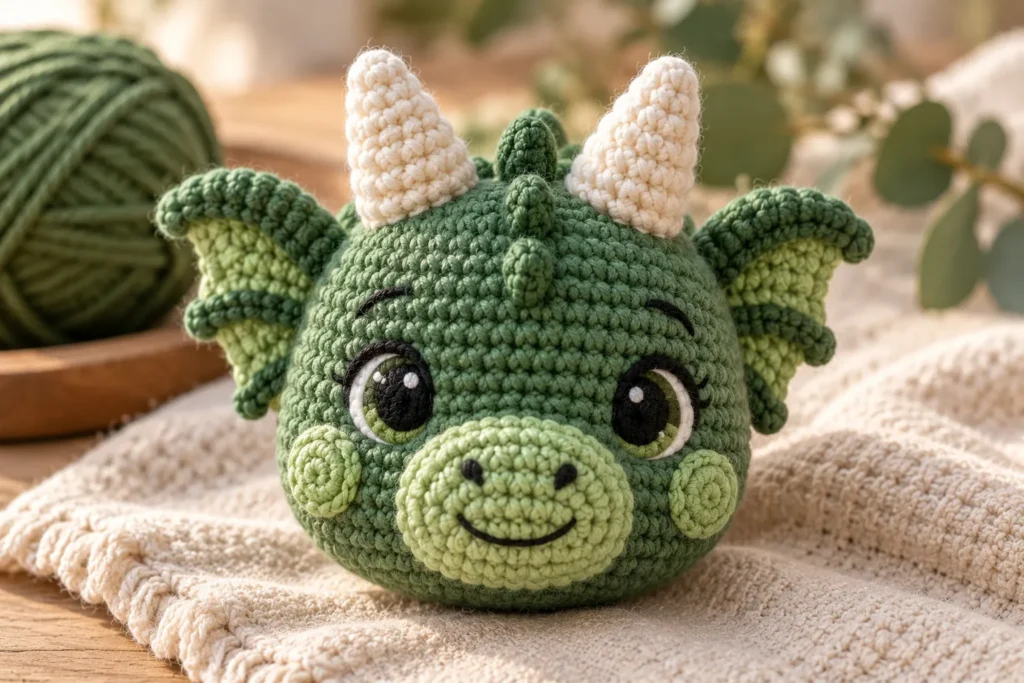
Step 1: Crochet the Head
Start with the magic ring and work increases to form a rounded head.
Continue with even rounds before gradually decreasing.
Add stuffing before closing.
Step 2: Crochet the Body
Create a slightly smaller rounded body.
Stuff evenly while working.
Leave an opening for final assembly.
Step 3: Make the Limbs
Crochet two arms and two legs.
Keep the pieces as symmetrical as possible.
Step 4: Make the Tail
Create a tapered tube and shape it into the desired curve.
Step 5: Make the Wings
Crochet two matching wing pieces.
Step 6: Make Horns and Spikes
Create the small decorative components.
Step 7: Assemble
Position all pieces before sewing.
Check the dragon from the front, back, and sides.
Step 8: Finish the Face
Add the eye patches, eyes, nose, and mouth.
Step 9: Secure the Yarn
Weave all ends securely into the crochet fabric.
Trim excess yarn only after the ends are properly anchored.
Tips for Making Better Amigurumi
Keep Your Stitches Tight
A dense fabric helps prevent stuffing from showing through.
Count Your Stitches
Amigurumi shapes depend on accurate stitch counts.
Use a stitch marker to identify the beginning of each round.
Stuff Gradually
Add small amounts of stuffing as you work rather than filling the entire piece at once.
Check Symmetry
Before sewing the ears, wings, arms, and legs, compare their positions carefully.
Assemble Before Sewing
Temporarily position the components so you can adjust the character’s proportions.
Creating a Nursery Dragon
A crochet dragon can become a beautiful nursery decoration.
Choose a soft color palette such as:
- Sage
- Cream
- Oatmeal
- Dusty blue
- Lavender
Place the finished dragon on a shelf, dresser, or decorative basket.
For nursery décor, avoid leaving loose small accessories within a baby’s reach.
Dragon Plush Gift Ideas
A handmade dragon makes a memorable gift for:
- Baby showers
- Children’s birthdays
- Fantasy lovers
- Handmade toy collectors
- Nursery decoration
- Holiday gifts
You can also create a coordinated set with a dragon-themed blanket, pillow, or crochet basket.
Safety Considerations
If the dragon is intended for a child, inspect it carefully before use.
Make sure:
- Eyes are securely attached or embroidered.
- Limbs are firmly sewn.
- Wings cannot easily detach.
- Horns and spikes are securely constructed.
- There are no loose yarn tails.
- No small accessories can detach.
For babies, avoid loose plush toys or decorative objects in a sleep environment. A crochet dragon should be treated as a supervised toy or decorative item rather than a sleep accessory.
Frequently Asked Questions
Is a crochet dragon difficult to make?
A basic dragon can be suitable for intermediate beginners because most components use simple amigurumi shapes. More elaborate wings, scales, and accessories increase the difficulty.
What yarn is best for a dragon plush?
Smooth cotton or acrylic works well for detailed amigurumi. Plush yarn is excellent for a cuddly texture but can be harder to work with.
How do I make the dragon larger?
Use thicker yarn and a larger crochet hook, or add additional increase rounds to the major body components.
How do I make a miniature dragon?
Use thinner yarn and a smaller hook while maintaining the same basic construction.
Can I change the colors?
Absolutely. Color changes are one of the easiest ways to personalize a dragon.
Can I sell finished crochet dragons?
If you are following another designer’s pattern, check that designer’s terms regarding commercial use of finished products before selling your finished pieces.
Final Thoughts
A crochet dragon plush is a fun project that combines classic amigurumi construction with plenty of room for creativity. The basic body can remain simple while details such as wings, horns, spikes, tails, and color combinations completely transform the character.
Start with a rounded beginner-friendly dragon, then experiment with different sizes, fantasy colors, accessories, and poses to create your own handmade dragon collection.