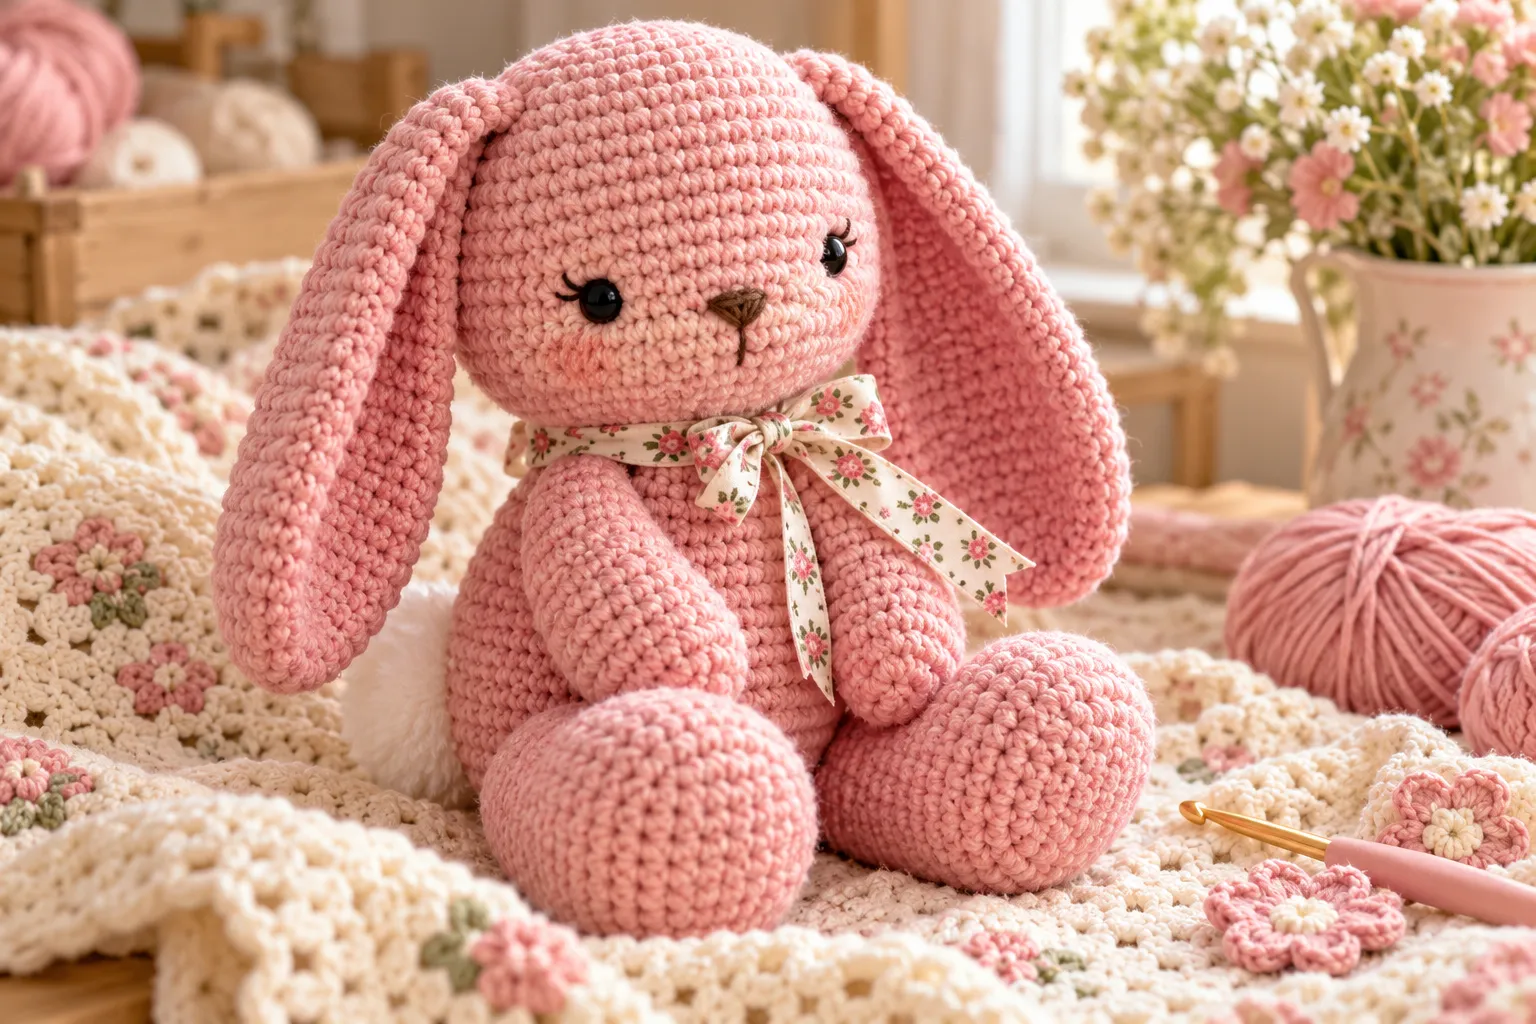
Meet Blossom Bunny, a sweet handmade crochet rabbit with a soft pink body, long floppy ears, rounded feet, embroidered facial features, and a pretty ribbon around her neck.
This adorable crochet bunny is made from several simple crocheted pieces that are stuffed, assembled, and finished with embroidered details. The finished bunny measures approximately 28 cm (11 inches) from the top of the head to the toes, excluding the ears.
Materials You’ll Need
| Material | Amount |
|---|---|
| Pink double-knitting yarn | Approximately 100 g |
| White double-knitting yarn | Small amount |
| Crochet hook | 3 mm |
| Toy stuffing | As needed |
| Black yarn or embroidery floss | Small amount |
| Pretty ribbon | 1 piece |
| Yarn needle | 1 |
| Scissors | 1 pair |
Recommended Yarn for Your Blossom Bunny
For a beautiful, soft pink finish, Rico Design Ricorumi Cotton Yarn in Old Rose (Shade 010) is a lovely option for creating your Blossom Bunny. This 25g cotton yarn is designed for amigurumi projects and is ideal for achieving neat, well-defined stitches. Its delicate old-rose shade gives handmade crochet animals a sweet, elegant appearance.
Check Rico Design Ricorumi yarn on Amazon.
Crochet Terminology
This pattern uses UK crochet terminology.
| Abbreviation | Meaning |
|---|---|
| ch | Chain |
| dc | Double crochet (UK) |
| sl st | Slip stitch |
| dc2tog | Double crochet two together |
Important: UK dc is equivalent to US sc.
Crochet the Body
Using pink yarn and a 3 mm crochet hook, make 2 chains.
Rounds 1–8
Round 1:
Work 6 dc into the second chain from the hook. Join with a slip stitch into the first dc.
6 dc
Round 2:
Ch 1, 2 dc into the same stitch, then 2 dc into each of the next 5 stitches. Join.
12 dc
Round 3:
Ch 1, 2 dc into the same stitch, 1 dc into the next stitch. Repeat around. Join.
18 dc
Round 4:
Ch 1, 2 dc into the same stitch, 1 dc into the next 2 stitches. Repeat around.
24 dc
Round 5:
Ch 1, 2 dc into the same stitch, 1 dc into the next 3 stitches. Repeat around.
30 dc
Round 6:
Ch 1, 2 dc into the same stitch, 1 dc into the next 4 stitches. Repeat around.
36 dc
Round 7:
Ch 1, 2 dc into the same stitch, 1 dc into the next 5 stitches. Repeat around.
42 dc
Round 8:
Ch 1, 2 dc into the same stitch, 1 dc into the next 6 stitches. Repeat around.
48 dc
Rounds 9–18
Round 9:
1 dc in every stitch.
48 dc
Round 10:
Increase in the first stitch, then 1 dc in each of the next 7 stitches. Repeat around.
54 dc
Round 11:
1 dc in every stitch.
54 dc
Round 12:
Increase in the first stitch, then 1 dc in each of the next 8 stitches. Repeat around.
60 dc
Rounds 13–18:
1 dc in every stitch. Join with a slip stitch at the end of each round.
60 dc
Shaping the Body
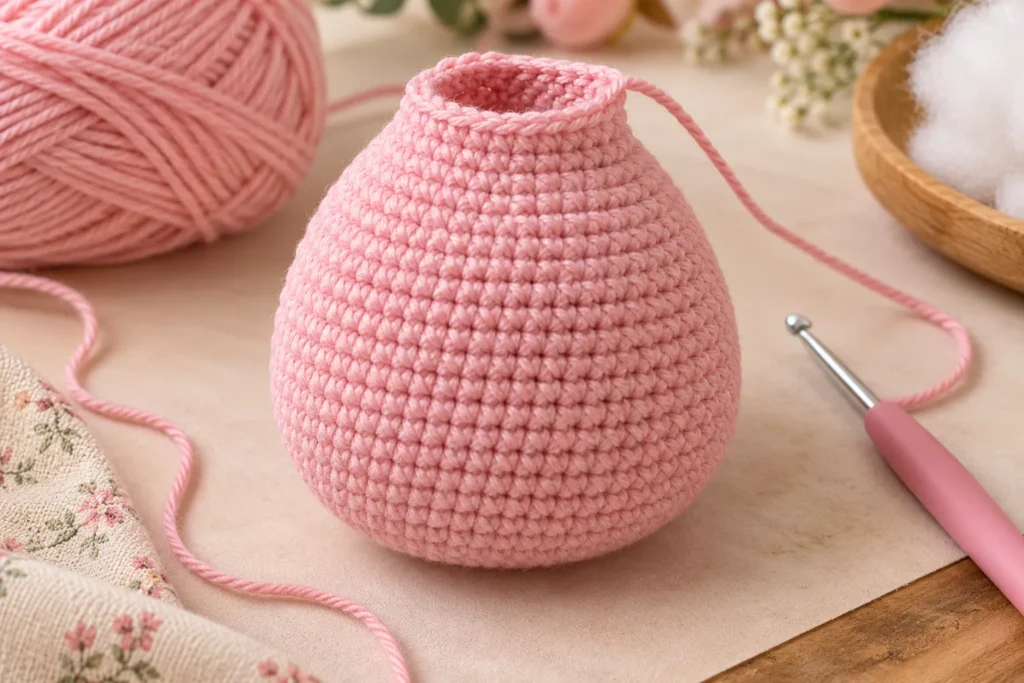
Round 19:
[dc2tog, 1 dc in next 8 stitches] 6 times.
54 dc
Rounds 20–21:
1 dc in every stitch.
54 dc
Round 22:
[dc2tog, 1 dc in next 7 stitches] 6 times.
48 dc
Rounds 23–24:
1 dc in every stitch.
Round 25:
[dc2tog, 1 dc in next 6 stitches] 6 times.
42 dc
Round 26:
1 dc in every stitch.
Round 27:
[dc2tog, 1 dc in next 5 stitches] 6 times.
36 dc
Round 28:
1 dc in every stitch.
Round 29:
[dc2tog, 1 dc in next 4 stitches] 6 times.
30 dc
Round 30:
1 dc in every stitch.
Round 31:
[dc2tog, 1 dc in next 3 stitches] 6 times.
24 dc
Round 32:
1 dc in every stitch.
Round 33:
[dc2tog, 1 dc in next 2 stitches] 6 times.
18 dc
Round 34:
1 dc in every stitch.
Fasten off and stuff the body. Leave the neck opening open for attaching the head.
Crochet the Head
Using pink yarn, make 2 chains.
Rounds 1–8
Round 1:
6 dc into the second chain from the hook. Join.
6 dc
Round 2:
Increase in every stitch.
12 dc
Round 3:
[2 dc in next stitch, 1 dc in next 3 stitches] 3 times.
15 dc
Round 4:
[2 dc in next stitch, 1 dc in next 4 stitches] 3 times.
18 dc
Round 5:
1 dc in every stitch.
18 dc
Round 6:
[2 dc in next stitch, 1 dc in next 5 stitches] 3 times.
21 dc
Round 7:
[2 dc in next stitch, 1 dc in next 6 stitches] 3 times.
24 dc
Round 8:
1 dc in every stitch.
24 dc
Rounds 9–17
Round 9:
[2 dc in next stitch, 1 dc in next 3 stitches] 5 times.
30 dc
Round 10:
[2 dc in next stitch, 1 dc in next 4 stitches] 5 times.
36 dc
Round 11:
[2 dc in next stitch, 1 dc in next 5 stitches] 5 times.
42 dc
Round 12:
[2 dc in next stitch, 1 dc in next 6 stitches] 5 times.
48 dc
Round 13:
1 dc in every stitch.
Round 14:
[2 dc in next stitch, 1 dc in next 7 stitches] 5 times.
54 dc
Rounds 15–17:
1 dc in every stitch.
54 dc
Shaping the Head
Round 18:
[dc2tog, 1 dc in next 7 stitches] 6 times.
48 dc
Round 19:
1 dc around.
Round 20:
[dc2tog, 1 dc in next 6 stitches] 6 times.
42 dc
Round 21:
1 dc around.
Round 22:
[dc2tog, 1 dc in next 5 stitches] 6 times.
36 dc
Round 23:
1 dc around.
Round 24:
[dc2tog, 1 dc in next 4 stitches] 6 times.
30 dc
Round 25:
1 dc around.
Round 26:
[dc2tog, 1 dc in next 3 stitches] 6 times.
24 dc
Round 27:
[dc2tog, 1 dc in next 2 stitches] 6 times.
18 dc
Round 28:
[dc2tog] 6 times.
12 dc
Stuff the head at this point.
Round 29:
[dc2tog] 6 times.
Fasten off and close the opening at the back of the head.
Sew the head securely to the top of the body.
Crochet the Ears
Make two identical ears using pink yarn.
Ear Pattern
Make 2 chains.
Round 1:
6 dc into the second chain from the hook. Join.
Round 2:
1 dc in every stitch.
Round 3:
[2 dc in next stitch, 1 dc] 3 times.
9 dc
Rounds 4–5:
1 dc around.
Round 6:
[2 dc in next stitch, 2 dc] 3 times.
12 dc
Rounds 7–9:
1 dc around.
Round 10:
[2 dc in next stitch, 3 dc] 3 times.
15 dc
Rounds 11–14:
1 dc around.
Round 15:
[2 dc in next stitch, 4 dc] 3 times.
18 dc
Rounds 16–17:
1 dc around.
Round 18:
[2 dc in next stitch, 5 dc] 3 times.
21 dc
Round 19:
1 dc around.
Round 20:
[dc2tog, 1 dc in next 5 stitches] 3 times.
18 dc
Round 21:
1 dc around.
Round 22:
[dc2tog, 1 dc in next 4 stitches] 3 times.
15 dc
Round 23:
[dc2tog, 1 dc in next 3 stitches] 3 times.
12 dc
Fold the ear in half and work 6 dc through both layers to close it.
Do not stuff the ears.
Fasten off and sew the ears securely onto the top of the head.
Crochet the Legs
Bring a little extra sweetness to your crochet collection with the Pink Blossom Bunny! This adorable amigurumi bunny is a lovely project for anyone who enjoys creating cute handmade companions. With its charming pink design, long floppy ears, and sweet little face, it makes a beautiful gift, nursery decoration, or keepsake for someone special.
Ready to make your own? Get the Pink Blossom Bunny PDF Crochet Pattern and follow the step-by-step instructions to bring this adorable little bunny to life. Grab your yarn, hook, and start crocheting your new favorite handmade friend!
Make Your Own Pink Blossom Bunny Today!
[GET THE PDF PATTERN]
Make two legs using pink yarn.
Start by chaining 10.
Leg Round 1
Work 1 dc into the second chain from the hook and 1 dc into each of the next 7 chains.
Work 2 dc into the final chain.
Continue along the opposite side of the foundation chain, working 2 dc into the same area, then 1 dc into each of the next 7 stitches.
Work 3 dc into the same chain where the first dc was made.
Join with a slip stitch.
22 dc
Leg Round 2
Ch 1. Work 1 dc into the same stitch, then 1 dc into the next 8 stitches.
Work 2 dc into each of the next 2 stitches.
Work 1 dc into the next 9 stitches.
Work 2 dc into each of the final 2 stitches.
Join.
26 dc
Rounds 3–4:
1 dc around.
Round 5:
1 dc into the next 7 stitches, [dc2tog] 4 times, then 1 dc into the next 11 stitches.
22 dc
Rounds 6–13:
Work 8 rounds continuously in a spiral without joining.
Round 14:
1 dc into the next 4 stitches, dc2tog, 1 dc into the next 9 stitches, dc2tog, 1 dc into the next 5 stitches.
20 dc
Rounds 15–18:
Work 4 rounds without shaping.
Round 19:
[dc2tog, 1 dc into next 3 stitches] 4 times.
16 dc
Rounds 20–23:
Work 4 rounds without shaping.
Round 24:
[dc2tog, 1 dc into next 2 stitches] 4 times.
12 dc
Round 25:
Work 1 round without shaping.
Fasten off and stuff the leg.
Sew the opening closed and attach the leg to the bottom of the body.
Repeat for the second leg.
Crochet the Arms
Make two arms in pink yarn.
Arm Pattern
Make 2 chains.
Round 1:
6 dc into the second chain from the hook. Join.
Round 2:
Increase in every stitch.
12 dc
Round 3:
[2 dc in next stitch, 1 dc in next stitch] around.
18 dc
Rounds 4–18:
Work continuously in a spiral for 15 rounds.
18 stitches
Round 19:
[dc2tog, 1 dc in next 4 stitches] 3 times.
15 stitches
Rounds 20–25:
Work 6 rounds without shaping.
Round 26:
[dc2tog, 1 dc in next 3 stitches] 3 times.
12 stitches
Rounds 27–28:
Work 2 rounds without shaping.
Fasten off and stuff the arm.
Sew the opening closed and attach the arm securely to the side of the body.
Repeat for the second arm.
Crochet the White Tail
The tail is worked in white yarn.
Make 2 chains.
Round 1:
6 dc into the second chain from the hook. Join.
Round 2:
Increase in every stitch.
12 dc
Round 3:
[2 dc in next stitch, 1 dc in next stitch] around.
18 dc
Rounds 4–6:
1 dc around.
Round 7:
[dc2tog, 1 dc in next stitch] 6 times.
12 dc
Fasten off and stuff the tail.
Sew it securely to the lower back of the body.
Embroider the Face
The face is kept simple to give the bunny a sweet handmade expression.
Using black embroidery floss, embroider:
- Two small eyes
- A cute little nose
Position the facial features carefully before securing the stitches.
The placement of the eyes and nose can dramatically change the bunny’s expression, so take a moment to make sure they are balanced.
Add the Ribbon
The final decorative detail is a pretty ribbon tied around the bunny’s neck.
Choose a ribbon that complements the pink yarn.
Floral prints, pastel patterns, cream ribbon, pink ribbon, or a delicate vintage-style ribbon can all work beautifully.
Secure the ribbon appropriately and avoid loose or detachable decorations if the finished bunny will be used around very young children.
Blossom Bunny Assembly
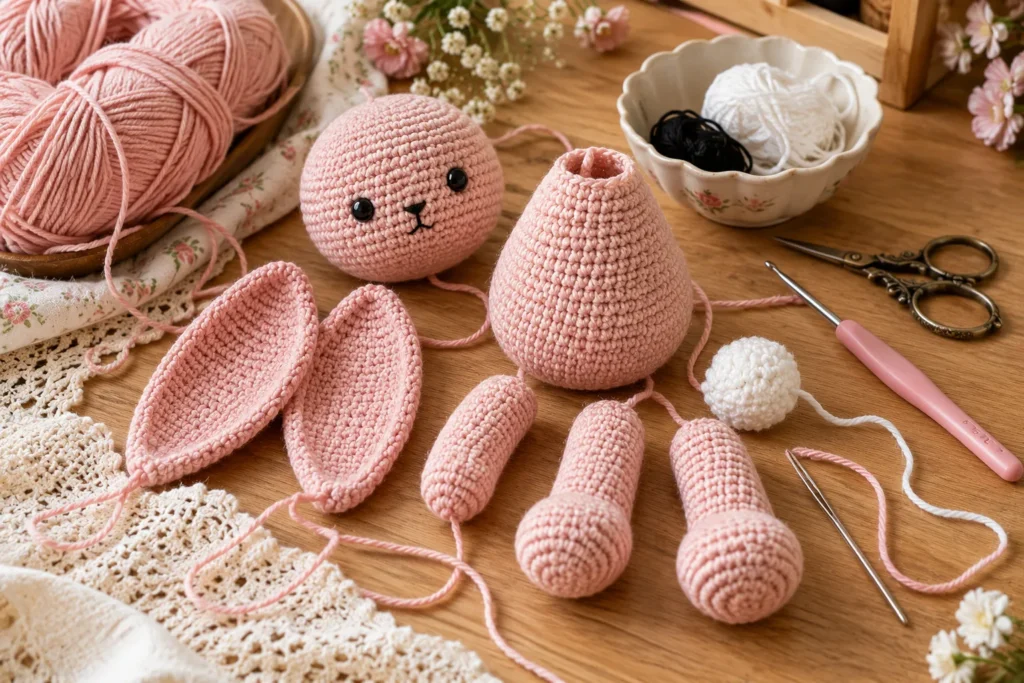
Once every crocheted component is complete, assemble the bunny in this order:
- Stuff and close the body.
- Stuff and close the head.
- Attach the head to the body.
- Sew both ears onto the head.
- Stuff and close both legs.
- Attach the legs to the base of the body.
- Stuff and close both arms.
- Attach the arms to the sides.
- Stuff and attach the white tail.
- Embroider the eyes and nose.
- Add the decorative ribbon.
This order makes it easier to position each piece accurately.
Tips for a Professional Finish
Keep Your Stitch Tension Consistent
The body, head, arms, legs, and tail should have a similar stitch density. Inconsistent tension can cause the finished bunny to look disproportionate.
Count Your Stitches
The pattern includes frequent increases and decreases. Checking your stitch count at the end of shaping rounds helps prevent mistakes from accumulating.
Stuff Evenly
Add small amounts of stuffing at a time and distribute it throughout the piece.
The goal is a firm but soft shape rather than an extremely tightly packed toy.
Shape Before Closing
When stuffing the head and body, use your fingers to distribute the filling evenly and create a smooth silhouette.
Sew Components Securely
Take several passes through the attachment points when sewing the arms, legs, ears, head, and tail.
This gives the finished bunny greater stability.
Color Ideas for Your Crochet Bunny
Although the classic version uses pink, you can create several different personalities by changing the yarn colors.
Soft Blush Bunny
- Blush pink
- Cream
- White
- Pale green
White and Pink Bunny
- Ivory body
- Pink ears
- Pink feet
- Pink ribbon
Spring Bunny
- Soft lavender
- Cream
- Mint
- Pale pink
Chocolate Bunny
- Warm brown
- Cream
- Pink nose
- Floral ribbon
Christmas Bunny
- White or cream
- Red
- Green
- Festive ribbon
How to Customize Blossom Bunny
Once you’re comfortable with the basic construction, there are many ways to personalize the finished toy.
You can experiment with:
- Different yarn colors
- Contrasting ears
- Different ribbon styles
- Embroidered eyelashes
- A larger bow
- A smaller bunny
- Longer ears
- Different facial expressions
Changing the colors is one of the easiest ways to create a completely different-looking bunny while keeping the same basic pattern.
Making a Smaller or Larger Bunny
The finished size depends on your yarn, hook, and tension.
For a smaller bunny, you can use lighter yarn and a smaller crochet hook.
For a larger bunny, choose thicker yarn and an appropriately larger hook.
Keep in mind that changing yarn weight and hook size will affect the amount of stuffing required and the proportions of the finished animal.
Safety Considerations
If the bunny is intended as a toy for a baby or young child, inspect every component carefully.
Pay particular attention to:
- Embroidered facial features
- Sewn ears
- Arms
- Legs
- Tail
- Ribbon
- Loose yarn ends
Make sure everything is firmly secured.
Avoid easily detachable small embellishments when making toys for young children.
Caring for Your Crochet Bunny
Care instructions depend on the yarn used.
Before washing, check the manufacturer’s recommendations for your specific yarn.
For a handmade stuffed toy, gentle cleaning is generally preferable.
Avoid excessive heat because it may alter the shape of the crochet fabric or affect the stuffing.
After cleaning, reshape the bunny gently and allow it to dry completely.
Frequently Asked Questions
How big is Blossom Bunny?
The finished bunny is approximately 28 cm (11 inches) tall from the top of the head to the toes, excluding the ears.
What hook size should I use?
The pattern uses a 3 mm crochet hook.
What yarn is needed?
The design uses approximately 100 g of pink double-knitting yarn and a small amount of white double-knitting yarn.
Are the ears stuffed?
No. The ears are folded and crocheted closed through both layers without stuffing.
When do I stuff the body?
The body is stuffed after Round 34, while the neck opening remains open for attaching the head.
When is the head stuffed?
The head is stuffed during Round 28, before the final decrease and closure.
What color is the tail?
The tail is made with white yarn, providing a contrasting accent against the pink body.
How are the eyes and nose made?
They are embroidered using black embroidery floss.
Can I change the ribbon?
Yes. A different ribbon can completely change the style of the finished bunny. Choose a ribbon that complements your yarn colors and overall theme.
Final Thoughts
Blossom Bunny is a charming crochet project built from simple rounded shapes and carefully assembled components. The combination of a soft pink body, long ears, rounded feet, embroidered face, contrasting white tail, and pretty neck ribbon gives this handmade rabbit a timeless, storybook-inspired appearance.
The construction also makes the project highly customizable. Once you’ve mastered the basic pieces, you can experiment with different colors, ribbons, yarn weights, and decorative details to create your own collection of handmade crochet bunnies.
Whether you’re making one as a handmade gift, a nursery decoration, or simply as a fun amigurumi project, Blossom Bunny is a delightful crochet project to add to your collection.