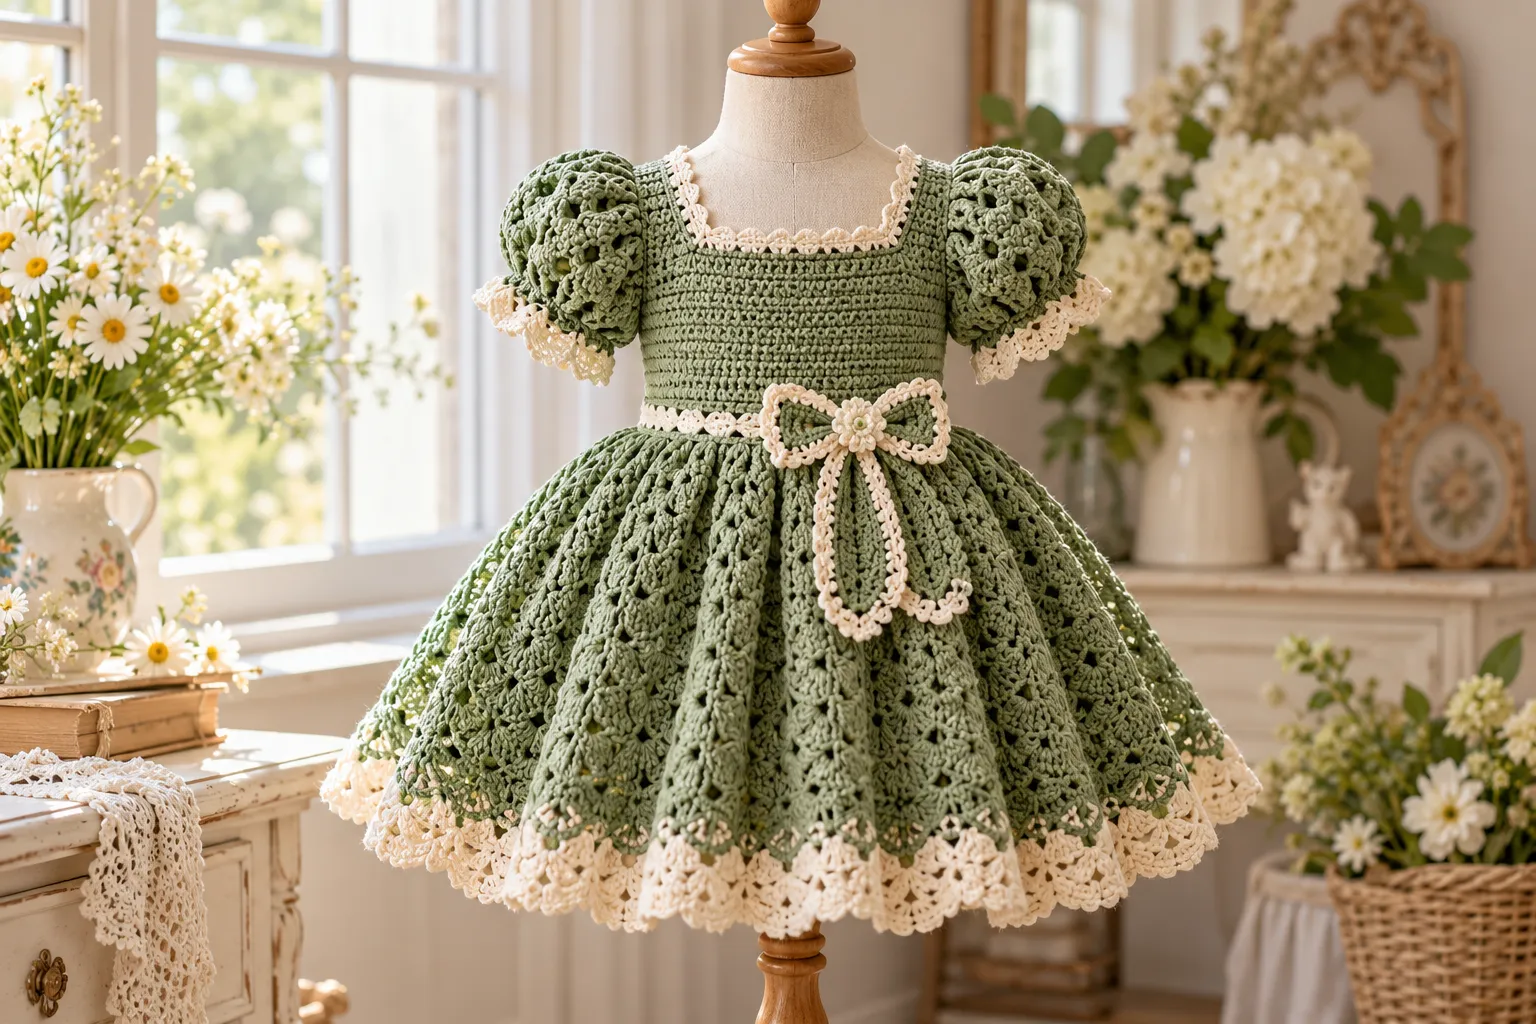
A green crochet dress for girls is a beautiful handmade project that combines a classic silhouette with delicate crochet details. With its fitted bodice, full skirt, sweet puff sleeves, and optional floral or bow accents, this dress works beautifully for birthdays, family celebrations, photoshoots, spring outings, and special occasions.
This guide explains how to make a green crochet puff-sleeve girl dress, including materials, sizing, gauge, construction, stitch instructions, customization ideas, finishing techniques, and styling suggestions.
Why Make a Crochet Girl Dress?
Crocheting a dress gives you complete control over the color, fit, texture, and decorative details. Instead of purchasing a mass-produced outfit, you can create something specifically suited to the child.
A green crochet dress is particularly versatile because green works beautifully with:
- Cream
- White
- Beige
- Soft pink
- Brown
- Gold
- Sage
- Dusty blue
The puff sleeves add volume around the shoulders while the full skirt creates a classic, playful shape.
Green Crochet Girl Dress at a Glance
| Feature | Details |
|---|---|
| Skill level | Advanced beginner to intermediate |
| Main construction | Bodice + skirt + sleeves |
| Style | Puff-sleeve dress |
| Main color | Green |
| Accent color | Optional cream or white |
| Best yarn | Soft washable cotton or cotton blend |
| Recommended hook | Approximately 3.5–4.5 mm |
| Customization | Very easy |
| Best seasons | Spring, summer, fall |
| Suitable occasions | Parties, birthdays, photoshoots, celebrations |
Materials You’ll Need
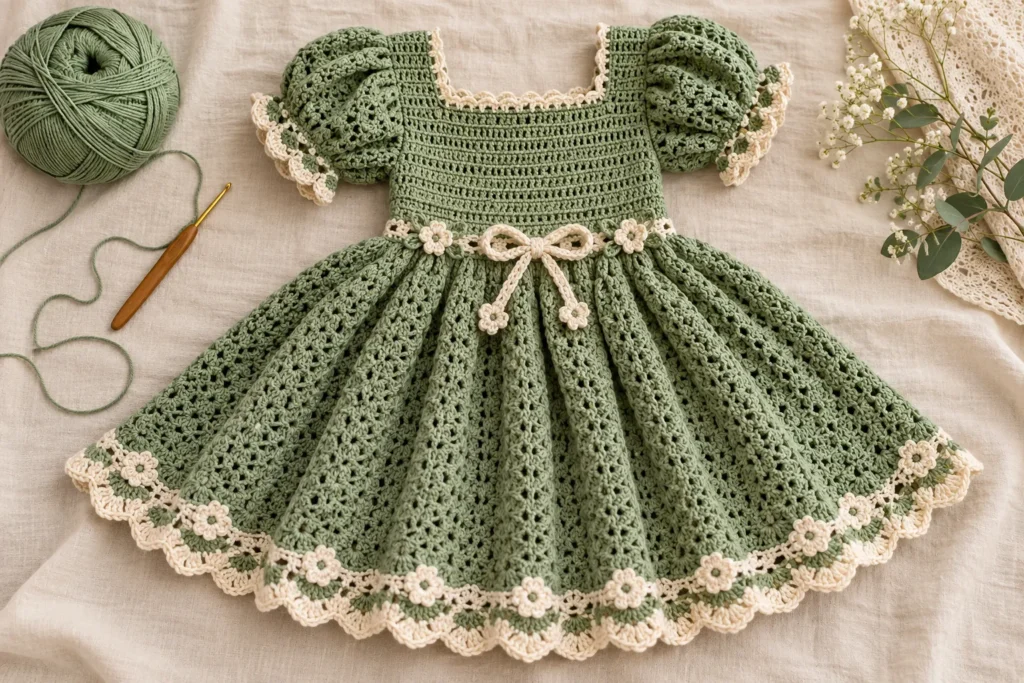
Yarn
Choose a soft yarn that is comfortable against children’s skin.
A cotton or cotton-blend yarn is particularly suitable because it provides:
- Good stitch definition
- Breathability
- Easy washing
- Moderate structure
- Comfortable texture
For a more delicate dress, choose a lightweight yarn.
For a warmer autumn version, a cotton-acrylic blend can provide additional softness and warmth.
Suggested Colors
The main dress can be worked entirely in green or combined with a contrasting color.
Beautiful combinations include:
Sage + cream
Soft and sophisticated.
Emerald + ivory
Rich and elegant.
Forest green + beige
Perfect for autumn.
Mint + white
Fresh and suitable for spring.
Olive + cream
Natural and understated.
Pistachio + dusty pink
Sweet and feminine.
Crochet Hook
The correct hook depends on your yarn.
A useful starting range is:
3.5 mm–4.5 mm crochet hook
Always check your gauge before beginning the dress.
A hook that is too large can create a loose, transparent fabric, while a hook that is too small can make the dress stiff.
Other Supplies
You may also need:
- Yarn needle
- Stitch markers
- Scissors
- Measuring tape
- Blocking pins
- Buttons
- Optional ribbon
- Optional sewing needle and thread
For children’s clothing, avoid decorative elements that could easily detach.
Crochet Abbreviations
| Abbreviation | Meaning |
|---|---|
| ch | Chain |
| sl st | Slip stitch |
| sc | Single crochet |
| hdc | Half double crochet |
| dc | Double crochet |
| st | Stitch |
| sts | Stitches |
| inc | Increase |
| dec | Decrease |
| BLO | Back loop only |
| FLO | Front loop only |
Choosing the Right Size
Never rely only on the child’s age.
Children of the same age can have very different body measurements, so measuring the child before starting is the safest approach.
Measure:
- Chest circumference
- Waist circumference
- Shoulder width
- Shoulder-to-waist length
- Waist-to-hem length
- Total desired dress length
- Upper-arm circumference
Approximate Size Guide
| Size | Chest | Waist | Approx. Length |
|---|---|---|---|
| 2T | 52 cm | 50 cm | 48 cm |
| 3T | 54 cm | 51 cm | 52 cm |
| 4T | 56 cm | 52 cm | 56 cm |
| 5T | 58 cm | 53 cm | 60 cm |
| 6 | 60 cm | 55 cm | 64 cm |
| 7 | 62 cm | 56 cm | 68 cm |
| 8 | 64 cm | 58 cm | 72 cm |
| 10 | 68 cm | 60 cm | 78 cm |
These are starting measurements rather than strict sizing rules. Adjust the pattern according to the child’s actual measurements.
Crochet Gauge
Gauge is particularly important for a fitted bodice.
Create a small swatch using the stitch pattern you plan to use.
Measure:
- Stitches across 10 cm
- Rows across 10 cm
For example, you might aim for approximately:
18–20 stitches × 10–12 rows = 10 × 10 cm
Your exact gauge will depend on your yarn and hook.
If your swatch is too large, use a smaller hook.
If it is too small, use a larger hook.
Understanding the Dress Construction
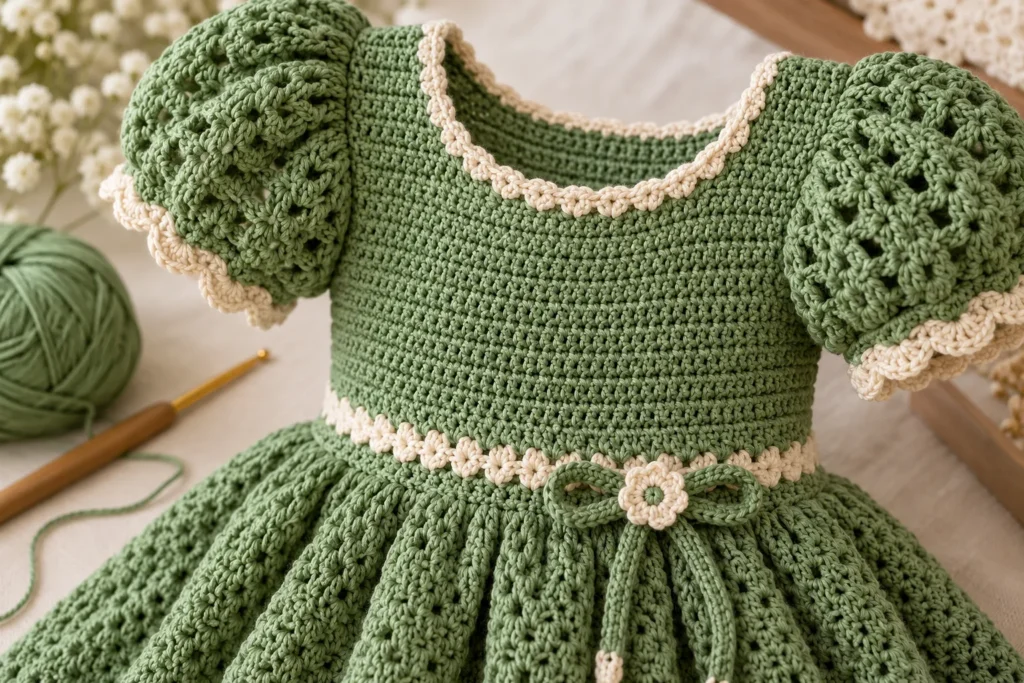
The dress can be divided into four major sections:
- Bodice
- Waist
- Full skirt
- Puff sleeves
This makes the project easier to understand and modify.
The bodice creates the fitted upper section.
The waist separates the bodice from the skirt.
The skirt provides the fullness.
The puff sleeves add the decorative feature that makes the dress distinctive.
Step 1: Crochet the Bodice
Begin with the bodice.
Depending on your preferred construction, you can work the bodice:
- Top-down
- Bottom-up
- In joined rounds
- As separate front and back panels
For a beginner-friendly construction, working the bodice in joined rounds can be convenient.
Foundation
Create a chain that corresponds to the child’s chest measurement.
Join carefully without twisting the chain.
Work your first round using your chosen stitch.
Half double crochet is an excellent choice because it creates a fabric that is:
- Soft
- Flexible
- Dense enough for clothing
- Relatively quick to crochet
Continue working rounds until the bodice reaches the desired underarm height.
Step 2: Shape the Bodice
The bodice should fit comfortably without being extremely tight.
If necessary, add increases gradually around the waist or bust area.
Try the piece against the child or compare it with the child’s measurements.
The finished bodice should allow enough room for movement.
Important Tip
Do not make the bodice completely rigid.
Children need room to:
- Sit
- Walk
- Raise their arms
- Play
- Move comfortably
A slightly flexible fit is preferable to an extremely fitted garment.
Step 3: Create the Neckline
The neckline can be simple or decorative.
Possible options include:
- Round neckline
- Square neckline
- Slight scoop neckline
- Scalloped neckline
For a classic children’s dress, a rounded neckline works particularly well.
Finish the neckline with one or two rounds of single crochet.
For an elegant contrast, use cream or white yarn for the final edging.
Step 4: Create the Waist
The waist is where the fitted bodice transitions into the full skirt.
You can create a defined waist using:
- A round of single crochet
- Half double crochet
- Front-post stitches
- A contrasting-color border
- A crochet drawstring
A narrow cream stripe around a green dress creates a particularly polished effect.
Step 5: Crochet the Full Skirt
The skirt is the most dramatic part of the dress.
Begin increasing gradually after the waist.
For example:
Round 1: Work evenly around the waist.
Round 2: Add increases at regular intervals.
Round 3: Continue with the chosen stitch.
Round 4: Increase again if additional fullness is needed.
Repeat this process until the skirt reaches the desired width.
Creating More Volume
If you want a very full skirt, increase more frequently.
For a softer, less dramatic silhouette, use fewer increases.
The amount of fullness can completely change the appearance of the finished dress.
Simple Skirt Formula
A practical approach is:
Increase → work evenly → increase → work evenly
Rather than placing all increases in one round, distribute them around the skirt.
This creates smoother shaping.
Step 6: Continue to the Desired Length
Keep crocheting the skirt until it reaches your preferred length.
For a shorter summer dress, stop around the knee.
For a more formal design, extend the skirt toward the calf.
Remember to allow for the border when measuring the final length.
Step 7: Add a Decorative Skirt Border
The bottom edge is an excellent place to add personality.
Simple Scalloped Border
A basic decorative border can be created with repeated groups of stitches.
You can also experiment with:
- Picot edging
- Shell stitches
- V-stitches
- Small floral motifs
- Contrasting cream trim
A cream border against green creates a beautiful vintage-inspired finish.
How to Crochet the Puff Sleeves
The puff sleeves are one of the most recognizable features of this dress.
They create volume around the shoulders while maintaining a feminine silhouette.
Step 8: Create the Armhole
Once the bodice is complete, identify the armhole area.
Attach yarn around the armhole opening.
Work one round of single crochet to create a stable foundation.
Do not make the opening too tight.
The child should be able to move her arms comfortably.
Step 9: Build the Puff Sleeve
Puff sleeves require increases to create their characteristic fullness.
Work several rounds while increasing around the sleeve.
The increase frequency determines how dramatic the puff becomes.
For a subtle puff:
- Use fewer increases
- Keep the sleeve shorter
For a dramatic puff:
- Add more increases
- Use a slightly longer sleeve section
- Gather the cuff more tightly
Step 10: Create the Sleeve Cuff
Once you reach the desired sleeve length, reduce the circumference.
A cuff can be made with:
- Single crochet
- Half double crochet
- Ribbed stitches
- Slip-stitch ribbing
A fitted cuff creates the classic puff-sleeve effect.
For comfort, avoid making the cuff excessively tight.
Green and Cream Puff-Sleeve Combination
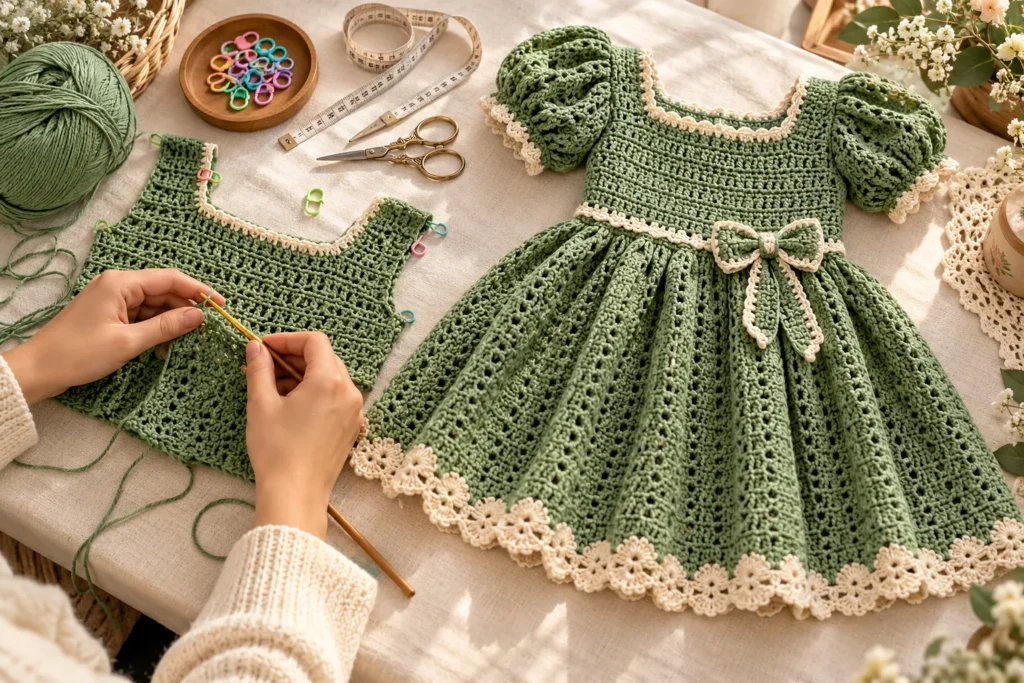
One particularly elegant design is:
Green dress + cream sleeve cuff
You can also use cream for:
- Neckline
- Waist stripe
- Skirt border
- Sleeve cuff
This creates a cohesive handmade look.
Adding Crochet Flowers
Small crochet flowers can transform a simple green dress into a decorative statement piece.
Flowers can be placed:
- At the waist
- Around the skirt
- Near one shoulder
- On the sleeve
- Along the neckline
Simple Flower Concept
A basic flower can be created using a small center followed by several petal stitches.
Use cream or white yarn for delicate flowers.
For a more colorful design, combine:
- Pink
- Yellow
- White
- Lavender
- Peach
Avoid adding too many flowers if you want the dress to maintain a minimalist appearance.
Adding a Crochet Bow
A crochet bow is another excellent embellishment.
You can attach one:
- At the waist
- At the back
- Near the neckline
- On one side of the skirt
A cream bow on a green dress creates a particularly charming contrast.
For younger children, securely sew decorative bows rather than relying on loose attachment points.
Adding a Waist Ribbon
A ribbon can provide additional definition at the waist.
Good choices include:
- Satin ribbon
- Cotton ribbon
- Grosgrain ribbon
Coordinate the ribbon with the dress.
For example:
Sage green + ivory ribbon
or
Emerald green + cream ribbon
For children’s clothing, make sure any ribbon is securely attached and does not create a loose loop that could become hazardous.
Green Crochet Dress Color Ideas
Green doesn’t have to mean one specific shade.
Sage Green
Soft, muted, and elegant.
Perfect with:
- Cream
- Beige
- White
- Dusty pink
Emerald Green
Bold and luxurious.
Ideal for:
- Birthday dresses
- Holiday outfits
- Formal photos
Mint Green
Light and playful.
Excellent for:
- Spring
- Summer
- Garden parties
Forest Green
Deep and sophisticated.
Especially beautiful for:
- Fall
- Winter
- Christmas
Olive Green
Earthy and modern.
Combine it with:
- Cream
- Tan
- Brown
- Natural accessories
Sage Green and Cream Dress
A sage-green crochet dress with cream details is one of the easiest combinations to style.
Consider:
- Sage-green bodice
- Sage full skirt
- Cream puff-sleeve cuffs
- Cream neckline
- Cream flowers
- Cream waist bow
This creates a soft vintage-inspired aesthetic.
Emerald Green and White Dress
For a more striking design, use emerald green as the dominant color.
Add white details around:
- Neckline
- Sleeve cuffs
- Waist
- Skirt hem
The contrast makes the crochet stitches more visible.
How to Adjust the Dress Length
One of the biggest advantages of crocheting your own dress is the ability to customize the length.
Short Dress
Stop the skirt earlier for a playful summer silhouette.
Knee-Length Dress
A classic everyday option.
Midi-Length Dress
Extend the skirt below the knee for a more formal appearance.
Longer Dress
Continue the skirt for a special-occasion design.
Always measure the child while standing naturally.
How to Make the Dress Wider
If the skirt is not full enough, add additional increase rounds.
For example:
Work evenly → increase → work evenly → increase
Continue until you achieve the desired fullness.
Avoid adding too many increases in one round because this can create unwanted ruffles.
How to Make the Bodice Larger
If the bodice is too small, increase the circumference by adding stitches to the foundation chain or increasing strategically around the body.
For an existing pattern, calculate:
Desired circumference ÷ current circumference = adjustment factor
Then use that factor when determining your stitch count.
Always check the garment against actual measurements rather than relying entirely on mathematical calculations.
Beginner Tips
If this is your first crochet garment, take your time.
1. Make a gauge swatch
This can save hours of work later.
2. Measure frequently
Don’t wait until the dress is finished.
3. Mark important sections
Use stitch markers for:
- Side seams
- Center front
- Center back
- Armholes
- Increase points
4. Keep your tension consistent
Uneven tension can make the skirt look irregular.
5. Don’t rush the sleeves
Puff sleeves require careful shaping.
6. Weave in ends as you work
Finishing dozens of loose ends at the end can become frustrating.
Common Crochet Problems and Solutions
The Bodice Is Too Tight
Cause: Gauge is smaller than expected.
Solution: Use a larger hook or add stitches.
The Bodice Is Too Loose
Cause: Gauge is too large.
Solution: Use a smaller hook or reduce the stitch count.
The Skirt Isn’t Full Enough
Cause: Not enough increases.
Solution: Add another increase round.
The Skirt Looks Too Ruffled
Cause: Too many increases.
Solution: Increase less frequently.
The Sleeves Don’t Puff
Cause: Insufficient increases.
Solution: Increase more around the upper sleeve.
The Sleeves Are Too Tight
Cause: The cuff circumference is too small.
Solution: Add additional stitches before finishing the cuff.
The Dress Looks Uneven
Cause: Inconsistent tension or uneven increases.
Solution: Count stitches regularly and maintain consistent tension.
Blocking the Finished Dress
Blocking can significantly improve the final appearance.
After weaving in your ends:
- Gently dampen the garment.
- Lay it flat on a clean surface.
- Shape the neckline.
- Smooth the skirt.
- Arrange the puff sleeves.
- Pin carefully if necessary.
- Allow the dress to dry completely.
Do not stretch the dress aggressively.
The goal is to improve the shape without distorting the crochet fabric.
How to Style a Green Crochet Girl Dress
The finished dress can be styled in many ways.
Spring Outfit
Pair it with:
- White cardigan
- Cream shoes
- Floral hair accessories
- White socks
Summer Outfit
Keep things simple:
- Sandals
- Small sun hat
- Light-colored hair bow
Fall Outfit
Add:
- Brown ankle boots
- Cream cardigan
- Tights
- Small crochet bag
Holiday Outfit
Use:
- Deep emerald green
- Cream details
- Gold accessories
- Velvet shoes
Matching Crochet Accessories
You can create a complete handmade outfit by coordinating the dress with crochet accessories.
Ideas include:
- Crochet headband
- Hair bow
- Mini cardigan
- Baby shoes
- Small handbag
- Flower hair clips
- Matching bonnet
Keeping the accessories in the same color palette makes the outfit look professionally coordinated.
Photography Tips for a Handmade Crochet Dress
If you’re photographing the finished dress for Pinterest, your website, or social media, focus on texture.
Use:
- Natural window light
- Neutral backgrounds
- Wooden surfaces
- Soft blankets
- Fresh flowers
- Simple children’s accessories
Take close-up photographs of:
- Puff sleeves
- Crochet flowers
- Waist detail
- Skirt border
- Stitch texture
These details help readers understand the craftsmanship.
How to Make the Dress More Elegant
Small details can dramatically change the appearance.
Try adding:
- A scalloped hem
- Cream edging
- Tiny crochet flowers
- A waist bow
- Decorative buttons
- A textured stitch pattern
The key is balance.
If the dress already has dramatic puff sleeves, keep the decorations relatively delicate.
How to Make a More Modern Version
For a contemporary design, simplify the decoration.
Try:
- Solid sage green
- Minimal cream edging
- Short puff sleeves
- Clean neckline
- Wide full skirt
- Small bow
This creates a modern cottagecore-inspired appearance without looking overly decorated.
How to Make a Vintage-Inspired Version
For a vintage aesthetic:
- Choose sage or forest green
- Add cream trim
- Use puff sleeves
- Add small crochet flowers
- Use a scalloped hem
- Add a waist ribbon
A soft cotton yarn works especially well for this style.
Care Instructions
Crochet children’s clothing should be washed carefully.
Whenever possible:
- Follow the yarn manufacturer’s washing instructions.
- Use mild detergent.
- Avoid aggressive scrubbing.
- Avoid excessive heat.
- Reshape while damp.
- Dry flat when recommended.
Never hang a heavy wet crochet dress because the weight can stretch the fabric.
Safety Considerations for Children’s Crochet Clothing
When making crochet clothing for children, prioritize comfort and safety.
Check that:
- Buttons are securely attached.
- Flowers cannot easily detach.
- Decorative pieces are firmly sewn.
- There are no excessively long loose cords.
- The neckline isn’t restrictive.
- Sleeves allow comfortable movement.
- The yarn is soft against the skin.
For very young children, avoid small detachable decorations that could become choking hazards.
Frequently Asked Questions
Is this crochet dress suitable for beginners?
It is best suited to an advanced beginner or intermediate crocheter because it involves garment shaping, increases, sleeves, and sizing.
A beginner who already understands basic crochet stitches can also work through it slowly.
What yarn is best for a crochet girl’s dress?
Soft cotton or cotton-blend yarn is an excellent choice because it is breathable, washable, and comfortable.
Can I make this dress in another color?
Absolutely. The construction works beautifully in pink, cream, lavender, blue, yellow, brown, or other colors.
Can I make the sleeves less puffy?
Yes. Simply use fewer increases and reduce the sleeve volume.
Can I make the skirt shorter?
Yes. Stop crocheting once you reach your desired length.
How do I make the skirt fuller?
Add additional increase rounds after the waist.
Can I make this dress for an older child?
Yes. Take the child’s measurements and adjust the bodice, skirt, sleeves, and length accordingly.
Can I use acrylic yarn?
You can, but choose a soft, high-quality acrylic specifically suitable for garments. Cotton is often preferable for warm-weather children’s clothing.
How long does a crochet dress take to make?
The time varies considerably depending on size, yarn weight, stitch pattern, and experience. A detailed child’s dress can take several hours or more.
Can I sell dresses made from this type of pattern?
If you’re using your own original pattern, you can generally sell the finished garments. If you’re following a designer’s specific pattern, check that designer’s terms regarding finished-item sales.
Final Thoughts
A green crochet puff-sleeve dress for girls is a wonderful handmade project for anyone who enjoys creating special children’s clothing. The combination of a fitted bodice, full skirt, puff sleeves, and delicate details creates a timeless silhouette that can easily be adapted for different ages and occasions.
The beauty of making the dress yourself is the freedom to customize almost everything—from the shade of green and skirt length to the sleeve volume, edging, flowers, bows, and matching accessories.
For a particularly elegant result, try sage green with cream details, a full skirt, softly puffed sleeves, and a simple crochet flower or bow at the waist. The result is charming, comfortable, and completely unique.