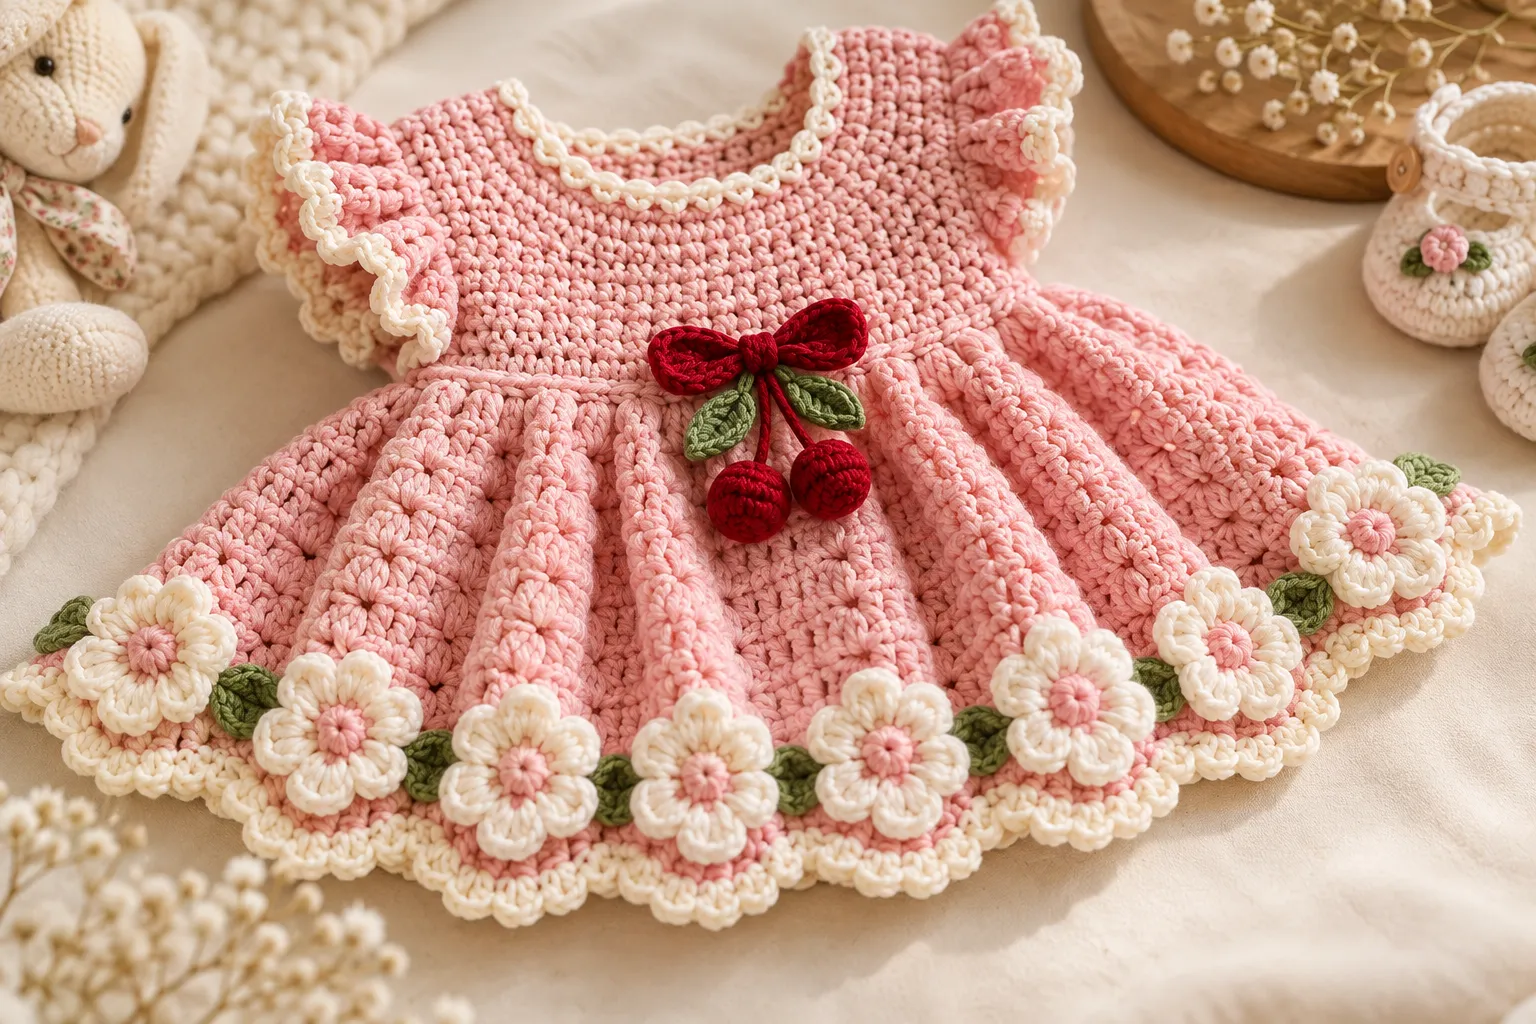
A handmade crochet baby dress is one of those projects that feels especially special because every stitch becomes part of a keepsake. This pink crochet baby dress with a cherry bow and flower hem combines a soft, feminine color palette with playful details that make it perfect for birthdays, baby showers, photoshoots, holidays, or everyday wear.
The design features a comfortable crochet bodice, a gently flared skirt, a decorative flower hem, and a charming cherry-inspired bow. You can keep the classic pink, red, green, and cream palette or adapt the colors to create your own version.
This guide walks through the construction, yarn choices, sizing, stitch techniques, decorative details, finishing, and customization ideas so you can create a beautiful handmade baby dress with confidence.
Why Make a Crochet Baby Dress?
Crochet dresses are wonderful projects because they can be customized in ways that are difficult to achieve with mass-produced clothing.
You can choose:
- The exact colors
- The skirt length
- Sleeve style
- Neckline
- Button placement
- Flower colors
- Bow size
- Cherry details
- Decorative edging
- Overall fit
A handmade crochet baby dress can also become a memorable baby-shower or first-birthday gift.
The most important consideration is comfort. Baby clothing should be soft, flexible, breathable, and free from decorative elements that could become loose.
Materials You’ll Need
For this project, choose soft yarn intended for baby garments.
Basic Materials
| Material | Suggested choice |
|---|---|
| Main yarn | Soft baby-friendly yarn |
| Main color | Pink |
| Accent color | Red or cherry red |
| Leaf color | Green |
| Flower color | White, cream, or contrasting pink |
| Crochet hook | Size appropriate for your yarn |
| Buttons | Small securely attached buttons |
| Yarn needle | For sewing and finishing |
| Scissors | For trimming yarn |
| Stitch markers | Helpful for keeping track of rounds |
| Measuring tape | For checking measurements |
Cotton, cotton blends, bamboo blends, or soft acrylic yarns can work well depending on the desired drape and the yarn manufacturer’s recommendations.
Avoid rough or scratchy fibers, particularly around the neckline and armholes.
Choosing the Yarn
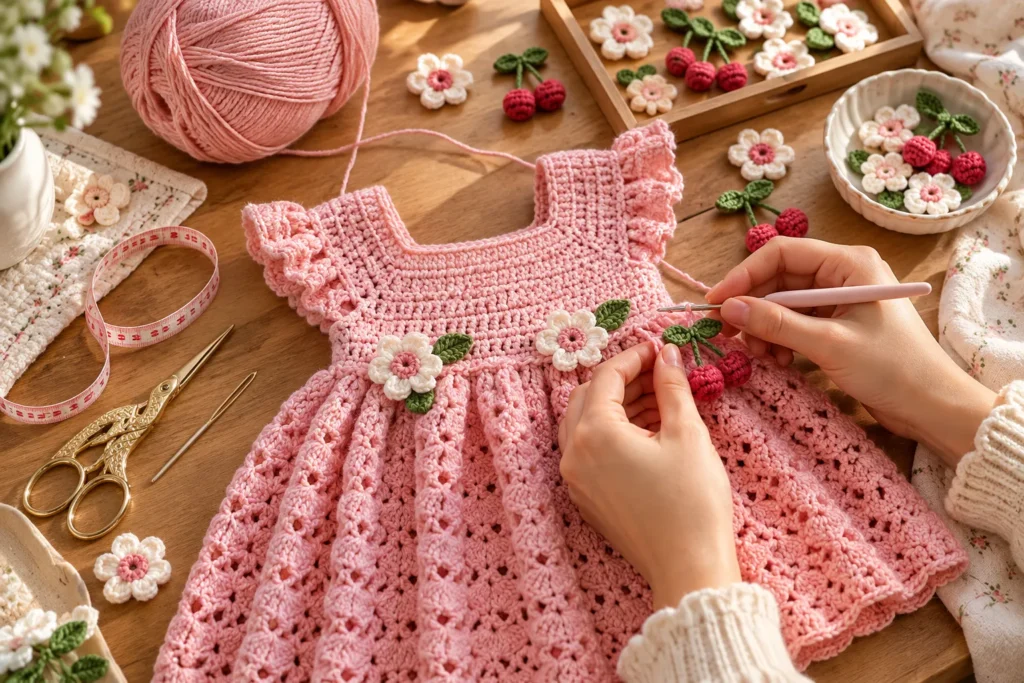
Yarn selection has a major impact on the final dress.
For a baby dress, look for yarn that feels soft against the skin and maintains its shape after washing.
Pink Main Color
A soft blush or dusty pink creates an elegant classic appearance.
For a brighter look, use:
- Bubblegum pink
- Rose pink
- Strawberry pink
- Coral pink
Cherry Red
Use red for the cherry-inspired bow and optional cherry motifs.
A deeper red gives the dress a more sophisticated appearance, while bright red creates a playful children’s look.
Green
Green is ideal for small cherry leaves and stems.
Sage green creates a softer aesthetic, while bright green gives the design more contrast.
Cream or White
Cream or white yarn works beautifully for the flower hem.
It also creates a gentle contrast against pink without making the dress look overly busy.
Crochet Abbreviations
The exact stitch combination can vary according to your preferred construction, but these abbreviations are useful for the project:
| Abbreviation | Meaning |
|---|---|
| ch | Chain |
| sl st | Slip stitch |
| sc | Single crochet |
| hdc | Half double crochet |
| dc | Double crochet |
| inc | Increase |
| dec | Decrease |
| st | Stitch |
| rep | Repeat |
| sk | Skip |
Always check your gauge before beginning the garment.
Baby Dress Size Guide
Baby sizes can vary considerably, so measurements are more reliable than age labels alone.
| Size | Approx. age | Chest circumference | Suggested dress length |
|---|---|---|---|
| Newborn | 0–3 months | 15–17 in | 10–12 in |
| 3–6 months | 3–6 months | 16–18 in | 12–14 in |
| 6–12 months | 6–12 months | 17–19 in | 14–16 in |
| 12–18 months | 12–18 months | 18–20 in | 16–18 in |
| 18–24 months | 18–24 months | 19–21 in | 18–20 in |
These are general planning measurements rather than a substitute for measuring the intended wearer.
If the dress is a gift and you cannot measure the baby, consider making the garment slightly adjustable through buttons, ties, or a flexible waist.
Gauge Matters
Gauge determines the final size of your dress.
Work a small swatch using the stitch pattern you intend to use for the bodice. Measure both stitch width and row height.
If your fabric is too large compared with your intended gauge, try a smaller hook.
If your fabric is too small, try a larger hook.
Don’t rely only on the hook size printed on the yarn label. Your individual tension can significantly change the finished dimensions.
Understanding the Construction
The dress can be thought of as several connected sections:
- Bodice
- Armholes
- Neckline
- Shoulders
- Waist
- Skirt
- Flower hem
- Cherry bow
- Optional cherry motifs
- Buttons and finishing details
This construction makes customization easier because you can adjust the skirt without completely redesigning the bodice.
Step 1: Crochet the Bodice
Begin with the upper portion of the dress.
Create your foundation chain according to the required chest measurement and join or work rows according to your preferred construction method.
Work evenly across the foundation using your chosen stitch.
For a softer baby garment, half double crochet can provide a comfortable combination of flexibility and structure.
Keep checking the width as you work.
The bodice should fit comfortably without being tight around the baby’s chest.
Creating the Armholes
Once the bodice reaches the appropriate height, shape the armholes.
Depending on your construction method, this can be done by:
- Leaving sections unworked
- Creating chain spaces
- Separating front and back sections
- Working around armhole openings
Keep both sides symmetrical.
The armhole should be large enough for comfortable movement without being excessively loose.
Step 2: Shape the Neckline
The neckline should be comfortable and easy to put on.
A simple rounded neckline works particularly well with the feminine design.
You can finish the neckline with:
- Single crochet
- Slip stitches
- A small scalloped border
- Picot edging
- A contrasting cream border
Avoid creating a neckline that is too tight.
If the dress uses buttons at the back, make sure the opening is large enough to make dressing easy.
Step 3: Finish the Shoulders
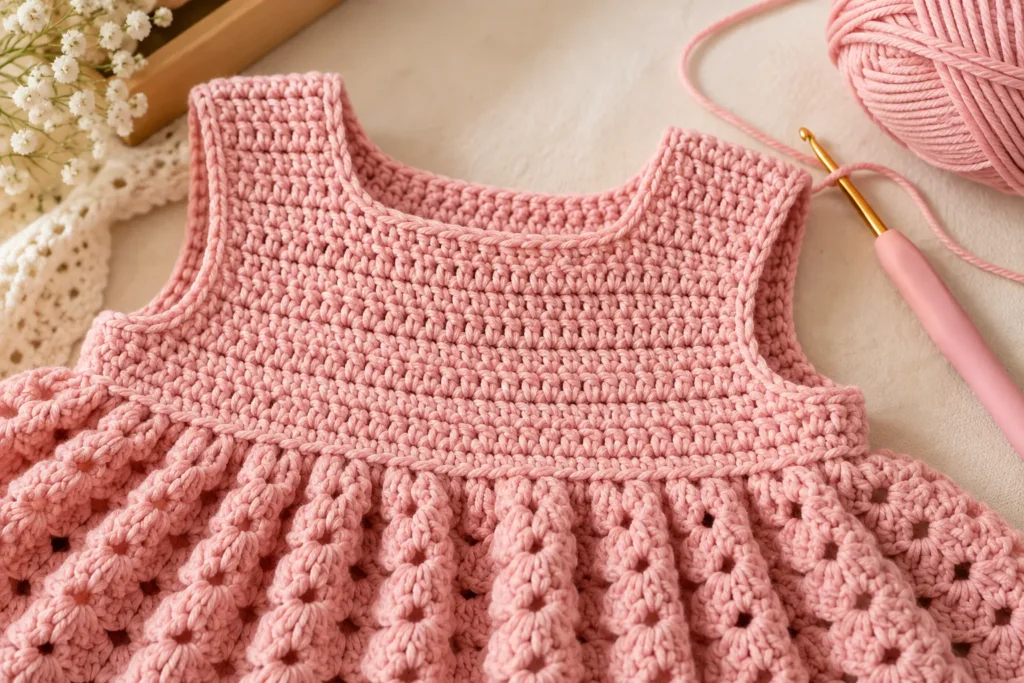
Join the front and back shoulder sections securely.
Check the symmetry before fastening off.
This is also a good point to try the bodice against the intended measurements.
The waist should sit comfortably without restricting movement.
Step 4: Create the Waistline
The waist is where the fitted bodice transitions into the fuller skirt.
Work a clean row around the waist before beginning the skirt.
You can emphasize this transition with a contrasting color.
For example:
Pink bodice → cream waist → pink skirt
or:
Pink bodice → red accent row → pink skirt
A narrow ribbon or crochet tie can also be added, but it should be designed carefully for baby safety and should not create a loose dangling element.
Step 5: Crochet the Full Skirt
The skirt is where the dress develops its volume.
Increase gradually around the waist to create a gentle flare.
Depending on the desired style, you can make the skirt:
- Lightly flared
- Full and gathered
- A-line
- Layered
- Extra long
- Short and playful
For a classic baby-dress silhouette, moderate increases usually create a comfortable shape without adding excessive weight.
Continue working until the desired length is reached.
Step 6: Create the Flower Hem
The flower hem is one of the most recognizable decorative elements of this dress.
There are several ways to create it.
Simple Crochet Flowers
A basic flower can be made by working several petals around a central ring.
Use cream or white for the petals and pink or yellow for the centers.
Scalloped Flower Border
Instead of individual flowers, create repeating rounded motifs along the bottom edge.
This produces a softer and more continuous finish.
Individual Flower Appliqués
For a more dimensional appearance, crochet individual flowers separately and sew them around the hem.
This allows you to control their placement and color.
When attaching flowers, make sure every piece is securely sewn and that no long loose ends remain.
Step 7: Add the Cherry Bow
The cherry bow is the statement detail of the design.
Use red yarn to create a small bow and green yarn for optional leaf or stem details.
A simple crochet bow can be constructed from a small rectangular piece.
Work several rows until the rectangle reaches the desired width.
Wrap or pinch the center and secure it with a narrow crochet band.
Making the Bow More Defined
For a structured bow:
- Use tighter stitches.
- Choose a slightly smaller hook.
- Add a firm center band.
- Block the finished bow.
For a softer bow:
- Use a larger hook.
- Choose a flexible yarn.
- Avoid excessive blocking.
Attach the bow securely to the dress.
For baby clothing, avoid relying on a removable pin or unsecured clip.
Step 8: Add Cherry Motifs
Small cherry motifs can be placed near the bow or along the upper part of the skirt.
A simple cherry motif can consist of:
- Two small red circles
- A green stem
- One or two green leaves
Keep the motifs relatively small so they complement rather than overwhelm the flower hem.
Use secure stitching to attach them.
Step 9: Add Buttons
Buttons can provide both decoration and functionality.
Small buttons can be placed down the back of the bodice or at another suitable opening.
Sew each button firmly with multiple passes of strong thread or yarn.
Always inspect buttons regularly on baby garments and replace anything that becomes loose.
Puff-Sleeve Variation
If you want a more decorative version, add small puff sleeves.
Puff sleeves can be created by working additional stitches around the armhole and increasing slightly to create volume.
A contrasting cream or white sleeve edge can coordinate beautifully with the flower hem.
For a simpler everyday dress, short straight sleeves or sleeveless armholes may be more practical.
Collar Variation
A small crochet collar can make the dress look especially polished.
Try:
- Peter Pan-style collar
- Rounded scalloped collar
- Simple cream edging
- Pink-on-pink textured collar
Keep the collar soft and lightweight.
How to Adjust the Dress Length
One of the advantages of making the dress yourself is that the length can be customized.
For a shorter dress, stop the skirt earlier.
For a longer dress, continue the skirt rounds before adding the decorative hem.
When changing the length, remember that additional rows increase the amount of yarn required and can slightly change the overall weight of the garment.
How to Adjust the Width
If you need a wider dress, increase the bodice circumference before beginning the skirt.
For a smaller dress, reduce the foundation measurement while maintaining the stitch pattern.
Always prioritize the baby’s actual measurements rather than simply changing the number of stitches based on age.
Beginner Tips
If this is your first crochet garment, don’t rush the construction.
Measure Frequently
Check the bodice against your target measurements after several rows.
Mark Important Sections
Use stitch markers to identify:
- Center front
- Center back
- Armholes
- Side seams
- Waist
Keep Both Sides Symmetrical
Count stitches regularly when shaping the neckline and armholes.
Make a Gauge Swatch
Skipping gauge can result in a dress that is dramatically different from the expected size.
Secure Your Ends
Loose ends can unravel with washing and normal wear.
Block Before Final Assembly
Blocking can help even out the stitches and improve the appearance of decorative sections.
Common Problems and Solutions
The Bodice Is Too Tight
Your gauge may be smaller than expected.
Try a larger hook or adjust the stitch count.
The Skirt Is Curling
The tension or increase pattern may need adjustment.
Blocking can help minor curling, but severe curling usually requires correcting the crochet construction.
The Skirt Is Too Full
Reduce the frequency of increases.
The Skirt Looks Too Straight
Add more increases gradually to create additional flare.
The Flower Hem Looks Uneven
Check your stitch count around the final round and distribute decorative motifs evenly.
The Bow Looks Flat
Use a firmer yarn, tighter stitches, or a more structured center band.
The Bow Is Too Bulky
Reduce the number of rows or use a lighter yarn.
Beautiful Color Combinations
Although pink is the classic choice, there are many ways to personalize the dress.
Blush Pink + Cream + Cherry Red
A soft, romantic combination perfect for photographs.
Dusty Pink + Sage Green + Ivory
A muted palette with a modern handmade aesthetic.
Strawberry Pink + Bright Red + Leaf Green
A playful cherry-inspired color scheme.
Pale Pink + Burgundy + Cream
A deeper autumn-friendly variation.
Rose Pink + White + Soft Green
A fresh spring and summer palette.
Styling the Crochet Baby Dress
The dress can be styled simply because the crochet details already create visual interest.
Pair it with:
- White baby tights
- Soft cream cardigan
- Simple ballet-style shoes
- A small crochet headband
- Matching crochet booties
- A lightweight baby blanket
For a special occasion, coordinate the accessories with the cherry bow rather than introducing too many additional colors.
Matching Crochet Accessories
A coordinated set can make the outfit feel more complete.
Consider creating:
- Cherry crochet headband
- Pink crochet booties
- Small crochet cardigan
- Matching baby bonnet
- Crochet flower hair accessory
- Mini crochet bag for older toddlers
Keep all decorative components securely attached and appropriate for the child’s age.
Baby Shower Gift Idea
A handmade crochet baby dress makes a memorable baby-shower present.
For a beautiful presentation, fold the dress carefully and pair it with a matching handmade accessory.
You could create a small gift set containing:
Pink dress + matching booties + crochet headband + soft blanket
Choose a neutral gift box or reusable fabric bag for a polished presentation.
Photography Tips
This dress is especially photogenic because of its colors and decorative details.
For natural photographs:
- Use soft window light.
- Photograph the dress against a neutral background.
- Place it on a cream blanket.
- Use wooden or wicker props sparingly.
- Photograph the cherry bow close-up.
- Capture the flower hem from several angles.
For baby photography, prioritize the child’s comfort and safety over styling.
Safety Considerations
Because this is baby clothing, safety should always come before decoration.
Avoid:
- Loose buttons
- Unsecured beads
- Long dangling cords
- Easily detachable appliqués
- Rough yarn
- Sharp accessories
Inspect the dress before every use, particularly after washing.
If the garment contains buttons or other small decorative components, check that they remain firmly attached.
Blocking the Finished Dress
Blocking can improve the final appearance of the garment.
Gently dampen the crochet piece according to the yarn’s care instructions.
Lay the dress flat on a clean surface.
Shape:
- The neckline
- Armholes
- Waist
- Skirt
- Flower hem
Allow it to dry completely.
Avoid excessive stretching, especially with baby garments.
Washing and Care
Always follow the yarn manufacturer’s care instructions.
In general:
- Wash gently.
- Avoid harsh detergents.
- Do not wring aggressively.
- Reshape while damp.
- Dry flat when appropriate.
- Store clean and completely dry.
Avoid high heat unless the yarn specifically permits it.
Frequently Asked Questions
What yarn is best for a crochet baby dress?
Soft cotton, cotton blends, bamboo blends, and baby-friendly acrylic yarns can all be suitable depending on the desired drape and care requirements. The most important qualities are softness, comfort, durability, and appropriate washing instructions.
Is this crochet baby dress suitable for beginners?
The basic construction can be approachable for a confident beginner, but shaping the bodice, armholes, skirt and decorative details requires some crochet experience. Beginners should work a gauge swatch and check measurements frequently.
Can I make the dress in another color?
Absolutely. Pink can be replaced with lavender, cream, sage, blue, yellow or any other baby-friendly color. Keep contrasting colors for the bow and flower hem to preserve the decorative effect.
How do I make the dress larger?
Adjust the bodice circumference first, then modify the skirt width and length according to the new measurements. Always make a gauge swatch before calculating the new stitch counts.
Can I make the flower hem in a different color?
Yes. Cream and white are classic choices, but contrasting pink, red, yellow, lavender or green can create completely different looks.
Can I add sleeves?
Yes. Short sleeves, puff sleeves, or simple capped sleeves can be added around the armholes. Make sure the sleeve opening remains comfortable and allows unrestricted movement.
How can I make the skirt fuller?
Increase more frequently around the waist or add additional shaping rounds. Test the skirt as you work so the finished dress doesn’t become unnecessarily heavy.
Is the cherry bow removable?
For baby clothing, a permanently and securely attached bow is preferable to a loose removable decoration. If you make a removable accessory, ensure it is age-appropriate and supervised.
Final Thoughts
This pink crochet baby dress with cherry bow and flower hem is a charming handmade project that combines a classic baby silhouette with playful decorative details.
The pink base creates a soft feminine foundation, while the cherry bow, green accents and flower hem give the dress its distinctive personality. Once you understand the basic construction, you can easily adapt the colors, length, sleeves, neckline and decorative details to create a completely personalized version.
Whether you’re crocheting it for your own little one, preparing a baby-shower gift, or building a handmade wardrobe, this dress is a beautiful project where thoughtful details make all the difference.